

The Ultimate Guide to Walk In Cooler Temperature
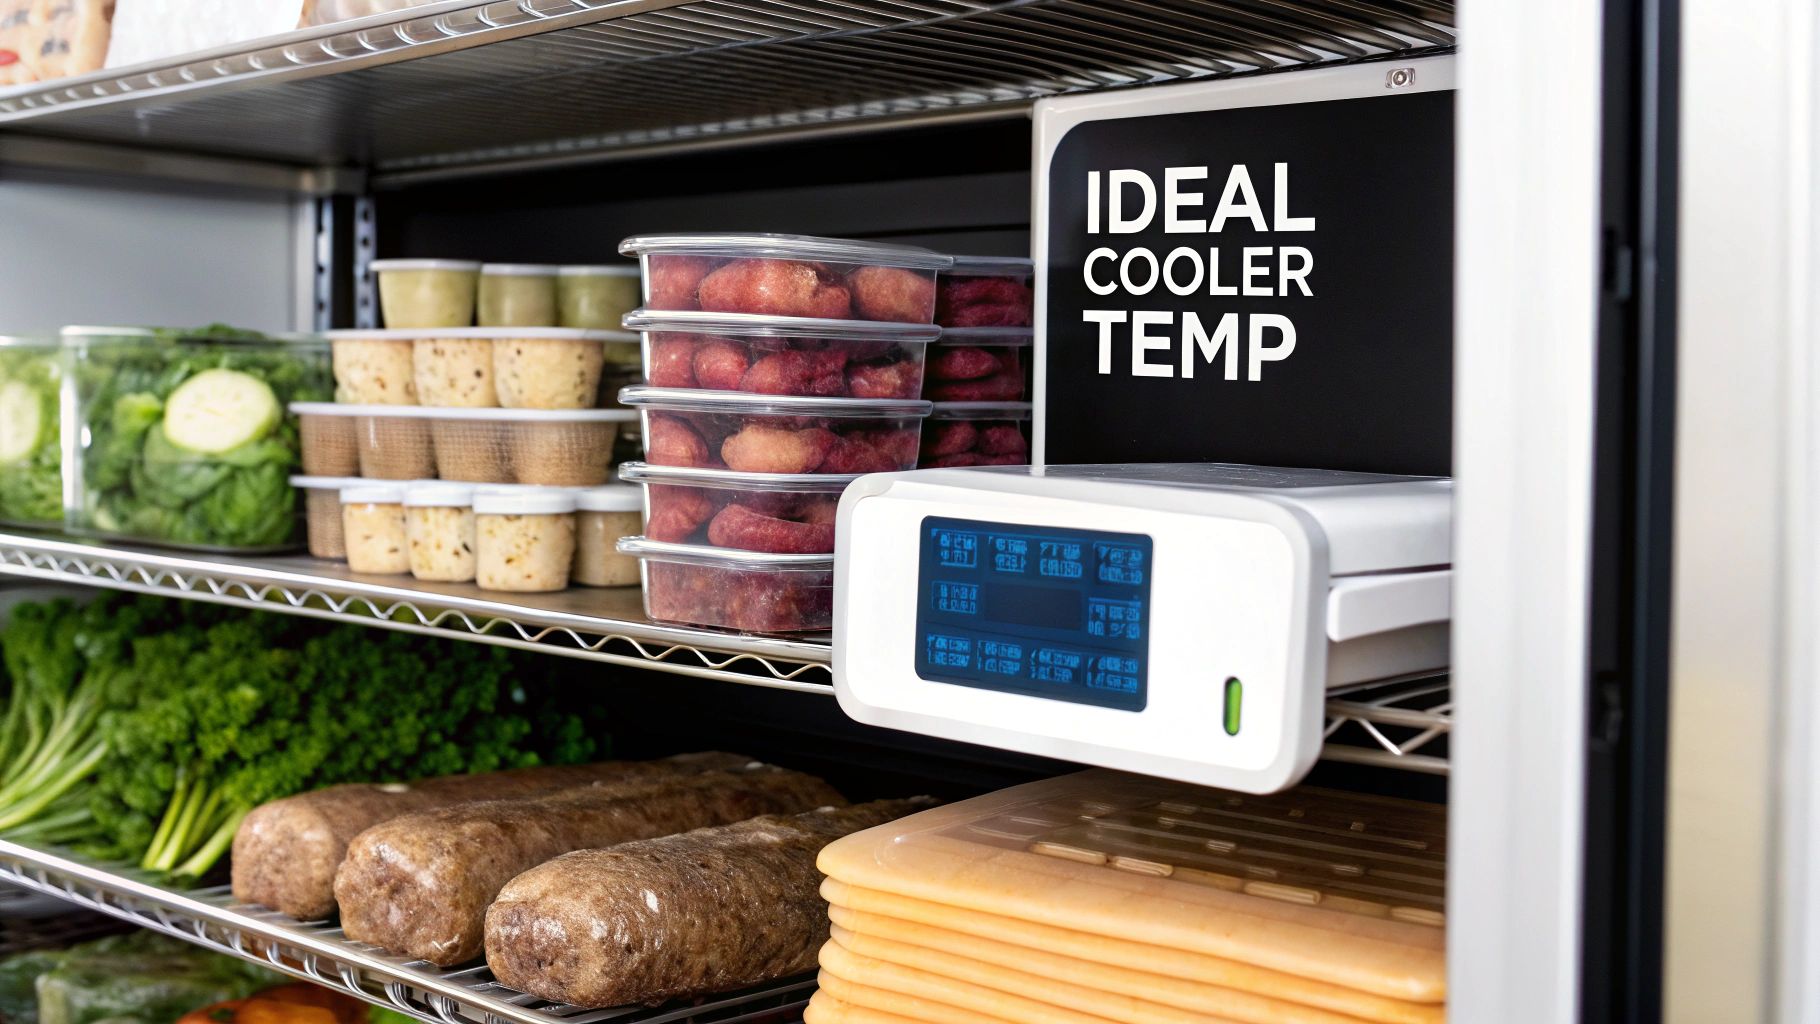
When it comes to your walk-in cooler, there's a magic number—or rather, a magic range. The ideal walk-in cooler temperature is between 35°F and 38°F (1.7°C to 3.3°C). Sticking to this sweet spot is the single most important thing you can do to keep perishable food out of the "Temperature Danger Zone," where nasty bacteria love to grow.
Why Your Walk-In Cooler Temperature Matters
Think of your walk-in cooler as the unsung hero of your kitchen. It’s not just a big cold box; it’s the vault protecting thousands of dollars in fresh produce, dairy, and proteins. Nailing the temperature isn't just a suggestion—it's a critical task that directly affects ingredient quality, food safety, and your bottom line.
Holding that steady temperature between 35°F and 38°F does a few crucial things. For starters, it slows down the growth of dangerous microorganisms like E. coli and Salmonella, which thrive between 41°F and 135°F. Keeping your cooler well below that threshold is your first and best line of defense against foodborne illness.
A consistent, correct walk-in cooler temperature is the bedrock of food safety. It extends shelf life, slashes waste, and guarantees that every dish you create begins with safe, high-quality ingredients.
This focus on temperature control is also front and center during health inspections. Inspectors are trained to spot inconsistencies, and seeing a well-maintained cooler with accurate temperature logs tells them you're serious about running a professional, safe kitchen.
Ideal Temperatures For Different Foods
While 35°F to 38°F is the golden rule for your walk-in's overall setting, different foods are happier at slightly different temperatures. Storing items in their optimal environment is key to preserving their texture, flavor, and nutrients. Think about it: fresh lettuce can wilt if it gets too cold, while raw chicken needs the chill to keep bacteria at bay.
Knowing these little details helps you organize your walk-in like a pro. To help you fine-tune your storage strategy, we've put together a quick-reference guide.
Recommended Storage Temperatures by Food Type
This table gives you a quick look at the best temperature ranges for common food categories. Using it to organize your shelves can make a real difference in both food safety and quality.
| Food Category | Ideal Temperature Range (°F) | Ideal Temperature Range (°C) | Key Storage Consideration |
|---|---|---|---|
| Fresh Produce | 35°F to 40°F | 1.7°C to 4.4°C | Keeps produce crisp without the risk of frost damage. |
| Dairy & Eggs | 36°F to 38°F | 2.2°C to 3.3°C | Consistency is crucial; fluctuations cause spoilage. |
| Raw Meat & Poultry | 35°F to 38°F | 1.7°C to 3.3°C | Store on the coldest shelves to inhibit bacterial growth. |
| Fish & Seafood | 32°F to 36°F | 0°C to 2.2°C | Keep it as cold as possible; storing on ice is best practice. |
Properly managing these temperatures ensures your inventory stays fresh longer, reducing waste and protecting your investment.
Whether you're setting up a new kitchen or looking to upgrade, solid temperature management is non-negotiable. If you're exploring new equipment, our guide on the best commercial refrigerators offers great insights into picking a unit that can meet these critical standards.
Why Precise Temperature Control Is Your Best Investment
Think of your walk-in cooler as more than just a big, cold box. It's the financial heart of your kitchen, the vault protecting thousands of dollars in inventory. Maintaining the right walk in cooler temperature isn't just a chore; it's the best insurance policy you can have for that investment. Every single degree matters, and even a small slip can have huge consequences for your business.
This is about more than just keeping food cold—it’s about playing active defense. The most critical fight is against the Temperature Danger Zone, that treacherous range between 41°F and 135°F. In that zone, nasty bacteria like Salmonella, E. coli, and Listeria can double their numbers in as little as 20 minutes. A cooler that's off by just a few degrees can quickly turn your valuable inventory into a dangerous liability.
A walk-in that’s sitting at 42°F instead of 38°F might not seem like a big deal, but it's basically rolling out the welcome mat for pathogens. That small difference is all it takes to risk food safety, spoil products, and put your customers—and your reputation—on the line.
Protecting Quality Beyond Food Safety
Of course, preventing foodborne illness is priority number one. But precise temperature control also has a massive impact on the quality and integrity of your ingredients. Consistency is what keeps customers coming back for the food they love.
When your cooler's temperature is stable and correct, you're preserving the very things that make your dishes great:
- Texture: Fresh produce like leafy greens and delicate herbs stay crisp and vibrant instead of wilting into a slimy mess.
- Flavor: Dairy products, like your cheeses and creams, hold onto their intended flavors without going sour or developing weird off-tastes.
- Integrity: Those beautiful cuts of meat and fresh seafood retain their moisture and firmness, which means a much better product on the plate.
When temperatures bounce around, tiny ice crystals form and thaw inside the food, breaking down its cellular structure. You can't always see it, but this is what turns vegetables mushy, makes sauces grainy, and leaves you with dry, sad-looking proteins. Poor temperature management slowly chips away at the quality of your menu before an ingredient even hits the prep line. This idea is central to protecting your stock, and you can learn more about it in our guide on what cold chain management is and why it's so crucial for your kitchen.
The Financial Impact of Temperature Swings
The fallout from poor temperature control hits your bottom line directly through food waste and spoilage. The U.S. food service industry loses an estimated $50 billion every year to spoiled food, and improper temperature is a leading culprit. Keeping your walk-in at the recommended 35°F to 38°F can extend the shelf life of fresh produce by up to 50% and dairy by 25%—a direct boost to your profitability. You can find more insights about the temperature danger zone on webstaurantstore.com.
At the end of the day, every spoiled case of lettuce or tray of fish is money down the drain. By treating your walk-in's temperature as a critical business metric, you’re actively cutting waste, protecting your menu's integrity, and safeguarding the reputation you've worked so hard to build. It’s not an expense; it’s a strategy for success.
Mastering Temperature Monitoring and Calibration
Getting your walk-in cooler to the perfect temperature isn't a "set it and forget it" task. It’s an ongoing process of observation and fine-tuning—think of it as a daily health check for the heart of your kitchen. A consistent monitoring routine is your best defense, turning a simple daily chore into a powerful system that guards your inventory, guarantees food safety, and gives you total peace of mind.
This routine is a mix of manual checks and, in some kitchens, automated alerts. The key is consistency. Catching a small temperature swing early can be the difference between a minor adjustment and a major spoilage event. When you build a foolproof system, you empower your team to maintain high standards and sail through any health inspection.
This chart perfectly illustrates the critical relationship between temperature and food safety, showing how quickly things can go from safe to spoiled.
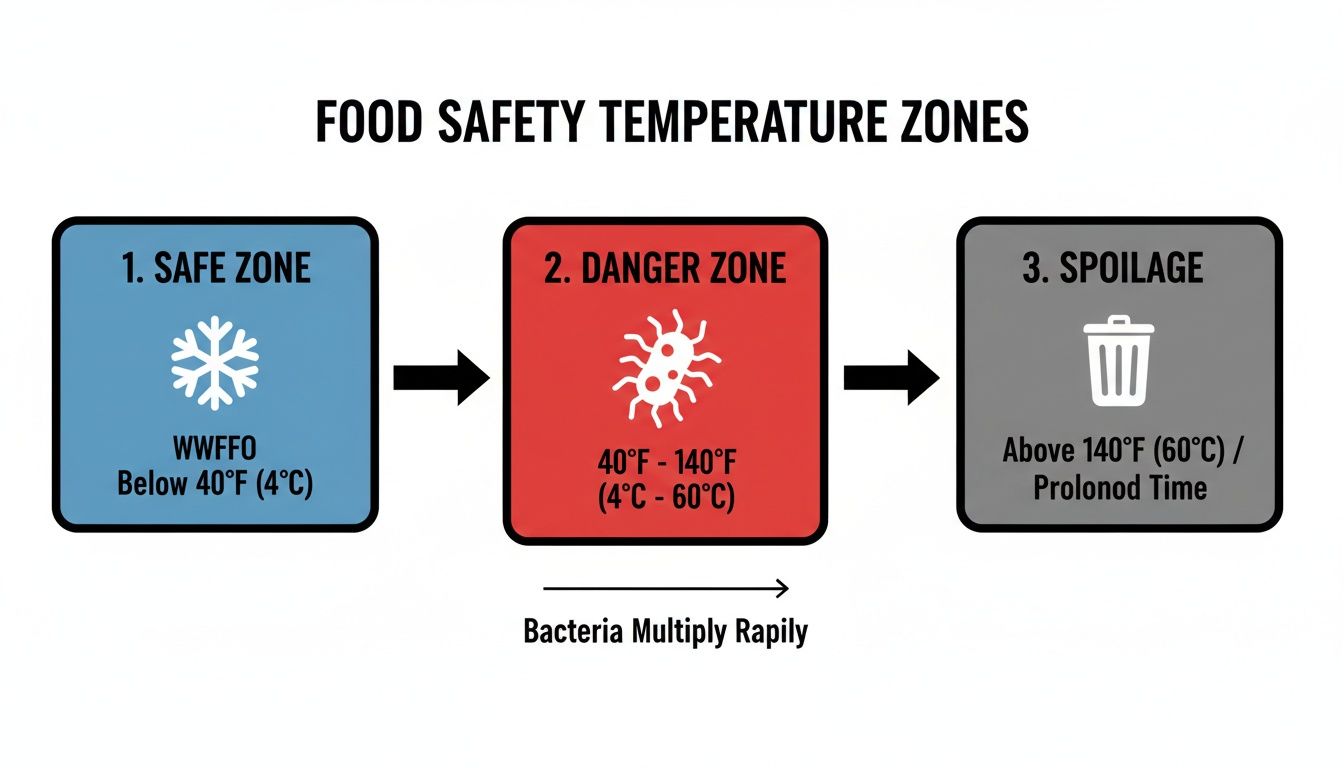
It’s a stark reminder of how fast food can enter the danger zone where bacteria thrive, reinforcing why constant vigilance is non-negotiable.
Building a Bulletproof Monitoring Routine
A solid monitoring routine starts with knowing where and how to check your cooler's temperature. The first step to getting data you can actually trust is placing your thermometers in the right spots.
Thermometer Placement Best Practices:
- Dodge the Doorway: Never, ever put your main thermometer right next to the door. That's the "hot spot" with the most temperature fluctuation, and it won't give you a true picture of the cooler's overall climate.
- Find the Warmest Part: The warmest area is usually near the top of the unit and away from the direct blast of the evaporator fans. Stick a thermometer there to ensure even the most vulnerable spot stays safely chilled.
- Monitor Multiple Zones: If you have a large walk-in, use at least two thermometers. Place one near the top and another in a different area to get a complete overview and sniff out any potential warm pockets.
Keeping a temperature log is an absolute must. A simple log sheet on a clipboard right by the door works perfectly. Your staff should record the temperature and the time at least twice daily—once at the start of a shift and again mid-day. During a health inspection, that log is your golden ticket, proving you’ve been doing your due diligence.
Why You Need to Calibrate Your Thermometers
An inaccurate thermometer is worse than no thermometer at all. It gives you a false sense of security. Calibration is the process of making sure your readings are reliable, so your team can trust their tools and make the right calls on food safety.
Calibrating your thermometers is like tuning a guitar before a concert. Without it, you might think you're hitting the right notes, but you're actually setting yourself up for a disaster. Regular calibration keeps your entire food safety operation in perfect harmony.
The ice-point method is the easiest and most reliable way to calibrate your thermometers right in your own kitchen.
Easy Steps for Ice-Point Calibration:
- Make an Ice Bath: Fill a glass completely with crushed ice, then add just enough cold water to fill in the gaps. Let it sit for a minute or two to stabilize.
- Insert the Thermometer: Submerge the thermometer stem at least two inches into the ice water, but make sure it doesn't touch the sides or bottom of the glass.
- Wait for the Reading: After about 30 seconds, the thermometer should read exactly 32°F (0°C).
- Adjust if Needed: If the reading is off, use a small wrench to turn the calibration nut on the back of a dial thermometer until it reads 32°F. For digital models, check the manufacturer's instructions for the reset or calibration function.
By mastering these simple monitoring and calibration habits, you take full control of your walk-in cooler's environment. It's how a basic daily task becomes a cornerstone of your kitchen's success.
Troubleshooting Common Cooler Temperature Problems
When your walk-in cooler's temperature starts creeping up, that sinking feeling in your stomach is all too familiar. An unexpected temperature spike puts thousands of dollars in inventory at risk and throws a major wrench into food safety protocols. But before you make that frantic call to a technician, take a breath. Many common issues are things you can diagnose—and sometimes even fix—yourself.
Think of it as first aid for your cooler. A few simple checks can often get things back on track, saving you from a costly emergency service call and the stress of potential downtime. We'll walk through the most frequent symptoms of a struggling cooler, from stubborn ice buildup to a motor that just won't quit, so you can take control of the situation.
Identifying the Root Cause of Temperature Fluctuations
The first step is always to play detective. What is the cooler actually doing? Is it just not getting cold enough, or is it turning into a block of ice? Is the motor running nonstop, or are you finding mysterious puddles on the floor? Each of these clues points to a different culprit.
You might be surprised to learn how often the fix is something simple. Most problems aren't a catastrophic mechanical failure but rather a basic maintenance oversight. In fact, refrigeration pros will tell you that over 70% of emergency calls for walk-ins trace back to preventable issues. The two biggest offenders are dirty condenser coils, which can slash cooling efficiency by 30%, and worn-out door gaskets that can hike your energy bill by up to 20% from leaking cold air. You can dig deeper into common walk-in cooler problems and how to fix them on achrnews.com.
A simple troubleshooting checklist is your best friend in these moments. Before calling for backup, running through a few quick checks for things like blocked airflow or a bad door seal can often solve the problem in minutes.
Common Temperature Issues and First-Step Solutions
Sometimes, you just need a quick cheat sheet to figure out what's going on. This table breaks down the most common symptoms, what they likely mean, and what you should check first before escalating the issue.
| Symptom | Potential Cause | What to Check First |
|---|---|---|
| Cooler Not Cold Enough | Dirty condenser coils, worn door gaskets, or low refrigerant. | Check if coils are dusty and clean them. Inspect door seals for gaps or tears. |
| Ice Buildup on Coils | Faulty defrost timer, blocked drain line, or leaking door seal. | Ensure the defrost cycle is running. Check door seals for a tight fit to prevent moisture entry. |
| Motor Runs Constantly | Low refrigerant, airflow obstruction, or a malfunctioning thermostat. | Make sure nothing is blocking vents. Check the thermostat setting and accuracy. |
| Water on the Floor | Clogged drain line or excessive condensation. | Clear any blockages in the drain line and check the door seal for moisture leaks. |
Seeing your problem here can bring a huge sense of relief. It gives you a clear, manageable starting point instead of just staring at a broken cooler and worrying.
Your Diagnostic Action Plan
When you spot trouble, here’s a simple process to follow before you pick up the phone.
-
Check the Thermostat: First things first—is it set correctly? Don't just trust the built-in display. Grab your calibrated, independent thermometer to verify the real temperature inside. Sometimes the display itself is the problem.
-
Inspect the Door Seals: Close the door and run your hand along the entire gasket. Can you feel cold air escaping? A classic trick is to close the door on a dollar bill. If you can pull it out with no resistance, your seal is too loose and likely needs to be replaced.
-
Examine Airflow: Take a look inside. Are boxes and containers stacked right up against the evaporator fans? Overcrowding is a classic mistake that chokes your cooler. Make sure there are at least a few inches of clearance around all vents to let the air circulate freely.
-
Clean the Condenser Coils: Think of these coils, usually on the outdoor unit, as your cooler's lungs. When they get clogged with dust, grease, and grime, the system can't "exhale" heat properly. This forces it to work overtime just to keep up. A quick but thorough cleaning with a stiff brush can make an incredible difference.
By methodically working through these areas, you can solve a surprising number of temperature issues on your own. And if you do end up needing a pro, you’ll be able to give them a much better report of the situation, which means a faster, more accurate, and less expensive repair.
How to Lower Your Walk-In Cooler's Energy Bill
Your walk-in cooler is one of the hardest-working pieces of equipment in your kitchen. It runs 24/7, silently protecting thousands of dollars in inventory. But that constant work comes at a steep price, showing up as a major line item on your monthly energy bill. The good news? With a few smart habits and strategic upgrades, you can dramatically cut those costs and stay informed on industry trends that boost your bottom line.
Many operators don't realize just how much a small temperature tweak can cost them. Dialing the thermostat even a few degrees colder than the necessary 35°F to 38°F range forces the compressor into overdrive for absolutely no food safety benefit. That extra work is pure wasted electricity, nibbling away at your profits every single day.
Quick Wins for Immediate Savings
You can start saving money right now, without a huge upfront investment. A few simple, low-cost changes in habits and hardware can make a real dent in your cooler's energy use. These small steps add up fast.
- Install Strip Curtains: Think of these overlapping vinyl strips as a flexible, see-through door. They create a barrier that keeps the cold air from rushing out every time someone walks in, giving your compressor a much-needed break.
- Switch to LED Lighting: Those old-school incandescent bulbs are basically tiny heaters. They generate a surprising amount of warmth, forcing your cooling system to work even harder. Swapping them for cool, efficient LEDs cuts heat, uses far less power, and they last forever.
- Keep Your Coils Clean: The condenser coils are like the lungs of your cooler. When they get caked with kitchen grease and dust, the unit can't "breathe" efficiently. This can slash its efficiency by up to 30%. A quick cleaning once a month makes a world of difference.
The Real Cost of Keeping Things Cool
To get a handle on the expense, you have to understand the numbers. A walk-in cooler is a power-hungry beast, no two ways about it. These units can easily consume anywhere from 5 to 30 kilowatt-hours (kWh) every single day.
To put that in perspective, a small 6x6 cooler might use around 660.48 kWh a month, costing about $70.74. A bigger 10x10 model can jump to 1,410.51 kWh, pushing the bill to over $151.07. If you really want to get granular and control your costs, it’s worth learning how to calculate electrical energy consumption for your specific unit.
Think of your cooler’s door as an open window in the winter. Every second it stays open, you're paying to cool the entire kitchen. Simple fixes like strip curtains and efficient habits are like closing that window, instantly stopping the waste.
Investing in Long-Term Efficiency
While quick fixes provide immediate relief, the biggest long-term savings come from investing in modern technology. Today's walk-in coolers are built from the ground up for efficiency, with superior insulation, intelligent compressors, and smarter defrost cycles.
Yes, a new unit is a significant capital expense, but the return on that investment often comes much faster than you might think. A modern, energy-efficient model can slash your refrigeration energy costs by 25-30% or more. If you're weighing your options, our guide on energy-efficient commercial refrigerators can show you how the latest tech translates to a healthier bottom line. It's not just buying a new box; it's a strategic financial move that pays you back for years.
Deciding When to Repair or Replace Your Walk In Cooler
Sooner or later, every restaurant owner stands in front of their walk-in cooler and faces the big question: do I pay for yet another repair, or is it finally time to bite the bullet and replace the whole thing? This isn't just about a broken part. It's a major financial decision that ripples through your daily operations, your utility bills, and even your food safety.
Making the right call means looking past the immediate repair quote and taking a hard, honest look at the long-term health of your equipment.
Think of it like an old, beat-up car. A few trips to the mechanic are expected, but when you find yourself on a first-name basis with your repair tech, that's a huge red flag. Those "small" fixes are starting to bleed you dry.
Key Factors in the Repair vs. Replace Equation
To make a smart call, you need to look at the big picture. It’s rarely about one single breakdown, but a pattern of declining performance and escalating costs. Before you make any major decisions, it’s always a good idea to see if something as simple as implementing an HVAC maintenance plan can extend your cooler's life and boost its efficiency.
But when a serious problem pops up, here’s what you need to weigh:
- Age of the Unit: Let's be realistic. Most commercial walk-in coolers have a solid lifespan of about 10 to 15 years. If your unit is older than a decade, replacement starts looking like the smarter long-term bet.
- Frequency of Repairs: A one-off repair every couple of years? That's just business. But if you’re calling for service multiple times a year, it’s a sign that other parts are on the verge of failing. You're entering a costly, frustrating cycle of whack-a-mole repairs.
- Skyrocketing Energy Bills: An old, inefficient cooler has to fight to maintain the right walk in cooler temperature. If you've noticed your utility bills creeping up month after month, that's your cooler's way of telling you it's losing the battle and costing you money every single day.
- Visible Wear and Tear: You can see this with your own eyes. Is there significant rust? Are the panels dented and damaged? Do the door seals have gaps? These aren't just cosmetic issues; they mean the cooler's structural integrity is shot.
The Financial Case for Upgrading
Dropping a chunk of change on a new walk-in cooler can feel intimidating, but the long-term payoff is often undeniable. Modern units are built to be incredibly energy-efficient, which means lower operating costs and more money in your pocket. In many cases, the upgrade essentially pays for itself over time through energy savings alone.
Upgrading to a modern walk-in cooler is just smart business. For a typical restaurant, swapping out a 10-year-old cooler can drop energy use from 20,000 kWh to 14,000 kWh. That’s an extra $720 in your pocket each year and a 25-30% cut in operating costs. You can learn more about the cost-benefit analysis of upgrading your cooler on americaninsulatedpanel.com.
Beyond the savings, a new unit gives you something priceless: reliability. You get consistent, stable temperatures that protect thousands of dollars in inventory and keep your food safe. Plus, that new warranty brings peace of mind, shielding you from the surprise repair bills that always seem to pop up with old equipment. By planning for this as a capital expense, you’re not just fixing a problem—you’re making a strategic investment that will serve your business well for years.
Frequently Asked Questions
When it comes to your walk-in cooler, the day-to-day details matter just as much as hitting the right temperature. Let's tackle some of the most common questions I hear from chefs and restaurant owners. These are the practical, on-the-ground answers that will help you keep your food safe, your kitchen running smoothly, and discover exclusive deals to keep your operation top-notch.
Getting these routines and organizational habits right is what separates a well-run cooler from a potential food safety headache.
How Often Should I Check My Cooler Temperature?
Consistency is everything. You need to be checking and logging the temperature of your walk-in at least twice a day. A great habit to get into is checking once when you open and again in the middle of the day.
This simple routine helps you spot temperature swings before they turn into major issues. And if you're in the middle of a summer heatwave or a slammed dinner service where the door is constantly swinging open, add a third check. It's a smart, proactive move that can save your inventory.
What's the Best Way to Organize Food for Temperature Safety?
Good organization is your first line of defense against cross-contamination and poor airflow. The golden rule is simple: organize your food from top to bottom based on the temperature it needs to be cooked to.
- Top Shelves: This is for your ready-to-eat foods—things like prepared salads, desserts, and items that are already cooked.
- Middle Shelves: Perfect for seafood and whole cuts of meat like beef and pork.
- Bottom Shelf: This is non-negotiable. Raw poultry and ground meats always go here. These items have the highest required cooking temperatures, so placing them at the bottom means any accidental drips won't contaminate the food below.
On top of this hierarchy, always leave a few inches of space between items. That gap is crucial for letting cold air move freely, which gets rid of warm spots and keeps the temperature consistent everywhere.
Think of your cooler shelving like a food safety ladder. Ready-to-eat foods are safe at the top, while the raw items that need the most heat are securely on the bottom rung. This little mental trick makes it easy to prevent dangerous cross-contamination.
Does Overstocking the Cooler Actually Affect Its Temperature?
Absolutely. In fact, it's one of the most common—and most damaging—mistakes I see in commercial kitchens. When you cram a cooler full, you're essentially building a wall that blocks cold air from the evaporator fans.
This blockage creates warm pockets where bacteria can thrive, putting your food directly in the danger zone. It also forces your refrigeration system's compressor to work overtime just to try and keep up. Not only does that send your energy bills through the roof, but it also puts a massive strain on the equipment, leading to faster wear and tear and a much higher chance of an expensive breakdown. A solid inventory system is the key to preventing this.
For expert advice on selecting, maintaining, or upgrading your commercial refrigeration, trust the team at Encore Seattle Restaurant Equipment. We provide top-tier equipment and supplies to keep your kitchen running safely and efficiently. Explore our solutions at https://encoreseattle.com.