

Choosing Your Next Sandwich Refrigerated Prep Table
Think of a sandwich refrigerated prep table as the heart of your sandwich or salad station. It’s a brilliant piece of engineering that combines a chilled ingredient rail on top, a sturdy cutting board right in front, and refrigerated storage below—all in one self-contained unit. It's designed to make the entire assembly process faster, smoother, and safer.
Why Your Kitchen Needs a Dedicated Prep Table
Picture your busiest lunch service. Tickets are flying, and the kitchen is buzzing. The fine line between smooth sailing and total chaos often comes down to the sandwich refrigerated prep table. This single piece of equipment becomes the command center for your entire assembly line, fundamentally changing how your kitchen functions.
This isn't just about keeping things cold; it's a strategic move to boost your workflow and product quality. When every ingredient is perfectly chilled and literally at your fingertips, you slash prep time and eliminate those wasted steps running back and forth to the main walk-in. This efficiency isn't just a nice-to-have; it shows up directly on your bottom line. Any comprehensive restaurant opening checklist worth its salt will stress the importance of core equipment like this for long-term success.
A dedicated prep station guarantees consistency. And consistency is the secret ingredient that turns first-time visitors into loyal regulars who come back week after week.
The industry has certainly taken notice. The global market for these tables was valued at around USD 1.2 billion and is expected to climb to nearly USD 1.8 billion by 2033. This growth highlights a major shift across the industry toward smarter, more efficient, and more hygienic ways of preparing food. Ultimately, this isn't just a table; it's the competitive edge that helps top-tier restaurants elevate their quality, one sandwich at a time.
Choosing the Right Type of Prep Table
Think of picking a sandwich refrigerated prep table like a chef choosing the right knife for the job. You wouldn't use a paring knife to break down a side of beef, right? The same logic applies here. The right table needs to fit your kitchen’s unique flow, your menu, and how your team actually works. Getting this right can make your line sing; getting it wrong just creates headaches and slowdowns.
The first big question you'll face is doors or drawers. It's the classic debate.
Doors, Drawers, or Undercounter Units
Traditional models with hinged doors are the undisputed champions of bulk storage. They’re perfect for stashing big containers of prepped veggies, backup sauces, or anything bulky. This design gives you maximum flexibility to store items of all shapes and sizes, making it a reliable workhorse for almost any kitchen.
On the flip side, drawer models are all about organization and efficiency. Imagine having one drawer for cheeses, another for sliced meats, and another for specialty toppings. Everything has its place, which makes for lightning-fast assembly during a busy rush. Plus, every time you open a small drawer instead of a big door, less cold air escapes. That keeps your ingredients at a more stable temperature and can even trim down your energy bills.
This infographic lays out the main differences at a glance.
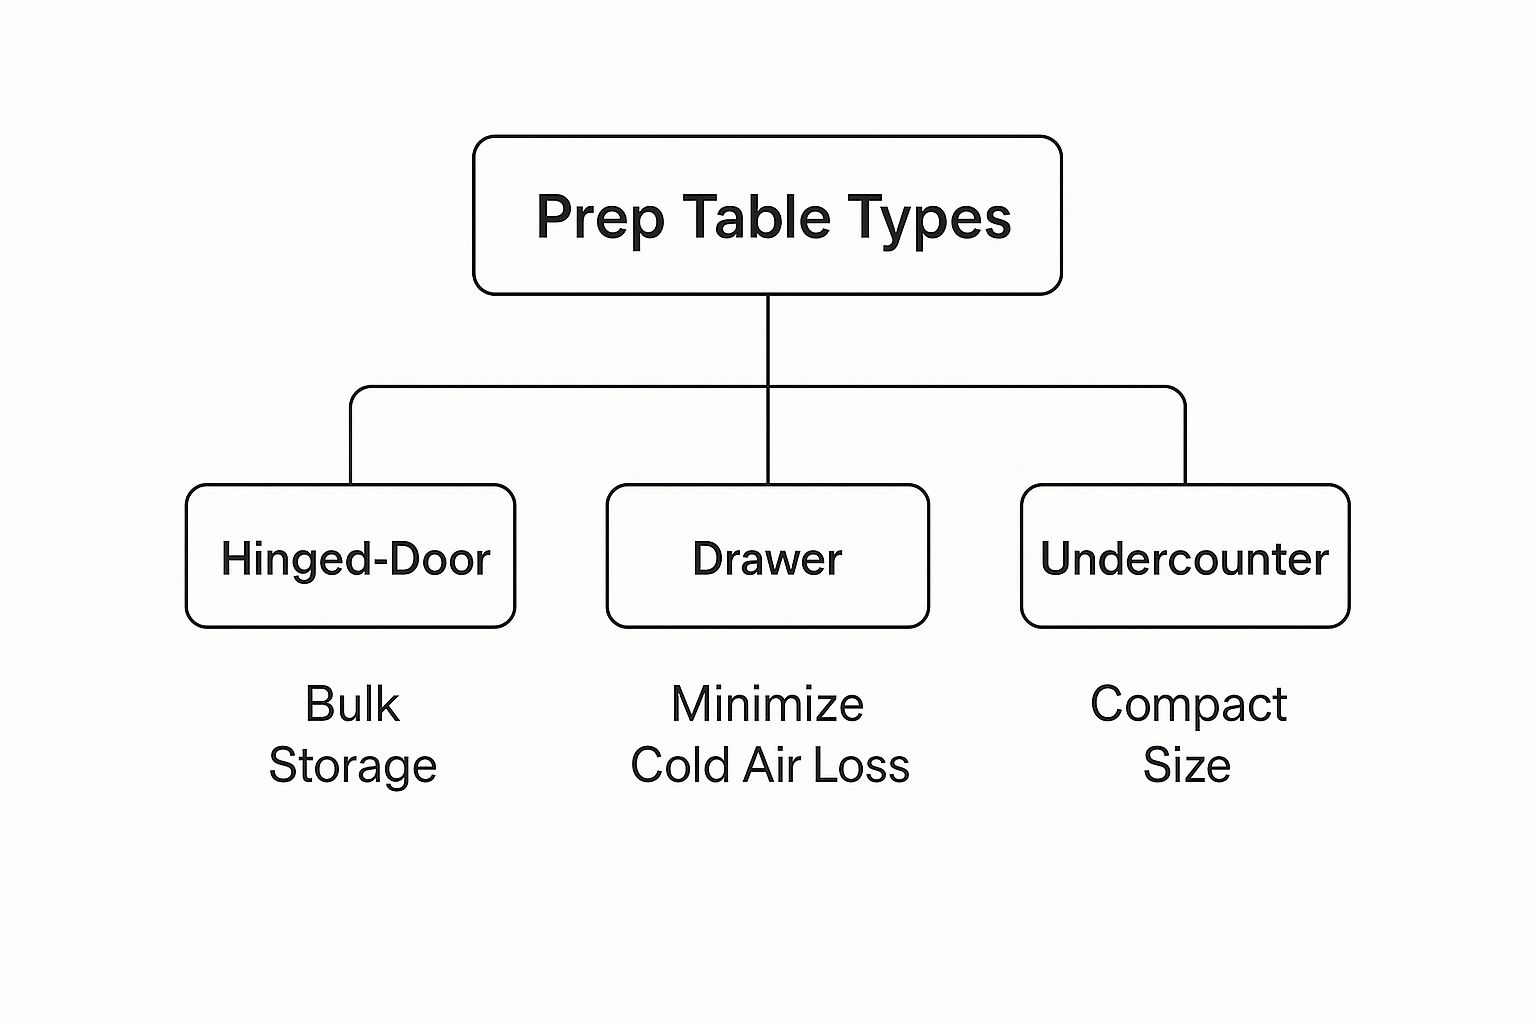
As you can see, it really boils down to what you value most: high-volume storage, grab-and-go organization, or just making the most of a tight space.
To help you visualize the trade-offs, here’s a side-by-side comparison of the most common prep table styles.
Prep Table Styles Compared
| Feature | Standard (Door) Models | Drawer Models | Undercounter Models |
|---|---|---|---|
| Best For | Bulk storage and oversized items | High-speed assembly and organization | Tight kitchens with limited floor space |
| Storage Type | Adjustable shelves for maximum flexibility | Divided pans for ingredient separation | A mix of door or drawer options, but smaller |
| Accessibility | Requires bending/reaching for items | Easy, ergonomic access to ingredients | Fits under existing counters for seamless workflow |
| Energy Efficiency | Loses more cold air when opened | More efficient; less cold air escapes | Varies by model, but small size is often efficient |
| Footprint | Standard depth and width | Standard depth and width | Compact; designed to fit under counters |
Ultimately, the best choice depends entirely on your kitchen's specific needs and layout.
What if your kitchen is short on space? That's where undercounter units come in. These compact powerhouses slide right under your existing countertops, giving you a dedicated prep and cooling station without eating up valuable floor space. They're becoming incredibly popular, especially in smaller urban kitchens where every inch counts. In fact, many manufacturers are now adding drawers to these smaller units to boost their efficiency.
A well-chosen table feels like a natural extension of your line. It anticipates your needs, keeps ingredients pristine, and supports a seamless flow from ticket to plate.
By thinking through how your team will access ingredients and how each style affects your energy costs, you can land on the perfect fit. For a closer look at a brand that gets the details right, check out our Atosa sandwich prep table review.
Critical Features That Impact Performance
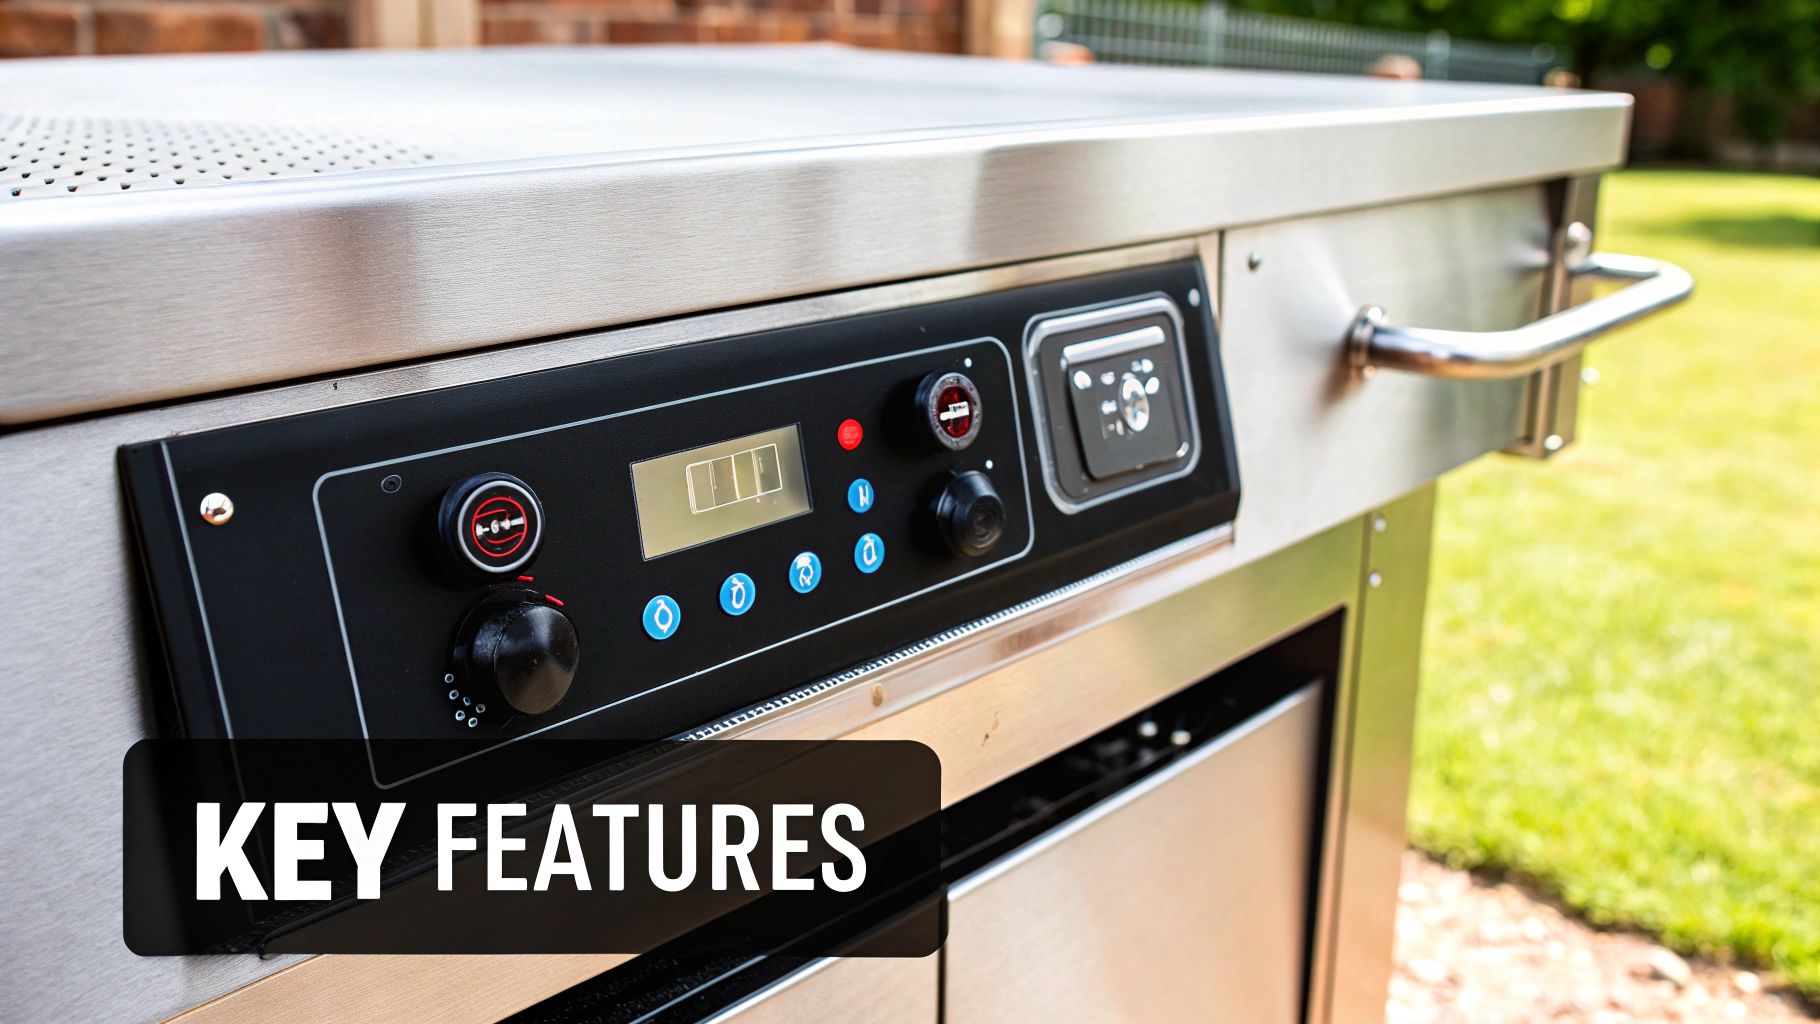
Beyond the basic size and style, the real difference between a workhorse and a headache lies in the performance features. These are the details that ensure your ingredients stay safe, your team works efficiently, and your energy bills don't creep up. To make a smart investment, you've got to look under the hood.
The heart of any prep table is its cooling system. Its one job is to keep everything—from the backup lettuce in the cabinet to the tomatoes in the top pans—at a consistent, food-safe temperature below 41°F (5°C). Pay close attention to models that mention specialized airflow. This isn't just marketing fluff; it's a system designed to push cold air directly over the ingredient rail, preventing the dreaded "danger zone" temperatures that can happen to top-pan items in a hot kitchen.
Durability and Food Safety Standards
How long your prep table lasts comes down to what it's made of. Most commercial units are stainless steel, but there's a world of difference between grades. For a busy kitchen, especially one with acidic ingredients like tomatoes and vinaigrettes, you'll want to look for higher-grade materials like 304 stainless steel. It offers much better corrosion resistance and will stand up to years of abuse.
Another absolute must-have is an NSF (National Sanitation Foundation) certification. That little logo isn't just for show; it's a guarantee that the unit is designed for easy cleaning and meets strict public health standards. When the health inspector walks in, seeing that NSF seal can save you a lot of trouble.
When you invest in a unit with a robust cooling system and high-grade materials, you’re not just buying a piece of equipment. You're investing in food safety, operational reliability, and long-term peace of mind.
Manufacturers are also getting smarter about food safety. Some high-end units now include features like UV-C sterilization to cut down on microbial contamination, which is a constant battle in salad and sandwich prep. You'll also see innovations like drawer-style tables, which are not only more ergonomic but also help save energy by minimizing cold air loss every time they're opened. You can explore more about these trends and their market impact to stay informed on where the industry is heading.
Getting Your New Prep Table Set Up Correctly
So, your new sandwich refrigerated prep table has finally arrived. The way you set it up right from the start is probably the most important thing you can do to guarantee it runs smoothly and doesn't cause you problems down the road. This is about more than just finding an outlet; it's about giving the unit a proper home where it can work efficiently for years.
First things first, give it some breathing room. Your table’s compressor needs to pull in air from the kitchen to keep everything cool inside. Shoving it right up against a wall or another hot piece of equipment is like making it breathe through a tiny straw—it’s going to struggle. That strain means a weaker cooling performance and a higher energy bill. Make sure you leave several inches of clear space around the back and sides.
Proper placement and initial setup aren't just one-time tasks; they are the foundation for the equipment's entire lifespan, directly impacting its efficiency and reliability.
Leveling and Initial Cool Down
Next, grab a level. If the unit is tilted, even slightly, the doors might not create a perfect seal. That gap lets cold air seep out, forcing the compressor to work constantly to keep up. Take a moment to adjust the casters or feet until the whole thing is perfectly level.
Once it's in place and balanced, it’s time to let it acclimate. Don't even think about loading it with ingredients yet. Plug it in, turn it on, and let it run empty for at least 24 hours. This gives the entire refrigeration system time to stabilize and hit its ideal temperature, ensuring it’s truly ready for a busy service.
Finally, consider your workflow. Where you put this table can either speed up your line or create a frustrating bottleneck. You want a smooth, logical flow from storage to prep to the service window. To get more ideas on optimizing your space, take a look at our guide to commercial kitchen design and layout.
Simple Maintenance to Extend Equipment Lifespan
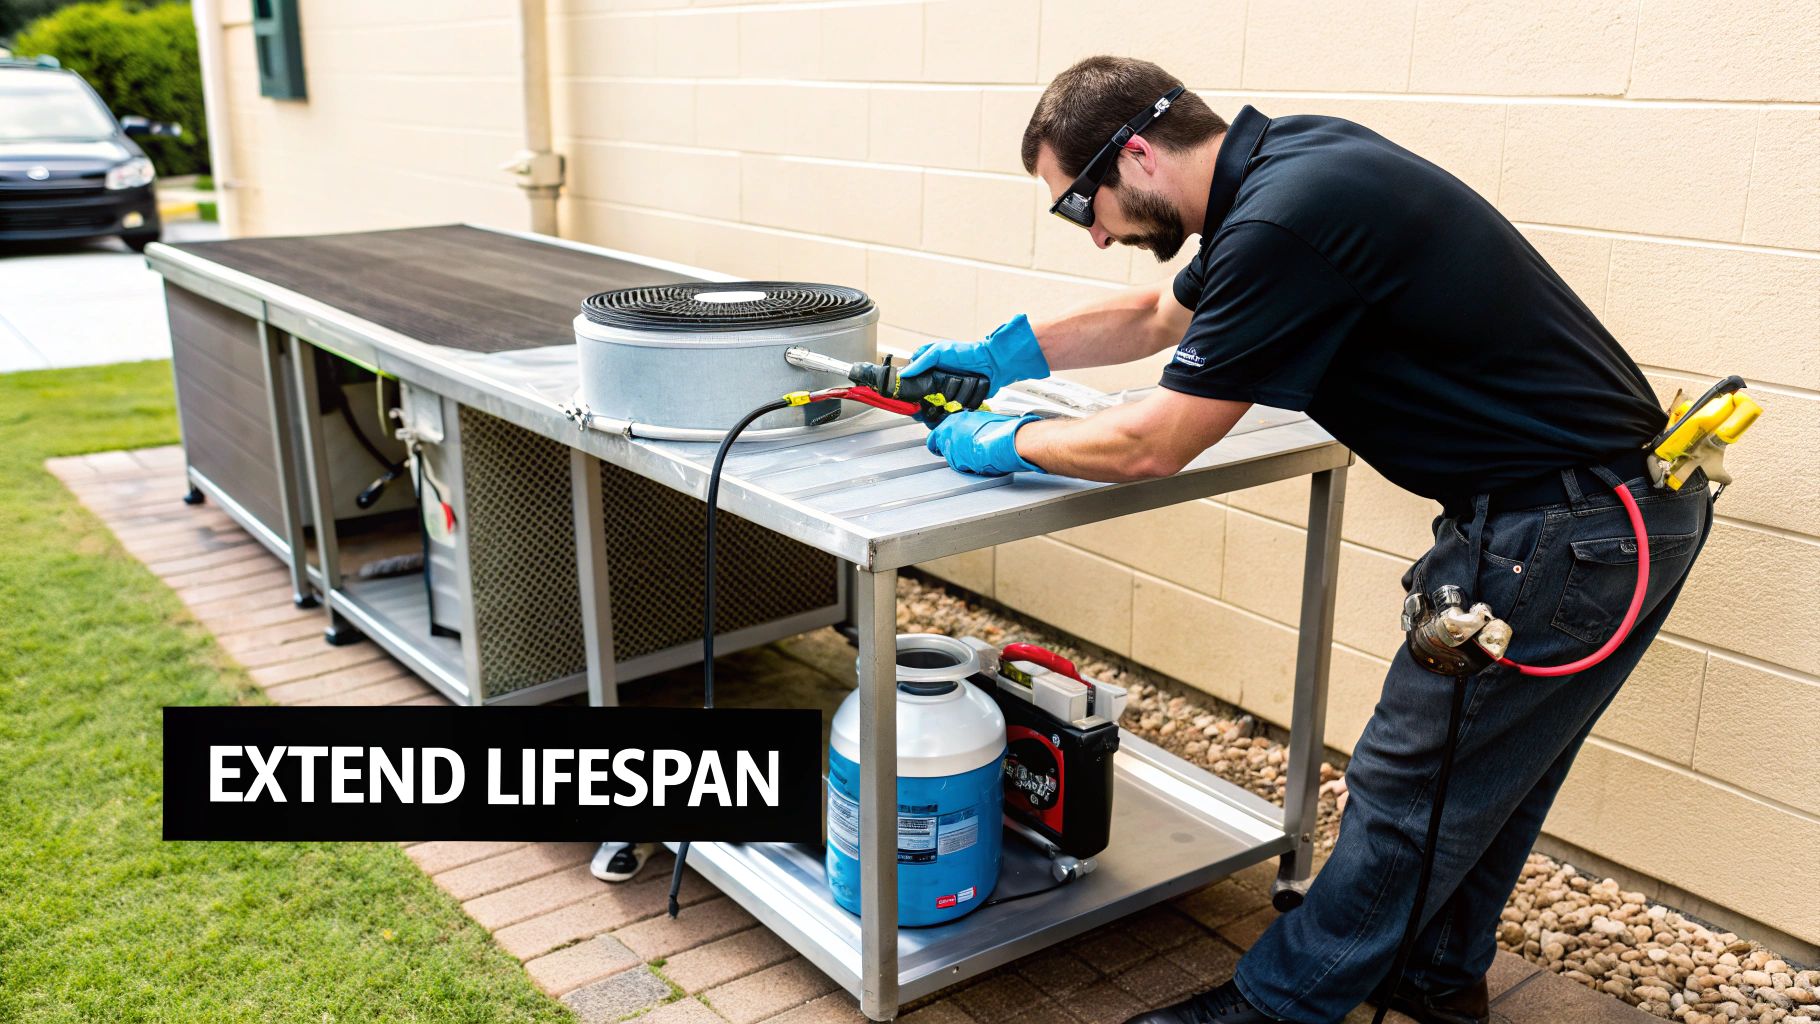
Let's be honest, your sandwich refrigerated prep table is a workhorse. It runs almost nonstop, day in and day out. A little preventative care is the smartest way to protect this investment, helping you sidestep expensive emergency repairs and even trim your energy bills. Think of it as a simple routine that pays for itself.
The good news is that this doesn't require a master technician or hours of downtime. It's really about building consistent habits that stop small issues from spiraling into catastrophic failures. The most crucial tasks boil down to cleaning, regular inspections, and making sure the unit can breathe properly.
Daily and Monthly Maintenance Checks
Consistency is the secret sauce for a long and happy equipment life. Daily cleaning is non-negotiable—it prevents food buildup and keeps your prep space sanitary. Deeper monthly checks, on the other hand, focus on the components doing the heavy lifting, the ones that can cause real headaches if you ignore them. For the common stainless steel surfaces, knowing what makes a good cleaner for stainless steel will make the job much easier.
Here’s a straightforward schedule your team can follow to keep your prep table running like a top.
A well-maintained prep table doesn't just last longer—it performs better. Consistent cleaning and inspection lead to more reliable temperatures, better food safety, and lower utility bills.
This simple checklist helps spread out the work and makes upkeep feel less like a chore. If you’re looking for a more comprehensive approach, our complete guide on https://encoreseattle.com/blogs/seattle-restaurant-equipment/commercial-kitchen-equipment-maintenance offers even more tips.
Preventative Maintenance Schedule
Sticking to a schedule is the easiest way to ensure nothing gets missed. This simple checklist keeps your prep table running efficiently and helps you catch problems before they lead to costly repairs.
| Frequency | Task | Why It's Important |
|---|---|---|
| Daily | Wipe down all interior and exterior surfaces, including the cutting board and gaskets. | Prevents cross-contamination and the buildup of food residue that can damage surfaces. |
| Weekly | Inspect door and drawer gaskets for cracks, tears, or brittleness. | A faulty gasket allows cold air to escape, forcing the compressor to overwork and wasting energy. |
| Monthly | Clean the condenser coils with a stiff brush and vacuum. | Dirty coils can’t release heat effectively, leading to poor cooling, higher energy bills, and potential compressor failure. |
| Monthly | Check and clear the drain lines to ensure they are free of clogs. | A clogged drain can cause water to back up inside the unit, creating sanitation issues and potential water damage. |
By breaking these tasks down into daily, weekly, and monthly duties, you turn a big job into small, manageable steps that protect your investment for years to come.
Your Top Prep Table Questions, Answered
When you're bringing a new sandwich refrigerated prep table into your kitchen, a few questions are bound to pop up. Making sure you've got the facts on temperature, food safety, and basic troubleshooting is the best way to keep your line running smoothly and safely. Let's tackle some of the most common things we hear from chefs and restaurateurs.
What’s the Right Temperature for a Sandwich Prep Table?
You'll want to keep the refrigerated base of your prep table between 33°F and 40°F (that's 0.5°C to 4.4°C). This isn't just a suggestion—it's the industry standard for safe cold food storage.
Why this specific range? It keeps your perishable ingredients—think deli meats, cheeses, and sauces—well out of the dreaded "temperature danger zone." This zone, which runs from 41°F to 135°F, is a breeding ground for nasty bacteria. Get in the habit of checking the internal temperature with a calibrated thermometer every day to make sure your unit is holding strong.
Can I Keep Raw Meat and Veggies in the Same Unit?
Technically, yes, but you have to be incredibly careful to avoid cross-contamination. The golden rule is to always store raw meats on the lowest shelf, far below any ready-to-eat foods like your fresh veggies, dressings, or sliced cheeses.
This simple vertical organization prevents any juices from raw proteins from dripping onto and contaminating other ingredients. I always recommend using separate, sealed containers with tight lids for your raw items. Honestly, if your menu involves a lot of raw proteins, the absolute safest bet is to dedicate a separate refrigerator just for them.
My Prep Table Is Sweating—What Do I Do?
Seeing condensation on your unit is a pretty common headache, but it usually points to a simple fix. It's almost always a sign that warm, humid air from your kitchen is finding its way inside.
Think of condensation as an early warning signal. Fixing it isn't just about getting rid of the moisture; it's about boosting your unit's efficiency, saving on energy costs, and preventing unnecessary wear and tear on the compressor.
Here are a few things to check right away:
- Look at the Gaskets: The rubber seals around your doors and drawers are the first place to inspect. Are they cracked, brittle, or pulling away from the frame? If so, they need replacing. A bad seal is the number one culprit behind condensation.
- Consider Its Location: Is your prep table sitting right next to your fryer, stove, or oven? That constant heat makes the refrigeration system work overtime. If you can, give it some breathing room.
- Talk to Your Team: A friendly reminder to staff not to leave doors or drawers hanging open can make a huge difference. The goal is to get in, grab what you need, and get out, keeping that precious cold air where it belongs.
If you’ve gone through these steps and are still seeing moisture, you might have a bigger issue with the refrigerant or compressor. At that point, it’s time to call in a professional.
Ready to boost your kitchen's workflow? Discover the latest news, exclusive deals, and industry trends on restaurant equipment and supplies with Encore Seattle Restaurant Equipment. Find the perfect solution for your operation by visiting us at https://encoreseattle.com today.