

A Practical Guide to Commercial Fryer Cleaning
Let’s cut to the chase: cleaning the commercial fryer is one of the most dreaded jobs in any kitchen. But seeing it as just a greasy chore is a huge mistake. Proper fryer maintenance is a non-negotiable part of the business, directly impacting food quality, kitchen safety, and your profit margins. Stay informed on the latest industry trends and equipment deals to turn this tough task into a smart financial strategy.
When you’ve got old oil and caked-on carbon, you’re not just serving subpar food—you’re actively hurting your bottom line. Think of this guide as your playbook for turning a tough task into a smart financial strategy, and subscribe to our newsletter for exclusive deals on the restaurant supplies you need to get it done right.
How a Clean Fryer Pads Your Pockets
If you reframe fryer cleaning from a chore to a profit-driver, the whole process changes. It’s not about scrubbing grease; it’s about protecting your investment and making your kitchen more efficient.

The Direct Line from Cleanliness to Cash
We all feel the squeeze of rising operational costs. A dirty fryer is a silent budget killer. That thick, black gunk coating the heating elements acts like an insulator, forcing the unit to burn through more gas or electricity just to get to temperature.
That means higher utility bills every single month. On top of that, dirty, broken-down oil contaminates new oil faster, forcing you to dump it and refill it more often. You’re literally pouring money down the drain.
A clean fryer isn't about looking good for the health inspector. It's about smart asset management. Neglecting it is like letting a slow leak drain your bank account—it adds up fast. Keep an eye on our latest deals to get the best prices on energy-efficient new models.
Serving Up Quality and Safety
Beyond the numbers, the state of your fryer directly affects the food on the plate. Old, dirty oil gives everything a nasty, rancid flavor that customers will notice. You can have the best recipe in the world, but if it comes out of dirty oil, it’s ruined.
A consistent cleaning routine guarantees that every single order of fries or fried chicken tastes fresh and looks perfectly golden. Even more critical is safety. Grease buildup isn't just gross; it's one of the biggest fire hazards in a commercial kitchen. Keeping your fryer clean is fundamental to protecting your staff, your customers, and your entire business from a disaster.
Your Essential Fryer Cleaning Toolkit
Before you even think about draining that hot oil, let's talk gear. The secret to a truly clean fryer isn't just elbow grease; it’s having the right tools for the job. Walking into a fryer clean-out unprepared isn't just slow—it's a serious safety hazard. We're not talking about a generic kitchen sponge and some dish soap here. We're talking about a specialized kit built to tackle that tough, polymerized grease without putting your team at risk.
Think of it this way: a chef wouldn't use a cleaver for delicate knife work. Likewise, you can't expect your crew to conquer baked-on carbon with the wrong equipment. Using the proper tools and chemicals is about more than just getting things clean. It protects your staff, extends the life of your expensive fryer, and guarantees the job gets done right the first time. Check our website for exclusive deals on cleaning supplies and kits.
Personal Protective Equipment: The Non-Negotiables
Safety is everything when you're working with scalding oil and powerful chemicals. A burn from hot oil is a whole different beast than a burn from hot water—it sticks to the skin and holds its temperature, causing much more severe injuries. Your team's protection has to be the top priority, no exceptions.
- Heat-Resistant, High-Cuff Gloves: Forget the standard blue nitrile gloves. You need heavy-duty, insulated gloves that reach up the forearm. These are your best defense against accidental splashes when draining oil or scrubbing the vat.
- Splash-Proof Goggles: It only takes one tiny drop of hot oil or caustic cleaner in an eye to cause permanent damage. Goggles that create a seal around the eyes are absolutely essential.
- Heavy-Duty Apron: A vinyl or rubber apron is that critical barrier between your staff and a nasty spill. It protects their clothing and, more importantly, their skin from hot liquids and chemical splashes.
The moment you decide to skip the goggles to save thirty seconds is the moment a preventable injury occurs. In a busy kitchen, there are no shortcuts when it comes to personal safety during a fryer boil-out.
The Right Tools for the Job
Once everyone is geared up and safe, it's time to assemble your cleaning hardware. These are the specialized tools designed to hit every corner of the fryer vat without scratching or damaging the surfaces.
Long-Handled Brushes: This is your primary weapon. A stiff-bristled brush on a long handle lets your team apply serious scrubbing pressure from a safe distance, keeping hands and arms far from the hot surfaces and cleaning solution.
Detail and Coil Brushes: For those tricky spots around the heating elements and down near the drain valve, a smaller, more specialized brush is a game-changer. These little guys ensure you're removing all that hidden carbon buildup that can lead to hot spots and equipment failure down the road.
Fryer Scrapers and Rods: A good, non-abrasive scraper is perfect for lifting that stubborn, caked-on gunk without scratching the stainless steel. You'll also want a fryer cleanout rod—a thin, purpose-built tool for clearing any hardened bits from the drain line. This ensures the oil and cleaning solution drain out completely every single time.
Choosing Your Cleaning Chemicals
The chemicals you use are just as critical as the tools. There's a reason the market for these products is so massive; the global deep fryer cleaning chemicals market is projected to grow from USD 1.8 billion in 2023 to nearly USD 2.9 billion by 2032. This isn't just a trend—it shows that smart operators everywhere know these chemicals are vital for maintaining oil quality and stopping carbon from taking over. This industry trend highlights the importance of investing in quality supplies.
Finding the right cleaner for your specific needs is key. Let’s look at the main options you’ll encounter.
Choosing the Right Fryer Cleaning Agent
| Chemical Type | Primary Use | Best For | Safety Note |
|---|---|---|---|
| Boil-Out Powder | Deep cleaning and removing heavily carbonized grease | Weekly or bi-weekly "boil-out" procedures | Highly caustic; requires full PPE and careful handling. |
| Liquid Degreaser | Daily cleaning of fryer exteriors, baskets, and surrounding surfaces | Wiping down surfaces to prevent grease accumulation | Less harsh than boil-out powder but still requires gloves. |
| Carbon Remover | Targeted application on extremely stubborn, old carbon spots | Spot-treating areas that a boil-out doesn't fully clean | Often comes in a gel or spray; potent and needs good ventilation. |
Ultimately, picking the right agent makes the entire job more efficient and effective. This same principle applies across your kitchen; just as you need a dedicated fryer kit, choosing cleaning products for commercial coffee equipment is equally important for proper maintenance. By understanding what each tool and chemical is designed for, you can build a safe, streamlined cleaning process for one of the most important—and messiest—tasks in your kitchen.
Building Your Daily, Weekly, And Monthly Cleaning Routine
When it comes to your commercial fryer, consistency is everything. A clean fryer isn't just about passing a health inspection; it's the secret to a safe kitchen, efficient equipment, and food that tastes exactly how it should. Putting a predictable cleaning rhythm in place—daily, weekly, and monthly—is how you turn a dreaded chore into a simple standard operating procedure.
A solid routine means everyone knows what to do and when to do it. It makes training easier, creates accountability, and stops tiny issues from snowballing into expensive repairs. Let’s break down what a truly effective fryer maintenance schedule looks like in a real-world kitchen.
Simple Habits For Daily Fryer Maintenance
The best routines are built on small, consistent actions. These daily tasks only take a few minutes each shift but make a world of difference. They're your first line of defense against the caked-on gunk that makes a deep clean feel impossible. Think of it as preventative care for one of your kitchen's biggest workhorses.
Here's what your team should be doing every single day:
- Skim and Strain: Every so often, grab a fine-mesh skimmer and fish out any floating crumbs and food particles from the hot oil. This one simple habit dramatically slows down how quickly your oil breaks down, preventing that burnt, bitter taste from ruining a batch of fries.
- Wipe Down All Surfaces: At the end of the day, once the fryer is off and cool enough to touch, give the exterior a thorough wipe-down. Use a clean cloth and a good degreaser to get rid of splashes on the front, sides, and backsplash.
- Clean Fry Baskets: Don't let grease build up on the baskets. Give them a good soak in hot, soapy water every night and scrub them clean. They'll be fresh and ready to go for the morning rush.
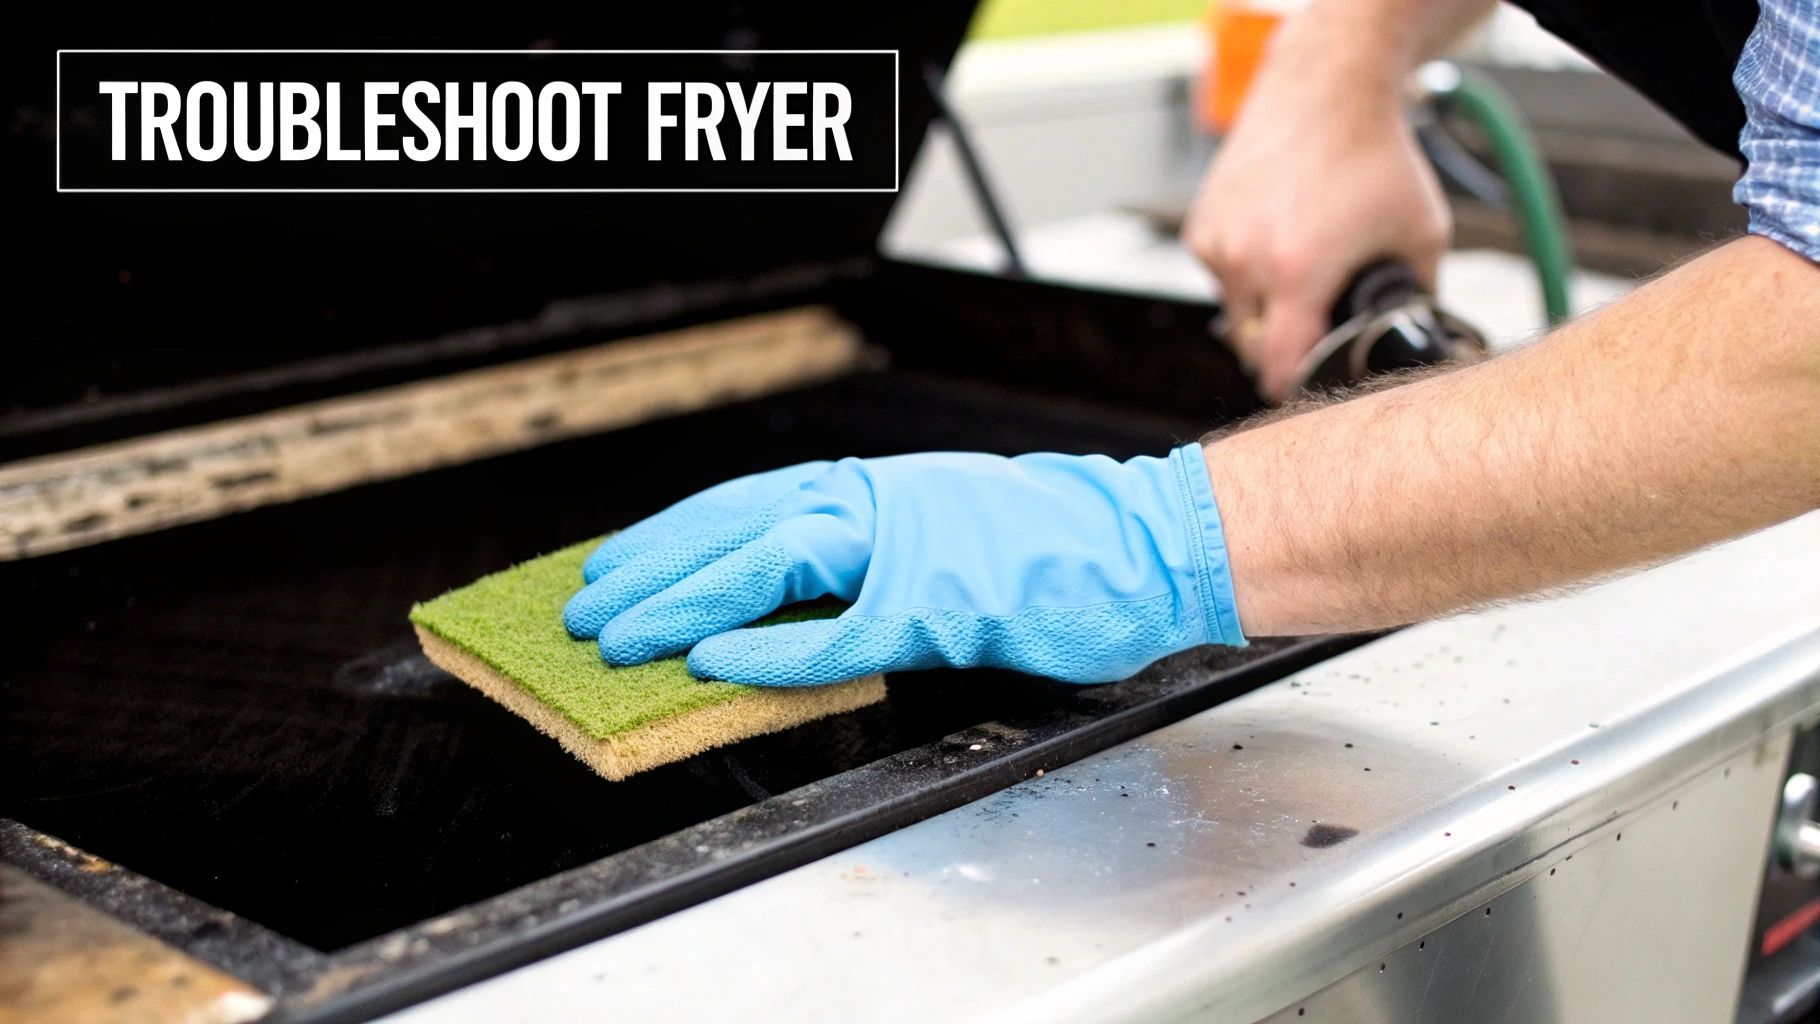
This quick visual breaks down the core of any good fryer cleaning strategy, from the protective gear you need to the tools and chemicals that get the job done right.
This process shows how the right gear, scrubbing tools, and cleaning solutions all work together to make the entire workflow safe and effective.
The Weekly Deep Clean, Or "Boil Out"
Once a week, it's time for a more intensive clean known as a "boil out." This is where you bring in a specialized cleaning solution and boiling water to strip away the stubborn, polymerized grease that a simple wipe-down just can't touch. A regular boil out is what keeps your fryer vat looking and performing like it’s brand new.
First thing’s first: make sure the fryer is off and the oil has cooled to a safe temperature, ideally below 150°F. Never, ever try to drain scorching hot oil. Once it's cool, drain the old oil into a designated, heat-safe container for disposal.
With the vat empty, use a scraper to gently knock off any large, loose bits of debris. Now, close the drain valve and fill the fryer with cold water, stopping just below the oil fill line. Add the boil-out powder or solution according to the manufacturer's instructions.
Next, turn the fryer on and bring the water to a slow, gentle boil. You want it to simmer for about 20-30 minutes—this gives the hot, soapy water time to dissolve all that tough grease. After it’s done simmering, turn the fryer off, let the solution cool down, and carefully drain it.
The final scrub is where the magic happens. Use a long-handled, non-abrasive brush to scrub the interior walls and heating elements, getting rid of any leftover residue. Once it's scrubbed clean, rinse the vat thoroughly with fresh water a few times to get every last trace of the cleaning chemical out.
Pro Tip: After the final rinse, do a quick "vinegar rinse." Just add a mix of one part white vinegar to ten parts water, swish it around, and drain. This neutralizes any leftover cleaner, which helps prevent your new oil from foaming or tasting off.
Your Monthly Health Check And Calibration
While daily and weekly cleaning focuses on the vat, your monthly tasks are all about checking the fryer's core components. This is your chance to catch small problems before they turn into major breakdowns. Think of it as a proactive check-up to keep everything running smoothly.
Here’s what your monthly inspection should cover:
- Inspect Heating Elements: Take a close look at the heating elements or gas tubes. You're looking for signs of deep pitting, cracks, or heavy carbon buildup that the weekly boil out didn't remove. Damaged elements are a major energy suck and can fail without warning.
- Calibrate the Thermostat: An inaccurate thermostat is bad news. It leads to undercooked food, burnt oil, and wasted energy. Use a calibrated kitchen thermometer to see if the oil temperature matches the fryer's dial. If it's off by more than 5-10°F, you might need to call in a pro for recalibration.
- Check and Clean the Drain Valve: Make sure the drain valve opens and closes smoothly without leaking. Clear out any gunk that might have gotten stuck in the drain line to prevent a messy clog during your next oil change.
By sticking to this three-tiered schedule, you build a cleaning system that’s both manageable and incredibly effective. To make things even easier, you can use commercial cleaning checklist templates to set clear expectations for your team. This structure doesn't just make your equipment last longer—it guarantees you’re serving the best possible product to every customer.
Mastering Oil Filtration And Disposal
Let's talk about the lifeblood of your fryer: the cooking oil. Managing it properly is one of those things that separates the pros from the amateurs. It's not just about keeping the vat clean; it's about flavor, cost control, and consistency.
Filtration is your number one tool for getting more life out of your oil, which saves you a surprising amount of money over time. When you pull all those tiny, suspended food particles out, you stop them from burning and breaking down the oil. That simple step keeps your food from tasting bitter or "off" and ensures every basket of fries comes out perfectly golden.
Pro Tips For Effective Oil Filtration
Whether your fryer has a built-in filter system or you use a portable machine, the goal is the same. Good filtration prevents "flavor transfer," which is what happens when your fries start tasting faintly like the fish you fried an hour ago. A quality filter traps the microscopic crud that carries those powerful flavors.
For most kitchens, filtering at least once a day (usually at close) is the standard. If you're a high-volume spot, you might even need a mid-shift filtration to keep things tasting fresh. Doing this consistently can easily double the life of your oil.
- Mind the Temperature: Check the manual for your specific machine, but most require the oil to be hot—usually around 300-350°F—so it flows easily through the filter medium.
- Use Filter Powder: This stuff is a game-changer. Sprinkling in a filter aid powder before you start the cycle helps grab even the tiniest particles, leaving you with remarkably clean oil.
- Let It Run: Don't cut the cycle short. Give the machine enough time to do its job properly. A full, uninterrupted cycle is key to getting all the gunk out.
Clean oil is your best insurance against inconsistent food quality. When a customer complains that their fries taste like fish, it's rarely the fryer's fault—it's almost always a sign of poorly filtered or old oil.
The Critical Rules Of Safe Oil Disposal
No matter how well you filter it, all cooking oil eventually gives up the ghost. When it's time to change it out, how you get rid of the old stuff is a huge deal. Getting this wrong can lead to plumbing disasters, angry inspectors, and some serious fines.
There's one golden rule here: never, ever pour used cooking oil down a drain. Not the floor drain, not the sink, not any drain. It might be liquid when it's hot, but as soon as it cools, it turns into a thick, pipe-clogging sludge. This mess causes nasty blockages, foul smells, and attracts every pest in a five-mile radius.
Partnering With A Rendering Service
So, what's the right way to do it? You need to work with a licensed rendering or oil collection service. It’s the professional standard and, in most places, a legal requirement.
These companies make it easy. They drop off a secure collection bin for your used oil and pick it up on a set schedule. They handle all the messy parts, recycling the old oil into things like biodiesel. It’s the responsible move that keeps you compliant with health and environmental codes.
Proper oil disposal goes hand-in-hand with your kitchen's other grease management systems. To keep everything flowing smoothly and avoid trouble with inspectors, it's smart to brush up on grease trap sizing and maintenance. When you get both filtration and disposal right, you’ve got a complete, professional system for managing your oil from start to finish.
Solving Common Fryer Cleaning Headaches
Let's be honest: even with a rock-solid cleaning schedule, things go sideways. Commercial fryers are workhorses, but they can be finicky. This is your go-to guide for tackling those frustrating little problems before they turn into big ones that require an expensive service call.
When you run into one of these common headaches, a little know-how can get your kitchen back on track in minutes.
Battling Stubborn Carbon Buildup
You just finished a full boil-out, but you can still see those nasty black patches of carbon stubbornly clinging to the corners and heating elements. That polymerized gunk is more than just ugly; it acts like an insulator and kills your fryer's efficiency.
This happens when tiny bits of grease and food debris get baked onto the metal over and over again. It's especially common in those awkward, hard-to-reach spots that daily scrubbing might miss.
Whatever you do, resist the urge to grab a steel wool pad or a metal scraper. You’ll just end up scratching and gouging the fryer's surface, creating more places for gunk to hide. Instead, arm your team with heavy-duty, non-abrasive scrubbing pads made for commercial equipment.
For the really tough spots, a dedicated carbon remover is your best friend. A targeted gel or spray can dissolve what scrubbing can't. You can learn more about how a professional-grade Carbon-Off cleaner can make this job easier in our detailed guide: https://encoreseattle.com/blogs/seattle-restaurant-equipment/carbon-off-cleaner
Dealing With A Lingering Odor After Cleaning
Another classic problem is that stale, off-smell that just won't go away, even after a deep clean. If you've scrubbed and rinsed but things still don't smell right, you’ve probably missed something.
A lingering off-smell is almost always a sign that something was missed. It could be old oil trapped in the drain line or a thin film of cleaning chemical that wasn't fully rinsed away.
Here’s a great old-school trick: do a final rinse with a diluted white vinegar solution. A 1:10 ratio of vinegar to water is perfect for neutralizing any leftover alkaline cleaners that might be causing the smell. Just swish it around the tank, drain it completely, and you’ll eliminate those phantom odors and prevent your fresh oil from foaming up.
Troubleshooting A Stuck Drain Valve
There are few things more aggravating during cleanup than a drain valve that's either frozen shut or won't close all the way. A slow drain eats up valuable time, and a leaky one is literally money dripping away.
Most of the time, the culprit is a simple buildup of hardened grease and crud inside the valve. Over time, that gunk prevents the valve from moving freely or seating properly to create a good seal.
After you've drained the oil, grab a fryer clean-out rod or a long, skinny brush and carefully work it into the drain line from inside the vat. Gently moving it around should dislodge any blockages. If the handle itself is stiff, a tiny bit of food-safe lubricant on the exterior parts can help, but never put any inside the oil path. Making this a regular part of your boil-out routine is the best way to prevent it from happening in the first place.
When to Call in the Pros for Fryer Maintenance
Your team's daily and weekly cleaning efforts are the bedrock of a well-run kitchen. But let's be realistic—even the most dedicated crew can't fix everything. Knowing when to put down the cleaning tools and call a certified technician is a critical skill in managing a commercial kitchen. It's not about admitting defeat; it's a smart business decision to protect your staff, your customers, and your bottom line.
Some problems simply go beyond a good scrub-down. They point to deeper mechanical or electrical issues that require a pro's touch and specialized tools.
Red Flags That Mean It's Time to Make the Call
While your staff is more than capable of handling the daily gunk and weekly boil-outs, certain symptoms are clear warning signs of an internal problem. If you spot any of these, don't try to troubleshoot it yourself.
- Pilot Light Won't Stay Lit: A pilot light that keeps going out is a classic sign of a bad thermocouple or a gas pressure problem. This isn't just an annoyance; it's a serious safety hazard. Never let an untrained employee attempt to fix a gas-related issue.
- Temperature is All Over the Place: You set the dial for 350°F, but the oil is either scorching at 375°F or barely hot at 325°F. A fryer that can't hold its temperature is a sign of a failing thermostat or controller. This will destroy your food quality and, worse, it's a major fire risk.
- Weird Noises or Smells: Fryers shouldn't be making strange rattling, buzzing, or clicking sounds. If you hear anything out of the ordinary, or if you ever smell gas or that distinct "electrical burning" odor, shut the unit off at the source immediately and call for service.
Think of it this way: you wouldn't tell your line cook to fix the transmission in the delivery van. A certified technician is a specialist for your most valuable equipment. Ignoring these warning signs is like driving with the check engine light flashing—it's only a matter of time before a small problem becomes a catastrophe.
The Smart Money is on Professional Deep Cleaning
Beyond just emergency repairs, scheduling professional service is a strategic move that savvy operators are making more and more. It frees up your kitchen staff to focus on what they do best: cooking and serving customers.
The market for commercial kitchen cleaning services was valued at USD 384.15 million in 2024 and is projected to skyrocket to USD 675 million by 2034. This massive growth is a key industry trend for restaurant owners to watch—it tells you that restaurants are seeing the ROI in outsourcing this heavy-duty work.
A professional crew brings in equipment and chemicals that can tackle the deep-seated grime your team can't reach, especially within exhaust hoods and fire suppression systems. This isn't just about appearances; it's about staying compliant with fire codes and your insurance policy, which often mandate professional servicing of your entire ventilation system.
In the end, a smart maintenance plan is a mix of in-house diligence and professional expertise. Understanding the full scope of commercial kitchen equipment maintenance helps you build a strategy that keeps your kitchen safe, efficient, and profitable for the long haul.
At Encore Seattle Restaurant Equipment, we provide the high-quality equipment and supplies you need to run a safe and efficient kitchen. Explore our extensive collection of new and used restaurant equipment today. Find everything your kitchen needs and discover exclusive deals at https://encoreseattle.com.