
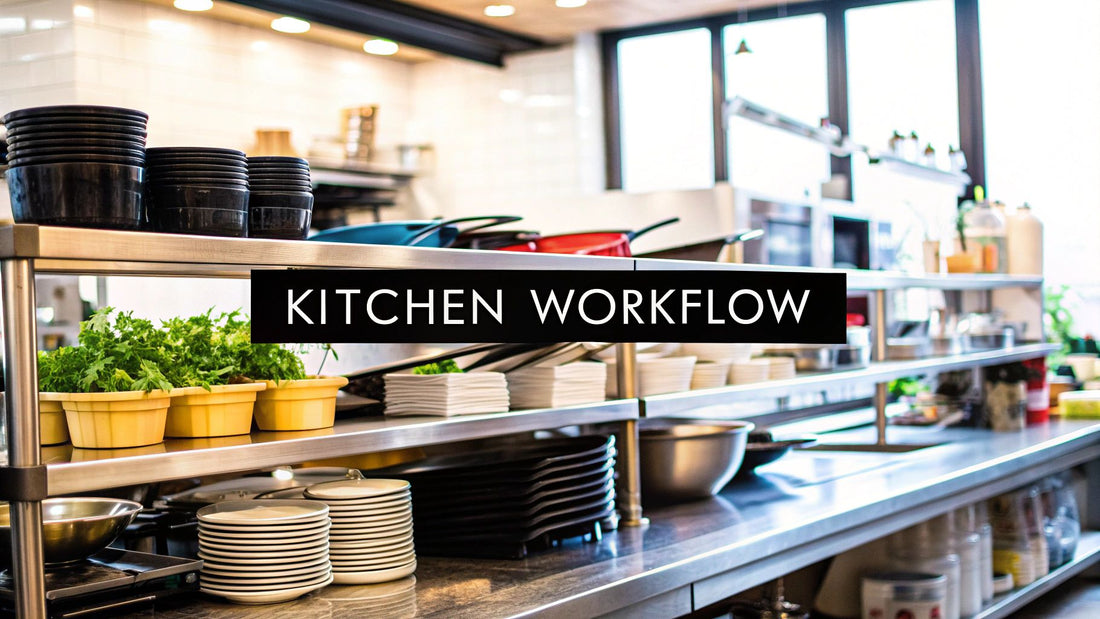
Expert Guide to Restaurant Kitchen Layout Design
When you’re designing a restaurant kitchen, you’re not just placing equipment—you're laying the groundwork for your entire business. A great layout is the hidden engine that powers fast service, happy staff, and consistent food quality. Get it right, and you're setting yourself up for profitability. Get it wrong, and you're building in chaos from day one. To stay ahead of industry trends and discover exclusive deals on the latest equipment, savvy chefs and owners are constantly seeking an edge—an advantage a well-designed kitchen provides.
Think of Your Kitchen Design as Your Business Plan in Action
The kitchen layout is the physical translation of your business plan. It’s where the concept meets reality. I’ve seen too many new owners pour their hearts and budgets into a stunning dining room, only to treat the kitchen as an afterthought. That's a recipe for disaster.
A clumsy, poorly planned kitchen creates constant friction. It slows down service, exhausts your team, and can even compromise food safety. On the flip side, a kitchen designed around a logical flow makes everything easier. It’s the difference between a frantic, stressful service and a smooth, controlled hum of activity, even on the busiest nights. Following the latest news on restaurant equipment can help you find innovative solutions that enhance this flow.
Start with the Flow, Not the Equipment
If you take away only one piece of advice, let it be this: map the journey of an ingredient before you do anything else. Follow its path from the delivery truck at the back door all the way to the finished plate heading out to a customer. This “flow-first” thinking is the secret to avoiding huge operational headaches down the road.
This journey is a one-way street. It has to be. A logical, forward-moving workflow is your best defense against cross-contamination and a cornerstone of food safety.
The typical path looks something like this:
- Receiving: The drop-off point where you check deliveries for quality and accuracy.
- Storage: From receiving, items move to their designated homes—dry storage shelves, walk-in coolers, or freezers.
- Prep: This is where raw ingredients are washed, chopped, portioned, and prepped for service.
- Cooking: The hot line, where the magic happens and dishes are fired.
- Plating & Service: The final stop for assembly and garnish before a server whisks the plate away.
- Warewashing: The return trip for dirty dishes, glassware, and utensils.
When you design your kitchen around this natural progression, you create an intuitive workspace. Staff aren't bumping into each other or backtracking through busy stations. This simple logic cuts down on chaos, reduces the risk of accidents, and keeps ticket times sharp during a rush.
Your Layout Must Serve Your Menu
There is no one-size-fits-all kitchen design. The perfect layout is completely dependent on your concept and what you're actually cooking. A bustling quick-service spot slinging burgers and fries needs a linear, assembly-line design for pure speed. A fine-dining restaurant with an elaborate tasting menu, however, will need dedicated zones to handle complex preparations without getting in the way of the hot line.
Before you even think about equipment placement, ask yourself some hard questions. How will this design support my specific menu? If you’re building a chef-driven restaurant, does the layout encourage creativity and communication between stations? If you're a first-time owner prioritizing consistency, does the design make it easy for new cooks to follow the process?
Answering these questions first ensures your kitchen becomes a powerful strategic asset, not just a room full of expensive stainless steel.
A Kitchen Built for Flow: Designing Your Workflow and Zones
A chaotic kitchen doesn't just feel stressful—it's a direct hit to your bottom line. I've seen it countless times: every wasted step a cook takes hunting for an ingredient, every near-miss as staff crisscross paths, it all adds up to slower ticket times and higher costs.
The secret is to stop thinking of your kitchen as one big room and start treating it like a well-planned city. It needs clear pathways and distinct "neighborhoods"—or zones—for every single task. A truly efficient restaurant kitchen layout design is built around a logical, one-way workflow, guiding everything from raw ingredients to finished plates.
Think about a slammed Saturday night. Without defined zones, your receiving area bleeds into your prep space. A line cook has to dodge across a busy walkway just to grab cheese from the walk-in, risking a collision with a server. This is where zoning becomes your best friend, creating a safer, calmer, and far more productive kitchen.
The Five Pillars of Kitchen Layout
Every functional kitchen I've ever designed or worked in, from a tiny cafe to a massive banquet hall, is built on five core zones. The magic happens when you arrange them in a sequential, linear path. This prevents backtracking and, crucially, cross-contamination. This one-way street is the backbone of kitchen efficiency.
-
Receiving & Storage: This is where it all begins, right next to your delivery door. Staff need space to weigh, inspect, and log every case of produce and protein before it moves one step further into the correct storage: dry racks, walk-in coolers, or freezers. No exceptions.
-
Prep Area: Once ingredients are pulled, they land here. This is for all the foundational work—washing vegetables, portioning steaks, mixing sauces. That means you need sinks, plenty of counter space, and easy access to smallwares and bulk items.
-
The Cooking Line: The heart of the whole operation. Your hot line, with its grills, fryers, and ovens, must be the next logical stop. Grouping related equipment here is key, so a grill cook isn't walking past the fryer station to get to their low-boy refrigerator.
-
Service & Plating: After the fire and fury of the line, finished dishes come here for final touches and garnishes. This zone is the critical bridge to the front-of-house, positioned for a seamless handoff to your servers.
-
Warewashing: The final stop. Your dish pit needs to be close to the dining room entrance so servers can drop off dirty plates without ever needing to cut through the hot line. This simple placement prevents countless accidents and contamination risks.
A well-zoned kitchen is a quiet kitchen, even when you're three deep at the pass. The flow becomes intuitive. People aren't shouting or running an obstacle course. This systematic approach cuts down on physical and mental fatigue, which leads directly to better food and faster service.
Tailoring Zones to Your Unique Concept
This five-zone framework is your starting point, but you have to adapt it to your menu and service style. A high-end tasting menu concept will need a large, isolated pastry section. A fast-casual spot, on the other hand, will live and die by a quick, assembly-line flow.
These principles even scale down to the smallest operations. For example, a huge part of creating a solid business plan for a food truck is about meticulously mapping these same zones into a tiny, mobile box.
Let’s look at a couple of real-world examples:
-
A Fast-Casual Burrito Shop: Speed is everything here. The zones would be laid out in a strict assembly line. The flow would be completely linear: cold prep (lettuce, salsa), to the hot line (grill, rice warmers), and straight to a cashier who wraps the final product. Every station is optimized for volume.
-
A Farm-to-Table Bistro: Here, technique and detail are paramount. You'd likely see a zone-style layout. The prep area would be much larger to handle breaking down whole animals and cases of farm-fresh produce. The cooking line might be split into distinct stations—sauté, grill, garde manger—that work together but have their own dedicated tools and refrigeration.
In the end, your restaurant kitchen layout design has to be a physical manifestation of your menu. You need to analyze how every dish is built, from raw product to the guest's table, and then arrange your zones to empower your team to do their best work.
Getting Smart with Equipment Selection and Placement
Alright, you’ve mapped out your kitchen zones. Now it's time to get down to the real heart of the kitchen: the hardware. Choosing and placing your restaurant equipment and supplies is what makes or breaks your kitchen's rhythm. This isn't just about filling space with shiny stainless steel; it’s a series of calculated decisions that will directly impact your menu, your budget, and even your future growth.
Think of your equipment as a highly specialized team. Each piece has a specific role, and they need to be positioned to work together seamlessly. It’s not enough to just buy a grill and a fryer. You have to visualize how they'll operate side-by-side during a chaotic Saturday night dinner rush.
Let Your Menu Be Your Guide
Your menu is the single most important document you have when building an equipment list. Don't fall into the trap of buying trendy gear or massive units that don't actually support what you’ll be cooking day in and day out. A steakhouse is going to sink its capital into high-octane grills and broilers, whereas a bakery’s world revolves around its convection ovens and proofing cabinets.
The best approach is to break down your menu, dish by dish. For each one, ask yourself:
- What are the core cooking methods? Frying, grilling, sautéing, baking?
- What needs to be held hot or cold before and after cooking?
- How much refrigerated and freezer space do I really need right on the line?
Going through this process helps you avoid overspending and ensures every piece of equipment earns its keep. You might even discover a need for multi-functional pieces. Combi-ovens, for instance, can steam, roast, and bake, all in one footprint—an absolute game-changer for smaller kitchens. To make sure you’ve covered all your bases, our comprehensive commercial kitchen equipment checklist is a great starting point.
My Two Cents: Don't build a kitchen for a menu you might have someday. Buy for the menu you have now. You can always add or upgrade later. Starting with oversized or underused equipment is a surefire way to burn cash and create dead zones. Stay informed about the latest restaurant equipment to find flexible solutions that can adapt as you grow.
Where You Put It Matters More Than You Think
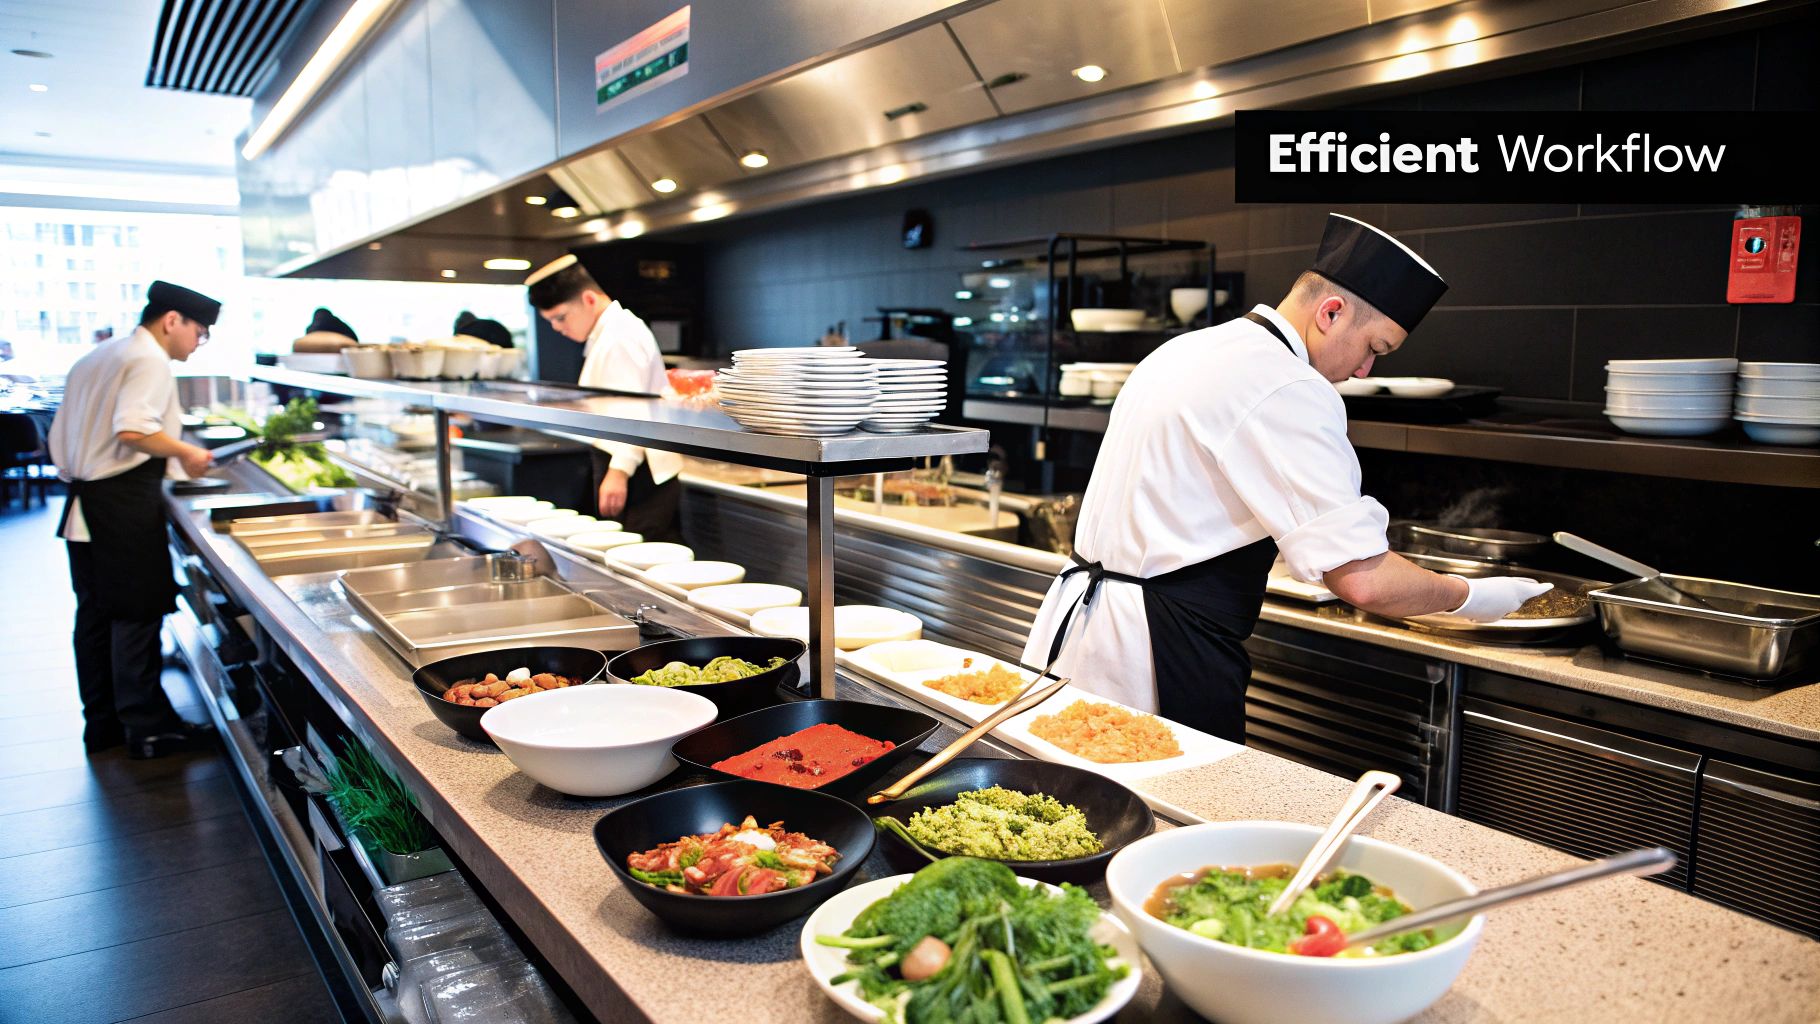
This is where the magic happens. Strategic placement is how you win the efficiency game. The goal is simple: minimize the number of steps a cook has to take. A well-designed, ergonomic layout reduces staff fatigue and drastically cuts down ticket times. When a cook has to walk ten feet to the reach-in cooler for every single order, you're bleeding precious seconds that add up fast.
This isn’t just a modern idea. In fact, some of the foundational studies on kitchen efficiency from the mid-20th century found that organizing a kitchen like a manufacturing assembly line could slash labor needs by cutting out wasted movement. The research proved that a smarter layout allows the same number of people to accomplish much more.
A perfect example is grouping your equipment. All your heat-producing monsters—fryers, griddles, charbroilers—should live together under a single, properly sized ventilation hood. This not only creates a more logical workflow for your grill station but also simplifies your HVAC and fire suppression systems, which means real savings on installation and ongoing costs.
Evolving the "Work Triangle" for a Pro Kitchen
You've probably heard of the residential "work triangle" connecting the sink, stove, and fridge. In a commercial kitchen, we blow that concept up. Instead of one big triangle, you have multiple, smaller, and overlapping triangles dedicated to each specific station.
A line cook’s primary triangle, for example, might be the grill, their under-counter cooler, and the plating counter. A prep cook’s triangle connects their work table, a dedicated prep sink, and bulk storage. The trick is to keep these triangles tight and contained within their designated zones to prevent staff from tripping over each other.
Here’s how that looks in practice:
- Refrigeration: Low-boy and under-counter fridges should be placed directly within each station. No more long walks to the walk-in.
- Sinks: Keep prep sinks in the prep area, completely separate from hand-washing sinks and the main dish pit. This is non-negotiable for health codes.
- Storage: Everyday essentials like spices, oils, and smallwares belong on shelves directly above or next to the station where they’re used.
By thinking about the specific movements needed to make each dish, you can fine-tune these micro-layouts. Shaving off just a few steps per task translates into massive labor savings and a much less frantic kitchen. This granular focus is what separates a kitchen that just works from one that truly performs at a high level.
Choosing the Right Commercial Kitchen Layout
So, you’ve mapped out your workflow zones and picked your essential equipment. Now comes the fun part: arranging everything into a layout that actually works in the heat of service. The good news is you don’t have to reinvent the wheel. Most successful kitchens are based on one of five classic design models.
Choosing the right one isn’t about chasing trends. It's about finding the perfect fit for your menu, your building's footprint, and your service style. This decision is huge—it will set the rhythm for your entire operation, dictating how fast you can plate, how clearly your team communicates, and how efficient your kitchen truly is.
Assembly Line Layout
Think of the assembly line layout as the undisputed champion of speed and volume. Just like a factory production line, stations are arranged in a straight line to build a dish from start to finish. This is the go-to design for quick-service spots, pizzerias, and build-your-own bowl concepts where getting consistent food out the door fast is everything.
The beauty of this model is its simplicity. Each team member masters one or two steps before passing the item down the line. This minimizes movement and keeps the orders flying out. The downside? It's not very flexible. If you have a complex menu or one that changes with the seasons, the rigid structure of an assembly line can quickly become a bottleneck.
Island Layout
In this popular restaurant kitchen layout design, all the heavy-hitter cooking equipment—your range, grills, and ovens—is grouped together on a central island. Everything else, from prep tables to the dish pit, is arranged along the outside walls. It’s a design you’ll often see in high-end, chef-driven restaurants and places with an open kitchen concept.
- Centralized Command: It naturally puts the head chef right in the middle of the action, making it a perfect hub for communication and quality control.
- Circular Workflow: This layout promotes a more fluid, circular flow of traffic, which is great when a dish needs touches from several different stations before it's ready.
- Space Hog: Be warned, this layout needs room to breathe. You need a significant amount of square footage to create wide, clear pathways around the central island and prevent a traffic jam during service.
Zone-Style Layout
A zone-style layout organizes the kitchen into different blocks based on function. You might have a dedicated sauté station, a separate fry station, a cold station (garde manger), and a plating area, each with its own specific equipment and staff.
This is probably the most common layout you'll find in full-service restaurants, from your neighborhood bistro to a fine-dining establishment. It’s perfect for restaurants with diverse menus because it allows multiple types of dishes to be prepared at the same time without cooks tripping over each other. The main challenge is orchestrating the hand-off between zones to make sure everything for table 12 comes together at the pass at the same time.
Galley Layout
When you're working with tight quarters, the galley layout is a lifesaver. In this design, all your workstations and equipment are lined up along two parallel walls, creating a single corridor for staff to move through. It's an incredibly efficient use of space, which is why you see it in almost every food truck, small café, and tiny urban kitchen.
Its linear design means everything is just a few steps away. But it can get crowded, fast. With staff working back-to-back, it's absolutely critical to design aisles that are wide enough (at least four feet) to prevent bumps and spills during a busy rush.
Open Kitchen Concept
Traditionally, kitchens were kept out of sight, a noisy world hidden behind swinging doors. But a major shift in restaurant kitchen layout design has brought the kitchen into the spotlight. This trend toward transparency turns the act of cooking into a form of entertainment for guests.
An open kitchen forges a direct connection between your team and your customers. It showcases the skill, the fresh ingredients, and the energy that goes into every plate, creating a dynamic atmosphere that people love. Staying informed about the latest news in open kitchen technology can provide solutions that enhance this experience.
This layout, however, is not for the faint of heart. It demands a higher level of discipline. Every surface must be spotless, and your team’s professionalism is constantly on display. Most importantly, you have to invest serious money in a powerful—and quiet—ventilation system to keep smoke, heat, and noise from overwhelming the dining room.
Comparison of Common Restaurant Kitchen Layouts
Choosing a layout can feel overwhelming, so I've put together a quick-reference table to help you compare the five main models. Think about your menu, your space, and how you want your team to operate, and see which one aligns best with your vision.
| Layout Model | Best For | Pros | Cons |
|---|---|---|---|
| Assembly Line | High-volume, limited-menu concepts (QSR, pizza, sandwich shops). | Maximizes speed and output; simple to train staff; highly efficient for repetitive tasks. | Inflexible; not suitable for complex or changing menus; can feel monotonous for staff. |
| Island | Large, open kitchens; chef-driven concepts; fine dining. | Excellent for communication and workflow; creates a central command point for the chef. | Requires a lot of space; expensive to install; can create a bottleneck if not designed properly. |
| Zone-Style | Full-service restaurants with diverse menus (bistros, casual dining). | Allows for simultaneous production of different dishes; organized and efficient for complex menus. | Requires strong communication between zones; can create bottlenecks at the pass if not managed well. |
| Galley | Small spaces (food trucks, small cafes, compact urban kitchens). | Extremely space-efficient; keeps all equipment within easy reach. | Can become very crowded; limited storage; requires careful planning to avoid traffic jams. |
| Open Kitchen | Concepts focused on transparency and entertainment; modern dining. | Creates a dynamic guest experience; showcases ingredient quality and staff skill. | Requires impeccable cleanliness and staff professionalism; high investment in ventilation and acoustics. |
Ultimately, the best layout is the one that makes your kitchen run like a well-oiled machine. By understanding the core strengths and weaknesses of each model, you're in a much better position to design a space that supports your team and delights your guests for years to come. For a more detailed breakdown, you can review our full guide on commercial kitchen design layouts.
The image below drives home a point that’s true for every single one of these layouts: you can never have too much smart storage.
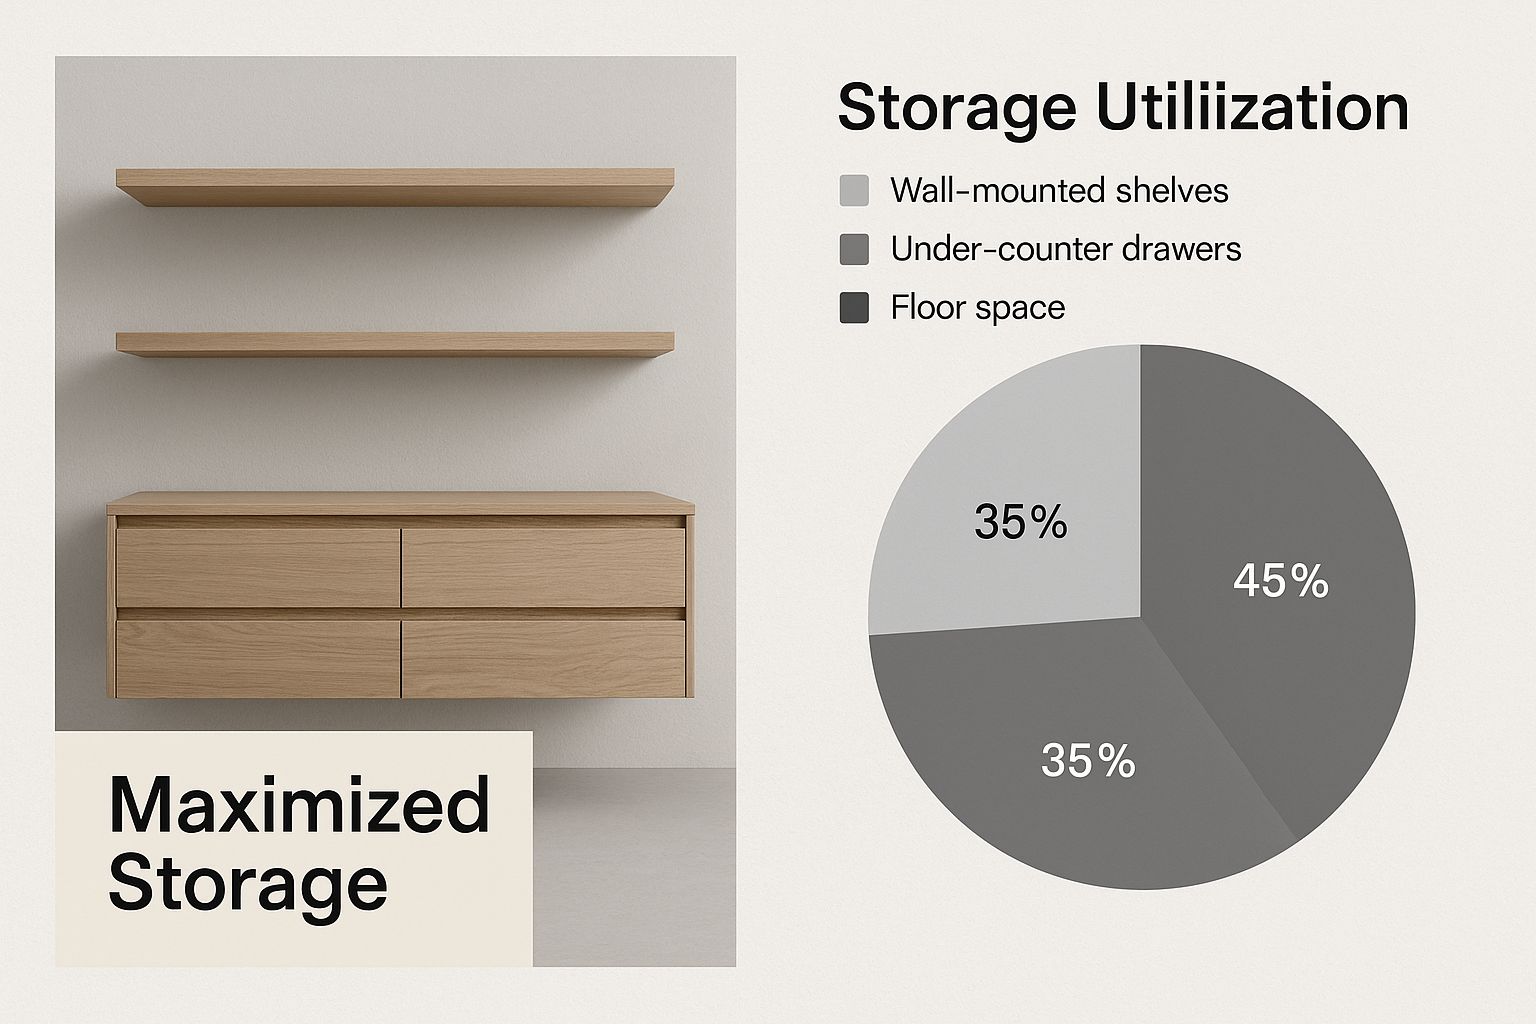
No matter how you arrange your cookline, maximizing vertical and under-counter storage is the key to keeping your workflow organized, safe, and efficient.
Navigating Safety, Sanitation, and Code Compliance
Let’s be honest: an efficient kitchen is great, but a safe kitchen is non-negotiable. It’s easy to get lost in optimizing workflow and placing equipment for pure speed, but if you ignore safety, sanitation, and building codes, you're building on a shaky foundation. A design flaw here isn't just an inconvenience that slows down service—it can get you shut down by the health department or, far worse, put your staff and customers at risk.
Think of code compliance as the blueprint that comes before your own. Before you even dream about where that six-burner range will go, you need to get intimately familiar with your local health and fire department regulations. These aren't just friendly suggestions; they're the hard and fast rules that will dictate much of your layout from the very start.
Designing for Food Safety First
Great kitchen design has food safety baked right in. Your layout should be an active defense against cross-contamination, making sanitation feel intuitive rather than like a chore. The most fundamental rule? Keep raw and cooked foods separate.
For example, your raw protein prep station—where you're breaking down chickens or portioning steaks—should never cross paths with the salad station or the final plating area. In a perfect world, you’d have completely separate rooms. But in the real world of tight kitchen spaces, a clear and strictly enforced workflow from "dirty" (raw) to "clean" (cooked) is absolutely mandatory.
Here are a few things I always insist on when designing for food safety:
- Smart Hand-Washing Stations: You need dedicated hand sinks—not prep sinks—at key points. Place them where staff enter the kitchen and between different work zones, like separating the raw prep area from the cooking line. Accessibility is everything.
- Easy-to-Clean Surfaces: This is where you don't cut corners. Stick with non-porous materials like stainless steel for countertops and any surface that touches food. Every surface needs to be smooth, durable, and free of tiny cracks where bacteria love to hide.
- Space to Clean: This gets overlooked all the time. Make sure there’s enough room—I always shoot for at least six inches—between big equipment and the walls, and between each heavy piece. If your team can't get behind and under things, they can't clean them properly.
A design that makes cleaning easy is a design that encourages it. When your staff can effortlessly get a mop and brush into every corner, you build a culture of cleanliness that health inspectors love to see.
Meeting Critical Safety and Building Codes
Beyond keeping food safe, your layout has to meet strict fire and building codes. These regulations influence everything from the width of your aisles to the materials on your ceiling. The big one—and often the most expensive—is your ventilation system.
Your cooking line, especially with its grills, fryers, and ranges, must live under a commercial ventilation hood that's been properly sized and installed. This isn't just for comfort; it's a critical system for pulling grease, smoke, and blistering heat out of the air. An integrated fire suppression system, built right into the hood, is also required in virtually every jurisdiction. Don't even think about skipping it.
Your floors are another huge safety checkpoint. Kitchen floors have to be tough, but more importantly, they must be non-slip. There’s a reason quarry tile is a classic choice: it offers excellent grip even when it's slick with water or grease, which drastically cuts down on slips and falls. This alone can save you from a world of hurt in worker's comp claims.
Accommodating Modern Storage Needs
Here's a trap I've seen even seasoned restaurateurs fall into: massively underestimating storage. Kitchens today need a whole lot more storage space than they did a few decades ago. That’s not just a gut feeling; it’s a fact.
Research has actually documented this. Studies from the National Kitchen and Bath Association (NKBA) back in the 1990s showed that storage needs in North American kitchens had already ballooned by about 110% compared to previous decades. You can actually see some of this history in the National Agricultural Library's digital exhibits. The lesson here is that your design has to be incredibly smart about using every square inch.
To make it work, you have to think vertically. Use tall, heavy-duty shelving in your dry storeroom and get shelves mounted on the walls above your prep tables. Under-counter refrigerators and freezer drawers are also game-changers, keeping key ingredients within arm's reach on the line without eating up precious counter space. If you fail to plan for this, you’ll end up with a cluttered kitchen, and clutter is the enemy of both efficiency and safety. Obstructed walkways are just asking for trips, falls, and other accidents.
Answering Your Top Kitchen Design Questions
Even with the best-laid plans, questions are bound to come up. This is where real-world experience truly matters. To help you push through the final stages of your restaurant kitchen layout, I’ve pulled together answers to the questions I hear most often from both seasoned chefs and first-time owners. Keeping up with industry news can also provide answers and exclusive deals on the restaurant equipment and supplies you'll need.
Think of this as your personal cheat sheet for tackling those last-minute challenges and making critical decisions with confidence.
How Much Does a Professional Kitchen Design Cost?
There's no single price tag for a professional kitchen design. The cost is really an investment, and it usually falls somewhere between 5% and 15% of your total equipment budget.
That percentage means the actual dollar amount can swing wildly. For a small coffee shop with a simple equipment setup, the design fee might land in the low thousands. But for a sprawling, high-end restaurant needing custom fabrication and all the bells and whistles, that fee can easily soar into the tens of thousands.
I know it can be tempting to try and save money here, but I have to strongly advise against it.
You have to see this as an investment, not just another bill. A smart layout, designed by someone who genuinely understands the flow of a working kitchen, will save you a fortune down the road. You’ll see it in lower labor costs, better energy use, and faster service. A great design pays for itself over and over again.
What Are the Biggest Mistakes to Avoid in Kitchen Layout Design?
Over the years, I've seen the same handful of mistakes derail otherwise great restaurant concepts. Dodging these common traps is one of the most crucial parts of your planning.
Here are the most common—and costly—blunders I see:
- Terrible Workflow: A layout that forces your staff to constantly backtrack, bump into each other, or take ten steps when two would do. This just creates chaos, slows down ticket times, and increases the risk of accidents.
- Not Enough Storage: This one is huge. Forgetting to plan for adequate storage is a surefire way to end up with a cluttered, disorganized mess. It’s not just ugly; it’s a major safety hazard when walkways are blocked.
- Ignoring the Rulebook: Skimping on ventilation, fire suppression, or health department codes is a guaranteed path to failed inspections, expensive do-overs, and a dangerous workplace for your team.
There's a fourth mistake that often gets overlooked: designing only for today. If your layout is too rigid, it can't grow with you. When your menu changes or your business booms, you'll be stuck facing a major renovation you didn't plan for.
How Can I Design an Efficient Kitchen in a Small Space?
A small kitchen doesn’t mean an inefficient one—it just means you have to be much smarter about it. When every square foot is precious, strategic design is everything. Your entire focus needs to be on maximizing every single surface.
First, look at a galley layout or a single-wall assembly line. These linear designs are incredibly efficient with space, creating a straightforward workflow that doesn't waste a single inch.
Next, get strategic with your equipment. Multi-functional pieces are your best friend here. A combi-oven, for example, can roast, steam, and bake, effectively replacing three separate appliances. It's a game-changer for saving space.
Then, think vertically. Use tall shelving units for your dry storage and get wall-mounted racks installed above prep stations for tools, spices, and small pans. Under-counter refrigeration is also non-negotiable; it keeps ingredients right where you need them without eating up valuable floor space.
Finally, let the small space guide your menu. A compact kitchen is at its best when it’s executing a focused, well-curated menu. This naturally streamlines the equipment you need and allows your team to perform flawlessly without feeling like they're working on top of each other.
Should I Hire a Restaurant Consultant or an Architect?
Honestly? For the best result, you really need both. It might seem redundant, but they handle very different—and equally critical—parts of the project.
A restaurant consultant or a dedicated kitchen designer is your operations specialist. They live and breathe workflow, ergonomics, and equipment specs. Their entire job is to design a high-performance workspace that lets your culinary team shine.
An architect, on the other hand, is your expert on the building itself and all the codes that come with it. They’re the one who ensures the design is structurally sound, meets every local building and fire code, and gets all the right permits filed.
When they work together, it’s the perfect partnership. The consultant designs a kitchen that functions beautifully, and the architect makes sure that beautiful design can be built safely and legally. Trying to skip one of them usually ends in a kitchen that’s either frustratingly inefficient or fails inspection—and both of those are very expensive problems to fix.
At Encore Seattle Restaurant Equipment, we've helped countless owners work through these exact questions. We help restaurant owners and chefs discover the latest news and exclusive deals on restaurant equipment and supplies. Our team has the hands-on experience to guide you through equipment selection and layout planning, making sure you get the best performance for your budget. You can explore our huge inventory of new and used equipment online or stop by our Seattle showroom to see it for yourself.