
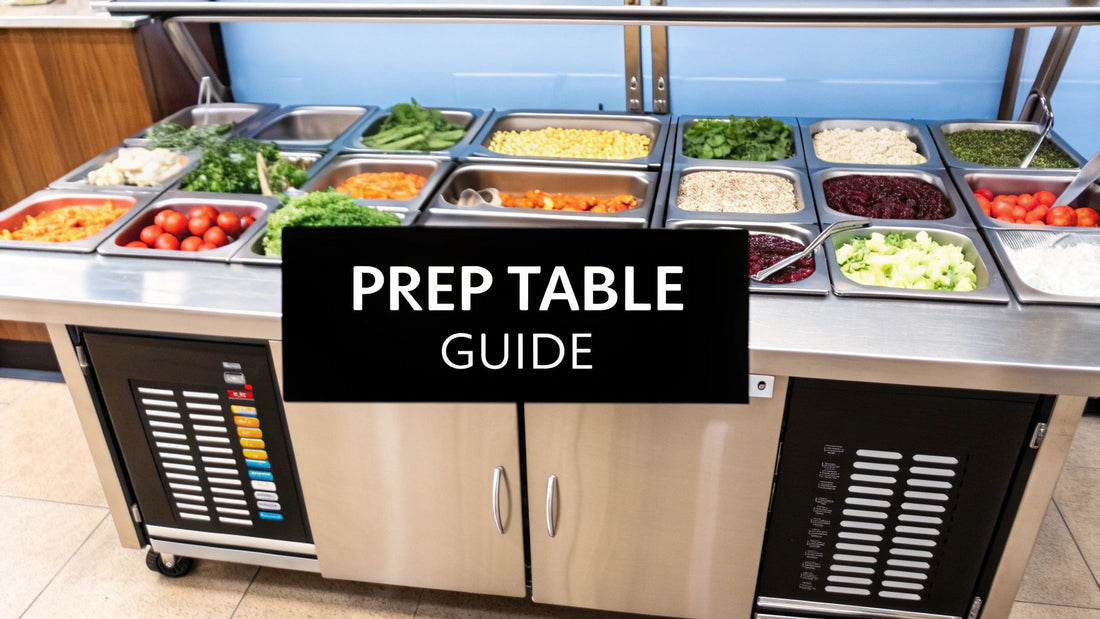
Your Guide to Refrigerated Sandwich Prep Tables
Picture this: it's the middle of the lunch rush. Is your sandwich line a well-oiled machine, or is it pure chaos with staff bumping into each other, searching for ingredients? More often than not, the difference comes down to a single piece of equipment. The best refrigerated sandwich prep tables are the true heart of a productive kitchen, directly impacting food safety and your bottom line.
Why the Right Prep Table Is Your Kitchen’s MVP
A well-chosen prep table is so much more than a refrigerator with a cutting board slapped on top. It’s the command center for your entire sandwich and salad line. Making the right choice here can transform your service speed, dramatically cut food waste, and ensure you're serving the fresh, quality product that brings people back.
Think of it as a direct investment in your restaurant's performance and reputation. The right unit creates an ergonomic workspace where every single ingredient is properly chilled, neatly organized, and always within arm's reach. That kind of efficiency is what gets you through the busiest rushes without sacrificing quality or stressing out your team.
The Growing Demand for Efficiency
It's no surprise that a focus on this kind of operational excellence is driving major market growth. Valued at US$ 7.67 billion in 2024, the global market for refrigerated prep tables is expected to hit US$ 10.30 billion by 2031. This isn't just a random spike; it shows a clear, industry-wide recognition of these units as absolutely essential tools. You can dig into the market trend data to stay informed about industry trends.
It's More Than Just a Purchase
When you start seeing this piece of equipment as a cornerstone of your kitchen, the way you shop for it changes completely. You stop looking at just the price tag and start thinking about its long-term value. A genuinely effective prep table delivers on several fronts:
- Smarter Workflow: A logical layout means less reaching, bending, and wasted movement. Your crew can assemble orders faster and with less physical strain.
- Rock-Solid Food Safety: Consistent, reliable temperature control is non-negotiable. It keeps your ingredients safely out of the temperature "danger zone," which is key for health inspections and, more importantly, protecting your customers.
- Less Food Spoilage: By holding ingredients at their ideal temperature, these tables prevent costly spoilage of meats, cheeses, and produce. That's money that goes straight back to your profit margin.
The real goal here is to create a seamless connection between your cold storage and the customer's plate. A great prep table doesn’t just hold ingredients; it presents them in a way that makes your entire line more productive.
In the end, this guide is about looking beyond the basic specs. We're going to walk through how to choose a prep table that becomes the most valuable player in your kitchen—one that ensures every sandwich you build is a perfect reflection of your commitment to quality and speed.
Choosing the Right Capacity and Size for Your Menu
When you’re picking out a refrigerated sandwich prep table, it’s easy to get caught up in just measuring the empty spot on your line.## Choosing the Right Capacity and Size for Your Menu
When you’re picking out a refrigerated sandwich prep table, it’s easy to get caught up in just measuring the empty spot on your line. But I’ve seen it time and time again: the real key is matching the unit to your menu's reality. A table that’s too small will absolutely crush your team during a lunch rush, creating a frustrating bottleneck. On the flip side, an oversized unit is just a waste of electricity and precious kitchen space.
Let’s get practical. The first thing you need to do is a simple ingredient audit. Take a hard look at your menu—not just what you offer now, but what you could offer. How many cold toppings, proteins, and sauces do you absolutely need at arm's reach? That number is your starting point, as it directly tells you how many food pans you’ll need. A small coffee shop with five signature paninis has vastly different requirements than a bustling deli with a "build-your-own" masterpiece menu.
Matching Pan Capacity to Your Menu
Think about your busiest hour. How many times are your cooks reaching into the back cooler to refill sliced turkey, provolone, or tomatoes? High-volume staples might need a deeper, full-size pan, while something like Kalamata olives or specialty aioli might only require a small 1/6-size pan.
Mapping this out is more than just counting; it's about anticipating your rhythm.
Here's a piece of advice I always give my clients: Don't buy a prep table that just fits today's menu. Always, always plan for a few extra pan slots. That small buffer gives you the freedom to run a weekly special or add that new, popular sandwich without having to overhaul your setup.
This little bit of foresight can save you massive headaches later. When you're weighing your options, keep these points in mind:
- Menu Complexity: If customers are building their own creations, you'll want to look at "mega-top" units. They're designed with extra rows of pans specifically for this kind of service.
- Ingredient Turnover: High-volume items demand larger or deeper pans. The goal is to get through your peak service without constantly stopping to restock.
- Future Growth: Are you planning to expand your sandwich offerings next year? A slightly larger unit now is a smart investment in your future.
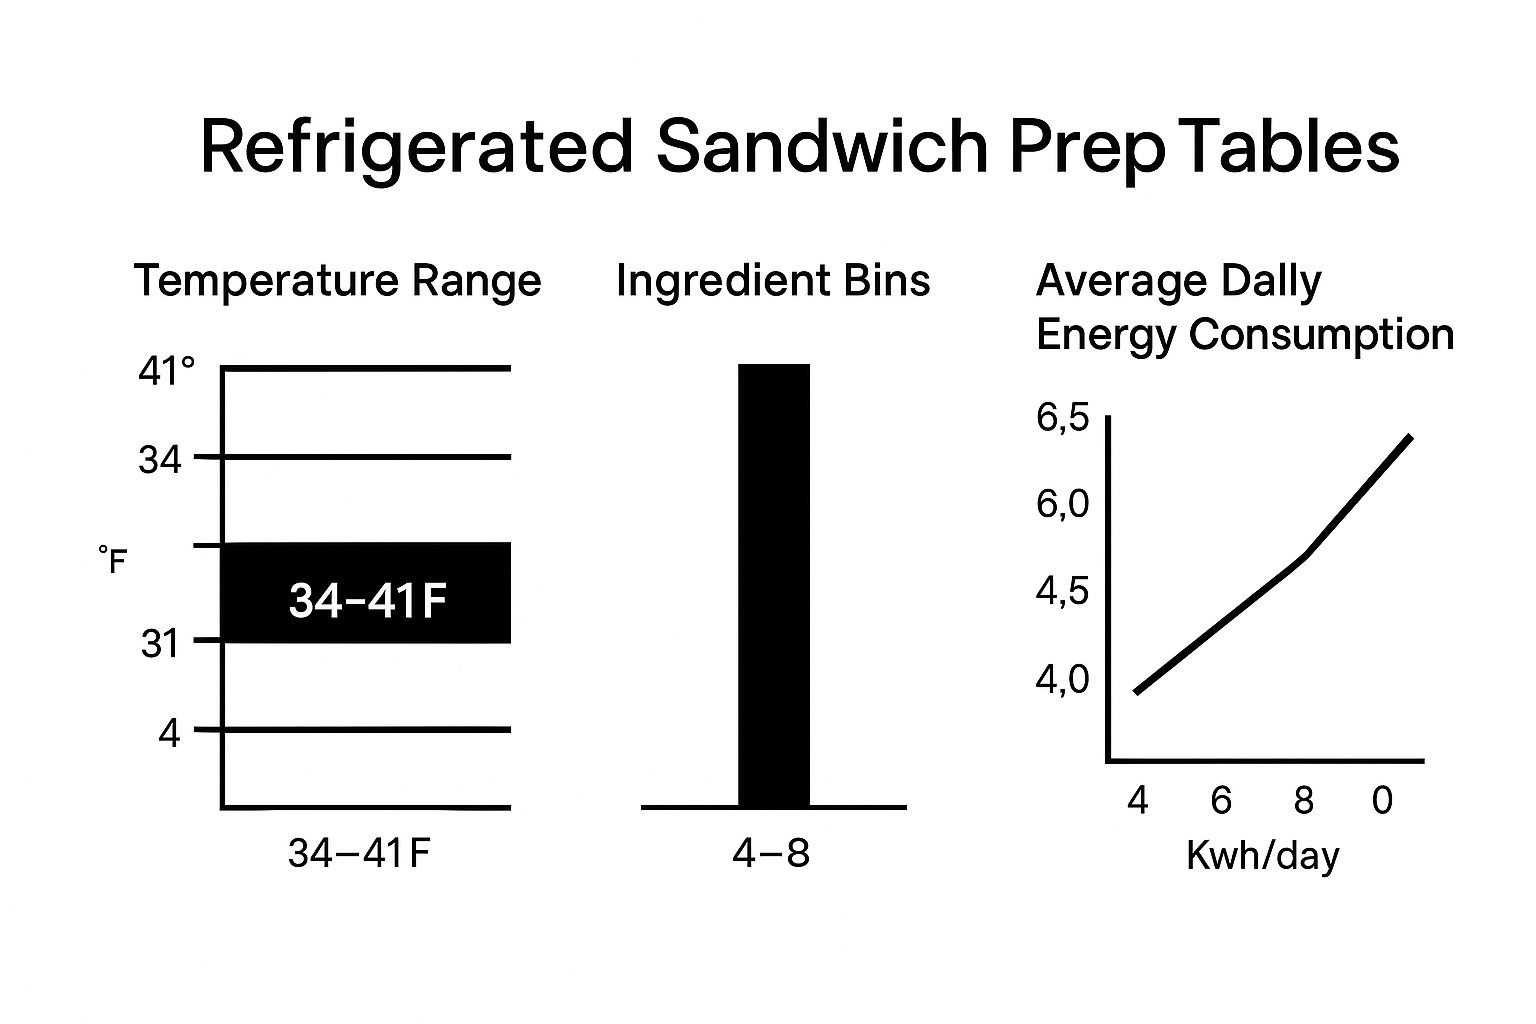
As you can see, while keeping food in the safe zone is standard, the pan capacity and energy draw vary wildly between models. Those differences hit your workflow and your utility bill directly.
To make this easier, here's a quick guide to help you visualize what size might work for you.
Sandwich Prep Table Size and Capacity Guide
| Table Size (Width) | Typical Pan Capacity (1/6 Size) | Best For (Kitchen Type) | Example Use Case |
|---|---|---|---|
| 27" | 8-10 | Small Cafés, Coffee Shops, Food Carts | A limited menu of 5-7 pre-designed sandwiches. |
| 48" | 12-16 | Mid-Sized Delis, Pizzerias | Standard sandwich menu with some customization. |
| 60" | 16-24 | High-Volume Delis, Large Restaurants | Extensive "build-your-own" options or dual roles. |
| 72" | 24-30 | Busy Sandwich Shops, Institutions | A dedicated, high-output sandwich/salad station. |
This table should give you a solid starting point for narrowing down the right fit for your kitchen's output.
Planning for Kitchen Workflow
Once you've got your pan capacity figured out, think about the physical footprint. The width of these tables, usually ranging from 27 to 72 inches, dictates how much elbow room your team has. A wider table provides a bigger cutting board and more prep surface, which is a lifesaver when two people are working the station or you’re assembling multiple complex orders at once.
Get out the tape measure, but don't stop there. Actually visualize how your staff will move around the unit. Can you open the refrigerator doors all the way without blocking a main walkway? Is there enough space for someone to pass behind the person working at the table? A smooth flow is everything.
Making sure your new prep table fits seamlessly is a huge part of a successful kitchen design. For a more comprehensive look at outfitting your entire space, our commercial kitchen equipment checklist is a fantastic resource. Making the right call now means your investment will pay dividends in speed and efficiency for years to come.
Decoding Refrigeration and Temperature Control
The refrigeration system is the heart of your prep table. It’s working around the clock to keep your ingredients safe, fresh, and delicious. But let's be clear: not all systems are built the same, and knowing the difference is what protects your inventory and, ultimately, your reputation. You’ll mainly run into two types: forced-air and cold-wall.
A cold-wall system is pretty straightforward—it has refrigerant lines inside the walls to cool the unit. It’s a simpler design and usually cheaper upfront. A forced-air system, on the other hand, uses fans to actively push cold air everywhere inside the cabinet. That active circulation is a big deal.
Why Forced-Air Is a Game-Changer
Picture your lunch rush. The lid on your prep table is flying open and shut as your crew pumps out orders. Every single time that lid opens, warm kitchen air rushes in, and the temperature in your food pans starts to climb.
This is exactly where a forced-air system earns its keep. It can bring the temperature back down to where it needs to be much, much faster than a cold-wall unit. This quick recovery is absolutely critical for two main reasons:
- Food Safety: It keeps your ingredients out of the "danger zone"—that dreaded temperature above 41°F where bacteria throw a party.
- Ingredient Quality: It keeps delicate stuff like lettuce and herbs from wilting and losing their snap due to constant temperature swings.
For any deli or sandwich shop with a decent lunch crowd, a forced-air system isn't just a nice feature. It’s essential for staying compliant and serving a quality product when things get hectic.
Understanding NSF-7 Compliance
When you see that a prep table is NSF-7 compliant, don't just gloss over it. This certification is a promise. It means the unit has been rigorously tested to hold open food pans safely. To get this stamp of approval, the equipment has to keep everything at or below 41°F, even if your kitchen gets as hot as 86°F.
Passing your health inspection often comes down to details just like this. An NSF-7 rated refrigerated sandwich prep table gives you peace of mind and shows inspectors your gear is designed for the job, protecting you from violations and spoiled product.
This standard isn't just about the average temperature; it guarantees that every food pan, from the front to the back, stays consistently cold. That consistency is what stops food waste in its tracks and ensures every sandwich tastes fresh.
It’s no surprise that the demand for this level of reliability is growing. The food prep tables market was valued at USD 1.18 billion in 2023 and is expected to hit USD 1.62 billion by 2029, a trend largely pushed by a bigger focus on food safety. You can read more about the food prep table market growth to see how the industry is shifting. Choosing high-performance, compliant equipment isn't an expense; it’s a direct investment in your business.
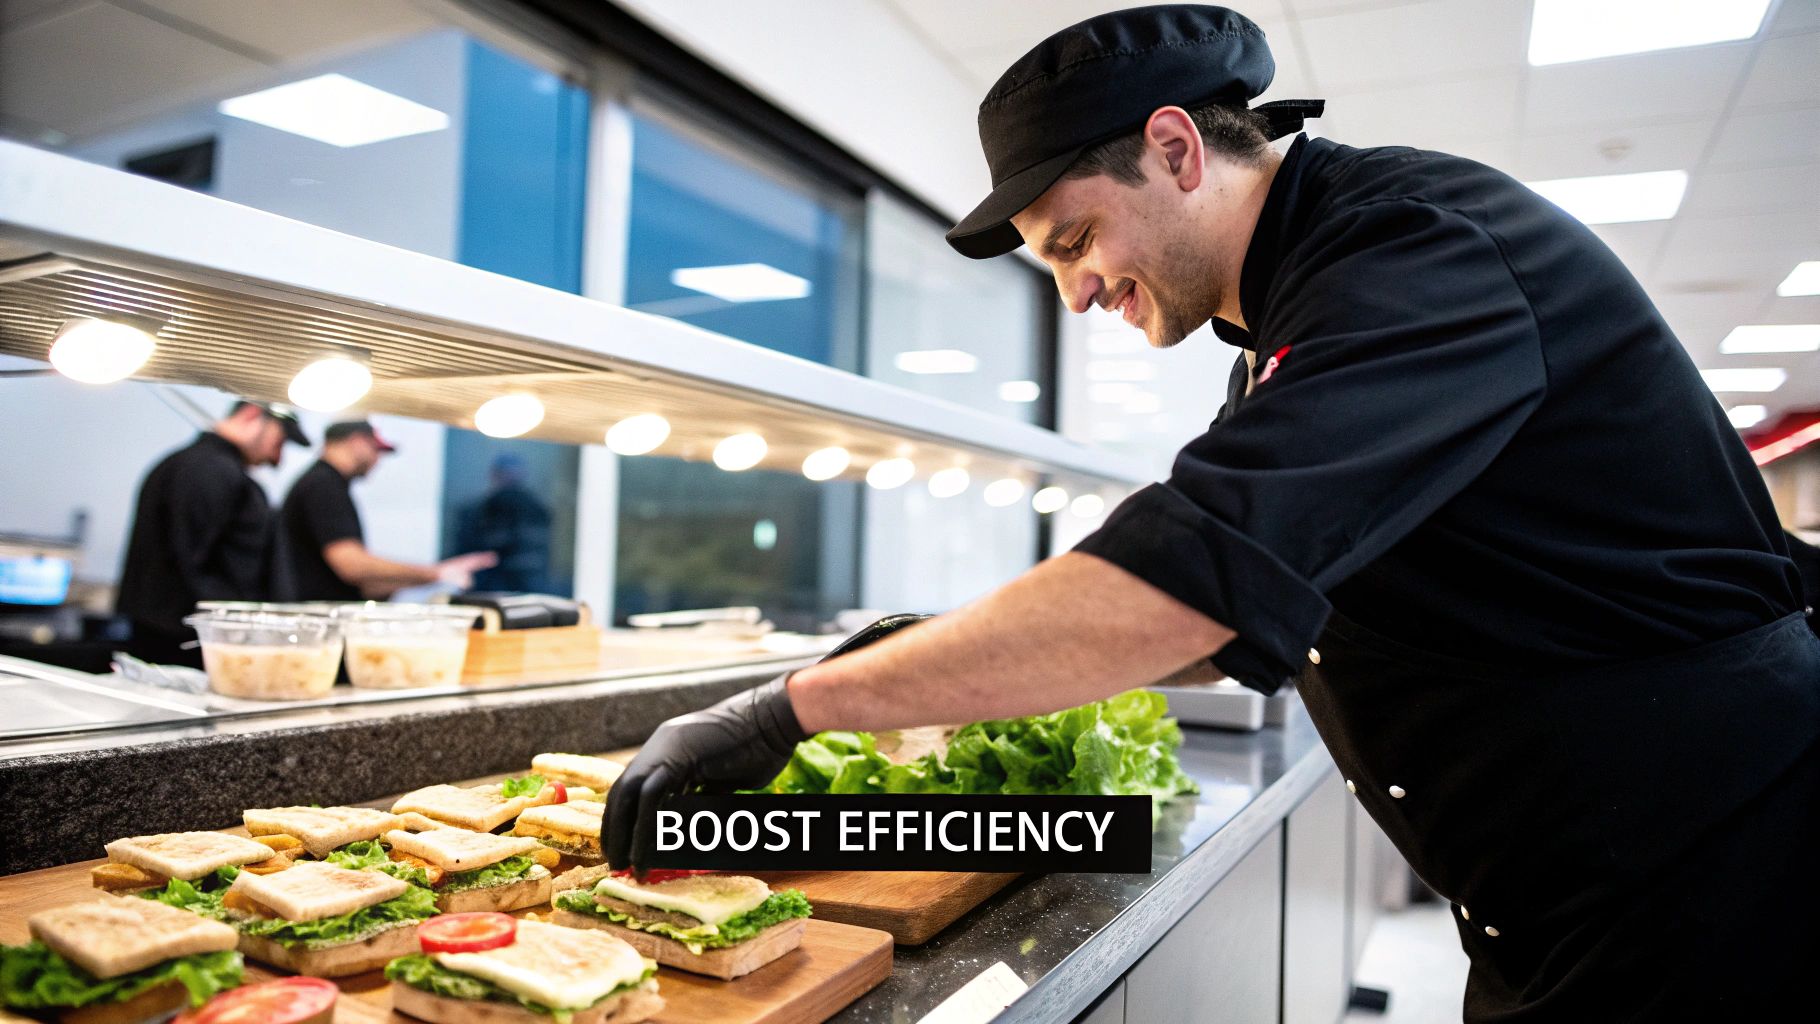
Smart Features That Boost Your Workflow
When you're shopping for a refrigerated sandwich prep table, it's easy to get lost in specs like horsepower and cubic feet. But honestly, the real magic happens in the details—the smart design choices that make your kitchen run smoother, faster, and with less hassle. These are the features that cut precious seconds off every ticket, especially when you're slammed during the lunch rush.
Think about a mega-top unit, for instance. A standard table is fine, but a mega-top gives you a much deeper cold well, usually with room for a whole extra row of food pans. If you're running a deli with a dozen different meats and cheeses or a build-your-own bowl concept, this is a lifesaver. It means your team isn't constantly running to the walk-in for refills. They stay planted, they stay focused, and they get orders out the door.
The Details That Matter Most
The little things truly make the biggest difference. Features that look minor on a spec sheet can be what separates a frustrating shift from a smooth one. As you compare models, keep an eye out for these game-changers.
- Raised Pan Rails: This is a simple but brilliant ergonomic touch. The rails tilt the ingredient pans slightly toward your staff, so they don't have to bend and reach as far. It might not sound like much, but it saves backs and reduces fatigue over a long day.
- Reversible Doors: Ever tried to cram a new piece of equipment into a tight line? The ability to switch which way the door swings, often right on the spot, is a huge advantage. It lets you optimize your space without creating a traffic jam every time someone needs to grab something.
- Integrated Lid Stays: A lid that stays propped open on its own during cleaning or restocking is a small luxury that pays off big. No more fumbling with one hand while the lid keeps trying to slam shut.
The best prep tables are designed with the chaos of a real kitchen in mind. Every single element, from how a handle feels to the material of the cutting board, should make your team’s job faster and easier.
Choosing Your Work Surface
The cutting board is the heart of your prep station. The material you choose impacts everything from how often you sharpen your knives to your daily cleaning routine. Most tables ship with a standard polyethylene board, but it’s smart to know your options.
Polyethylene boards are the workhorse of the industry for good reason. They’re tough, non-porous, relatively easy on your knife edges, and simple to clean and sanitize. Their main downside is that they can get scratched and stained over time.
Composite cutting boards, often made from pressed wood fiber, are another solid choice. They're incredibly durable and can resist deep cuts better than plastic. The trade-off? They are usually harder on knife blades, so you’ll be sharpening them more often. It really comes down to what you prioritize in your kitchen.
Picking the right gear is a huge part of building a high-performance workspace. For more on creating a truly efficient kitchen from the ground up, explore our guide on commercial kitchen design layout. A well-designed prep station is just the beginning.
Calculating Energy Use and Long-Term Costs
The initial price of a new prep table is just the tip of the iceberg. I've seen too many restaurant owners fixate on that number and forget about the real cost of ownership, which shows up month after month on the utility bill. Thinking long-term is what separates a decent purchase from a truly smart investment for your kitchen.
It can be tough to justify spending more upfront on a high-efficiency unit, I get it. But that extra investment often pays for itself, sometimes several times over, during the life of the equipment. The trick is to shift your focus from the sticker price to the lifetime operating cost.
Spotting Energy-Efficient Models
So, how do you find a unit that won't drain your bank account?
Your first and easiest tell is the ENERGY STAR® logo. This isn't just some marketing gimmick; it's a certification from the U.S. Environmental Protection Agency. A unit with that blue sticker is, on average, 15% more energy-efficient than a standard, non-certified model.
This efficiency comes from smarter engineering. Things like high-efficiency compressors, better fan motors, and superior insulation all work together to hold the cold without the motor running constantly. That translates directly to lower electricity bills.
Another huge factor is the refrigerant. Look for models that use R290 propane refrigerant. It’s not only better for the environment with a near-zero ozone impact, but it's also more thermally efficient. The compressor simply doesn't have to cycle as often or work as hard, which saves energy and reduces wear on the machine.
Don't just look at the price tag. Dig into the spec sheet for the ENERGY STAR® rating and R290 refrigerant. These are your best indicators of a lower total cost of ownership. A pricier unit with these features is almost always the smarter financial move in the long run.
Calculating Your Potential Savings
Let's run some quick numbers. Say you're looking at two different 48-inch prep tables.
- Unit A: Cheaper upfront, but no efficiency rating.
- Unit B: Costs more initially, but it's an ENERGY STAR® model.
Pull up the manufacturer's spec sheet for each. Find the daily energy consumption, usually listed in kilowatt-hours (kWh).
Just multiply that daily kWh figure by your local electricity rate, then by 365 days. The difference you see in the annual operating cost is your direct savings. When you project that out over five or ten years, the more efficient unit almost always wins, protecting your profit margins. It’s simple math, but it makes a huge difference.
This push for efficiency is an industry-wide trend. The refrigerated prep tables market was valued at around USD 2.5 billion in 2022, and it’s growing fast, fueled by innovations that help businesses like yours cut down on operating costs.
This long-term mindset should apply to more than just your prep line. It’s the same logic behind setting up effective commercial kitchen storage solutions, which is fundamental to keeping your entire operation running smoothly and efficiently.
Practical Maintenance That Prevents Downtime
Your refrigerated sandwich prep table is a true workhorse, running nonstop to keep your ingredients fresh and safe. But protecting this vital piece of equipment means doing more than just wiping it down at the end of a shift. A simple, consistent maintenance routine is your best insurance policy against emergency repairs, lost product, and a line that grinds to a halt during the lunch rush.
Think of it this way: spending 15 minutes a week on upkeep can literally save you thousands of dollars down the road. The most expensive repair is always the one you didn't see coming. By creating a straightforward checklist, you can empower any team member to protect one of your kitchen's most valuable assets.
Your Essential Maintenance Checklist
The key to consistency is breaking the work into manageable chunks. Spreading tasks out daily, weekly, and monthly makes maintenance feel less like a chore and more like a simple habit.
Daily Habits (5 Minutes):
- Wipe Down Surfaces: A quick but thorough cleaning of the cutting board, interior, and exterior with a food-safe sanitizer is non-negotiable. It’s your first defense against cross-contamination.
- Inspect Door Gaskets: Give the rubber door seals a quick wipe. More importantly, feel for any stiffness, check for cracks, or see if they’re pulling away from the door. A good seal is everything for efficiency.
Weekly Reset (10 Minutes):
- Clear the Drain Lines: Don't wait for a clog. Pouring a bit of warm water and a mild, food-safe cleaner down the drain lines prevents the slow buildup that leads to water pooling inside your unit.
- Organize and Rotate: This is the perfect time to pull everything out, give the shelves a proper scrub, and make sure you're following a first-in, first-out (FIFO) system.
The Dollar Bill Test: A leaky gasket forces your compressor to work overtime. To check your seal, close the door on a dollar bill. If you can pull it out with zero resistance, that gasket is costing you money in electricity and needs to be replaced.
The One Task You Can't Afford to Skip
If you only do one thing, make it this: clean the condenser coils.
These coils are like the radiator in your car; their job is to get rid of heat. Over time, they get caked with a nasty mix of dust, flour, and grease from the kitchen air. A clogged coil can't release heat efficiently, which forces the compressor—the heart of the unit—to run constantly until it burns itself out.
This is, without a doubt, the most common cause of catastrophic (and expensive) failures.
For most operations, you should plan on cleaning the condenser coils every 90 days. If your kitchen does a lot of frying or has a lot of grease in the air, bump that up to monthly. Just unplug the unit, grab a stiff-bristled brush to knock the gunk loose, and use a shop vac to clear it all away. This one task can single-handedly prevent your most costly potential breakdown.
Got Questions? We've Got Answers
You've got the big picture, but let's be honest—it’s the little details that can make or break a major equipment purchase. When you're about to invest in a new prep table, specific questions always pop up. Here are some quick, straightforward answers to the things we get asked most often.
What’s the Magic Number for Temperature?
For food safety, the sweet spot you're aiming for is between 33°F and 41°F (0.5°C to 5°C). This isn't just a suggestion; it's the critical range that keeps bacteria from crashing your party while preventing your fresh lettuce and tomatoes from turning into icy mush.
Keep in mind, while this is the industry standard, your local health inspector is the ultimate authority. Always double-check their specific requirements. A high-quality prep table won't just hit this temperature—it will hold it steady from one end of the rail to the other.
How Often Do I Really Need to Clean the Coils?
Think of it like changing the oil in your car. For most restaurants, cleaning the condenser coils every 90 days is the golden rule. This is hands-down the most important bit of preventative maintenance you can do.
However, your kitchen's environment matters. If you're running a busy bakery with flour dust in the air or a high-volume deli with more grease, you need to be more aggressive. In those cases, bump up the cleaning schedule to once a month. A clean coil lets the unit breathe, which saves your compressor from burnout and keeps your energy bills from creeping up.
A clean condenser coil isn't just about avoiding a costly repair bill. A dirty, clogged coil forces the compressor to work up to 30% harder. That's wasted electricity and money out the door, every single day.
Can I Just Use a Pizza Prep Table for Sandwiches?
You could, but it’s like trying to chop onions with a butter knife—it’s just not the right tool for the job. Pizza prep tables have raised rails designed to hold deep pans full of sauce, cheese, and pepperoni. It’s all about bulk toppings.
A true refrigerated sandwich prep table, on the other hand, usually has rails that are flush with the cutting board. This design gives you a smooth, uninterrupted workspace that’s perfect for the art of sandwich assembly. Using the right table makes your team faster, more comfortable, and ultimately gets orders out the door quicker.
Ready to find a prep table that will work as hard as you do? We live and breathe this stuff. Come explore the new and used equipment at Encore Seattle Restaurant Equipment, where you can get expert advice, discover exclusive deals, and find a unit that fits your kitchen and your budget.
Check out our selection today and let’s get your line running at peak efficiency.