

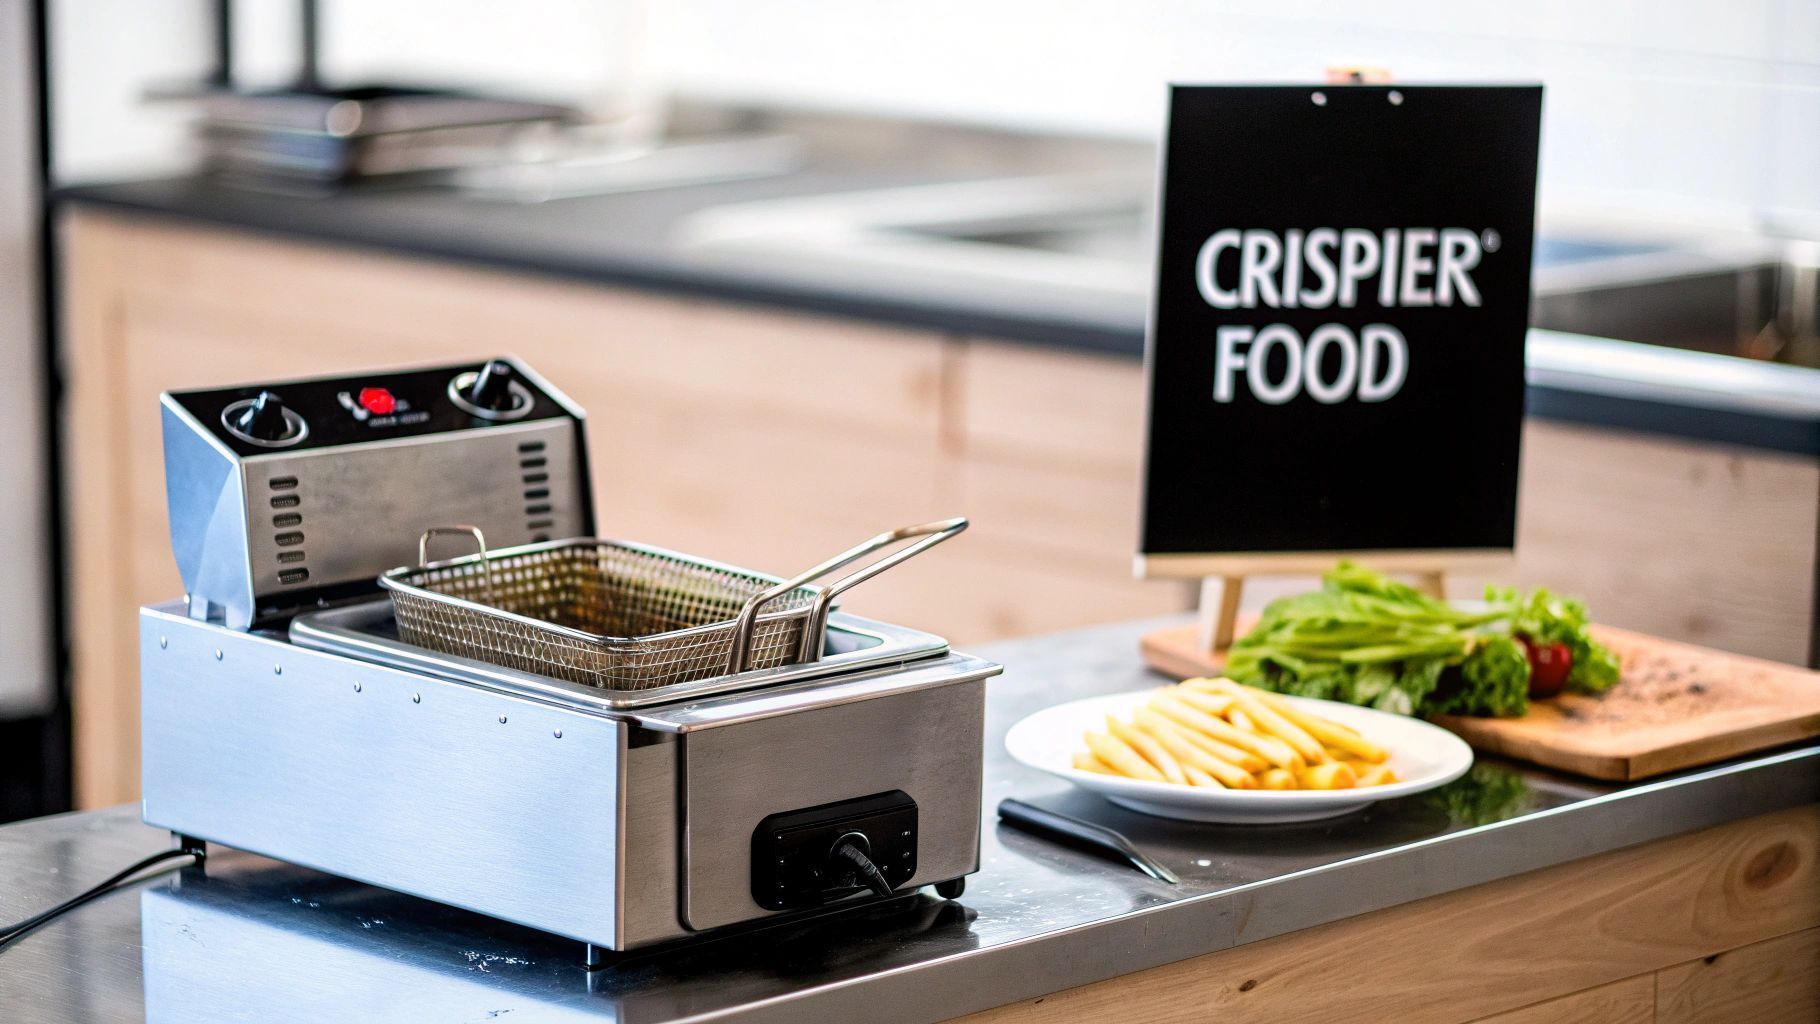
How to Clean Commercial Deep Fryer: A Chef's Guide
Knowing how to properly clean a commercial deep fryer goes way beyond a simple wipe-down at the end of the night. It's a full-on process: shutting it down, draining the old oil, running a "boil-out" cycle with a specific cleaner, and then giving it a final, thorough rinse. This is the deep clean that gets rid of the stubborn, baked-on gunk that daily cleaning just can't touch, and it's absolutely crucial for both food quality and kitchen safety.
Why a Clean Fryer is Your Kitchen's Secret Weapon
Let's be honest—cleaning the fryer is probably the most hated job in the kitchen. It’s a greasy, messy, and thankless task that usually gets stuck at the end of an exhausting shift. But if you see it as just another chore to rush through, you’re making a huge mistake that can cost you big time. A sparkling clean fryer is the backbone of your kitchen's performance, impacting everything from the taste of your food to your profit margin.
When you let old oil, carbon, and food debris build up, it does more than just look gross. That gunk actually accelerates the breakdown of your fresh oil, imparting a burnt, bitter flavor to every single thing you fry. You know that perfectly crispy, golden-brown fried chicken everyone raves about? Forget about it. A dirty fryer makes that impossible.
It's About More Than Just Good Food
Beyond the flavor, a neglected fryer creates serious problems for your entire operation. That caked-on grease is a major fire hazard. The grime also acts as an insulator, forcing your fryer to work much harder to maintain temperature. This means higher energy bills and a much greater risk of a sudden, costly breakdown.
So, think of consistent cleaning not as a chore, but as a direct investment in your most valuable equipment. The payoff is real and easy to see.
Regular deep cleaning isn't just for food quality—it's one of the best ways to protect your equipment. Proper maintenance can extend a fryer's operational life by up to 10 years and boost its efficiency by around 15%. Stay informed about industry trends like this and discover more tips for mastering commercial fryer maintenance from seasoned industry pros.
For a quick overview of the process we'll cover, here’s a look at the essential stages.
The Commercial Fryer Cleaning Process at a Glance
| Stage | Primary Goal | Key Action |
|---|---|---|
| Safety First | Prevent accidents and injuries | Turn off and unplug the fryer; wear proper PPE. |
| Preparation | Get the fryer ready for cleaning | Drain old oil and scrape out large debris. |
| The Boil-Out | Dissolve stubborn, baked-on grease | Fill with water and boil-out solution. |
| Scrub & Detail | Remove all remaining residue | Use non-abrasive pads to scrub all surfaces. |
| Rinse & Neutralize | Remove all cleaning chemicals | Thoroughly rinse with water and a vinegar solution. |
| Final Steps | Prepare the fryer for service | Dry completely and polish the exterior. |
This table maps out the journey from a greasy mess to a pristine machine ready for service.
The Real-World Cost of a Dirty Fryer
Think for a minute about what happens when you put off that deep clean. One bad online review complaining about "funny-tasting fries" can do lasting damage to your reputation. A fryer breaking down in the middle of a Saturday night dinner rush? That’s lost sales, angry customers, and a stressed-out team. These aren't just hypotheticals; they're the direct consequences of skipping this essential task.
When you start treating the cleaning process as a strategic part of kitchen management, everything changes. You're protecting your investment, keeping customers happy, and running a safer, more efficient kitchen. This guide will give you the complete roadmap to get it done right, turning a dreaded job into one of your most powerful tools for success.
Safety First: Prepping Your Fryer for the Deep Clean
Before a single drop of cleaning solution hits the stainless steel, the most important job is setting up a safe work area. Let's be honest, we're dealing with residual heat, gallons of hot oil, and some pretty potent chemicals. There's zero room for error here. This is about more than just getting the fryer clean; it’s about protecting your crew from steam burns, chemical splashes, and dangerous flare-ups.
The first, non-negotiable step is to completely shut the fryer down. I mean everything. Turn it off at the main controls, unplug it from the wall, or shut off the gas valve. Then, walk away. That unit needs to cool completely, and that can take a few hours. Rushing this is one of the biggest and most dangerous mistakes a kitchen can make.
Handling and Disposing of Used Oil
Once the fryer is cool to the touch, it’s safe to drain the old cooking oil. Make sure you have a designated, heat-resistant container ready to go. Never, ever use a standard plastic bucket—even a little residual heat can melt it, creating a nightmare spill that’s both hazardous and a mess to clean up.
Depending on your kitchen's process, you might filter this oil for another use or store it for collection. Before you get into the nitty-gritty of cleaning, get the oil situation handled safely. If you need a refresher, check out these essential tips for safe hot oil handling.
The biggest risk in fryer cleaning is the combination of hot oil and water. That's why strict safety protocols are so important. Always ensure the fryer is completely cool and every last drop of oil is drained before you even think about adding water for the boil-out.
Gearing Up with the Right PPE
With the oil safely out of the way, it's time to gear up. Personal Protective Equipment (PPE) isn't optional for this task. It's mandatory. Anyone involved in the cleaning process needs to be wearing the right gear to prevent serious injuries.
- Heat-Resistant Gloves: These are crucial for protecting your hands from hot surfaces and the caustic cleaning chemicals you'll be using.
- Splash-Proof Goggles: Your eyes need a solid shield from any chemical splashes, especially during the scrubbing and boil-out stages.
- Waterproof Apron: This creates a vital barrier between you and any hot water or cleaning agents.
Good ventilation is the final piece of the safety puzzle. Try to schedule the cleaning for a slower time in the kitchen. Crank your ventilation hoods to full power to pull steam and chemical fumes straight out of the workspace.
Setting up this safe zone does more than just protect your team; it reinforces the kind of safety-first culture that every well-run kitchen is built on. For restaurant owners looking to stay informed about the latest safety trends, our guide on commercial kitchen fire suppression is a great resource.
Mastering the Boil-Out to Dissolve Tough Grime
Now that the fryer is off and the old oil is gone, we get to the most satisfying part of the job: the boil-out. This is where the real magic happens. We're not just washing the fryer; we're using a powerful technique to dissolve all that stubborn, caked-on gunk that a simple scrub could never handle. It's like a chemical peel for your equipment, getting through layers of built-up grime to reveal the clean steel underneath.
To do this right, you need the right tool. Forget standard dish soap—it’ll just create a foamy, hazardous mess and won’t have the muscle to break down polymerized grease. You need a commercial-grade, high-alkaline fryer cleaner. These formulas are specifically designed to attack that tough residue without turning your kitchen into a bubble bath.
Executing the Perfect Boil-Out
First things first, fill the fryer vat with cold water. Be careful to fill it just a bit below the regular oil fill line, which you should see marked inside the tank. If you add too much, you risk a boil-over, but if you don't add enough, you won't clean the grimy tide line at the top.
Next, add your cleaning solution. It's really important to follow the manufacturer's directions on the bottle; getting the ratio right is key for both safety and effectiveness. Once the solution is in, you can turn the fryer back on. Set the thermostat to a low simmer, right around 200°F (93°C). You're not looking for a heavy, rolling boil—that can cause dangerous splashing and isn't as effective at slowly breaking down the grease. A gentle simmer is what you want.
This infographic lays out the crucial safety checks you should have already done before getting to this point.
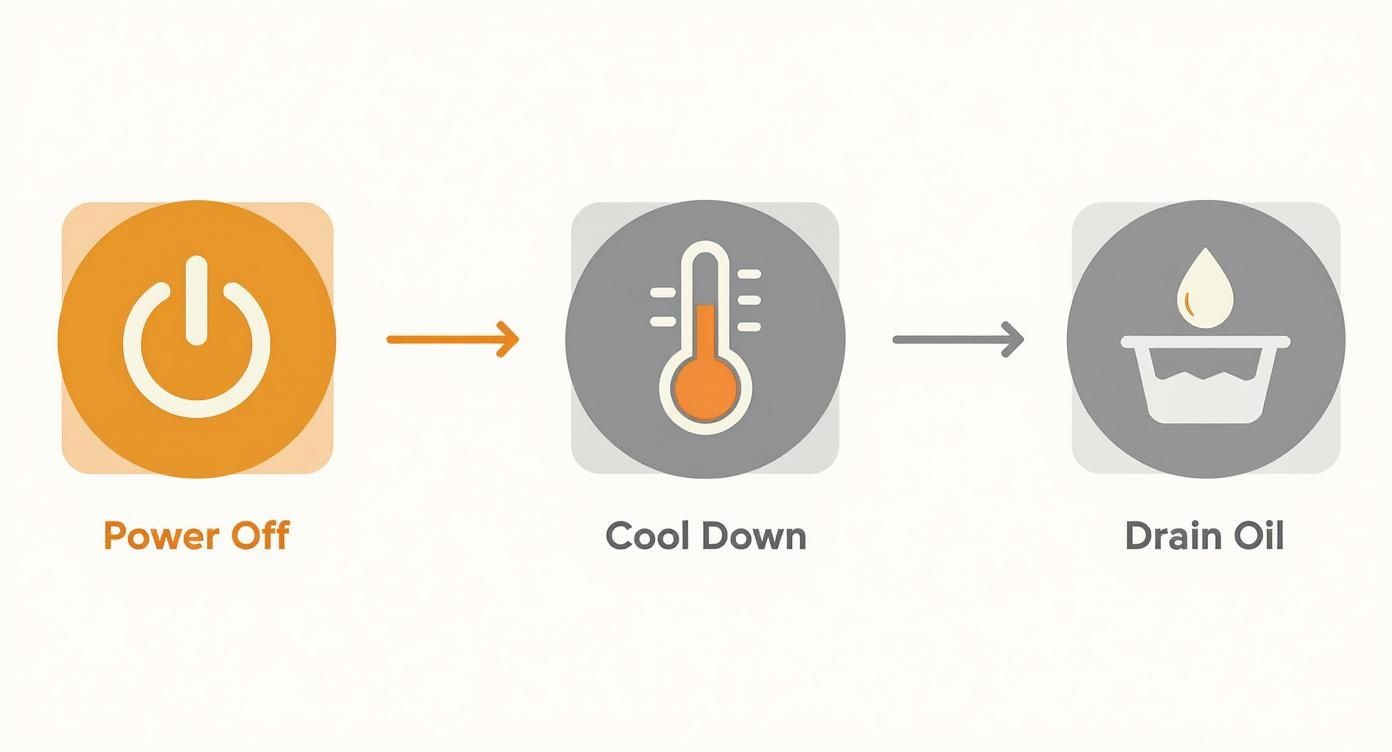
As the visual shows, powering down, letting it cool, and draining the oil are non-negotiable steps. Don't ever skip them.
Monitoring and Timing for the Best Results
Let the solution simmer away for about 20 to 30 minutes. That's the sweet spot where the heat and the chemicals really start working together. You’ll literally see the baked-on carbon begin to flake off and the greasy film dissolve into the water.
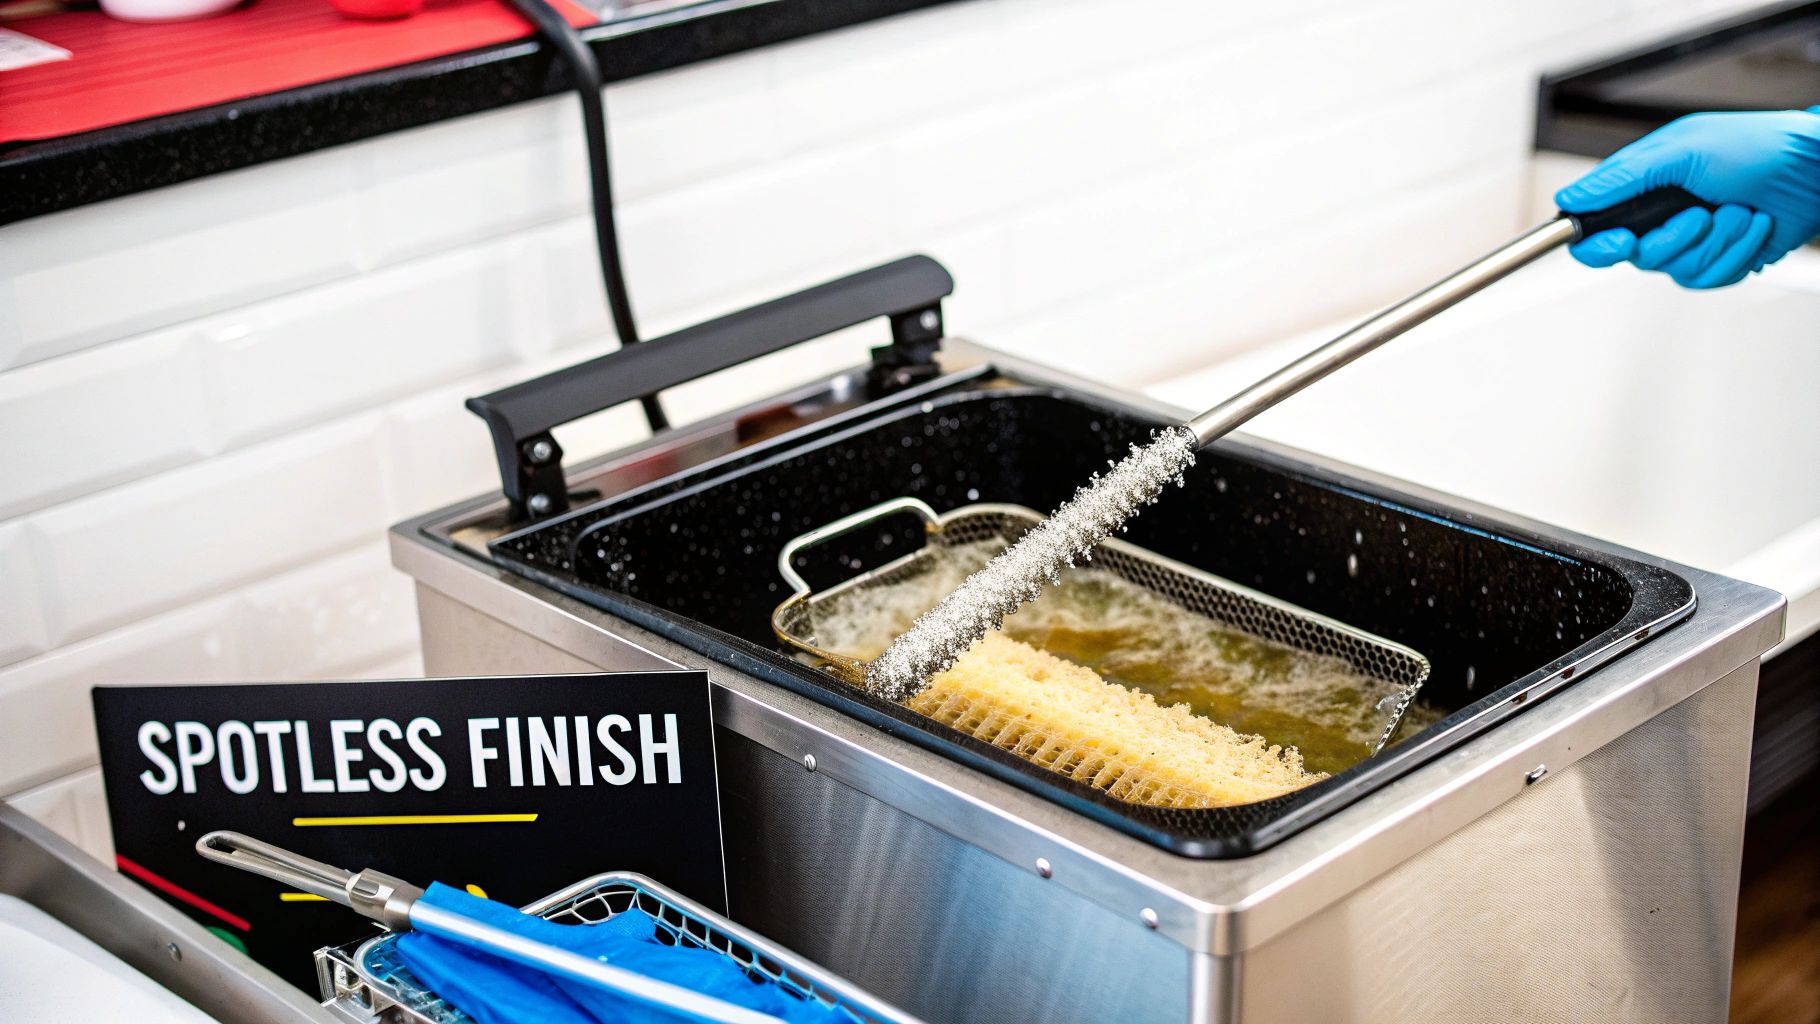
While it’s simmering, grab a long-handled, heat-resistant brush and give the sides of the vat and the heating elements a gentle scrub. The cleaning solution has done all the heavy lifting, so this should be pretty easy. If you're dealing with some seriously stubborn carbon deposits that just won't budge, you might need a more targeted product. Our guide on choosing the right carbon off cleaner can help you find exclusive deals on the best restaurant equipment and supplies for those tough spots.
Once your timer goes off, carefully shut down the fryer. Let the hot water cool down a bit before you drain it—you don't want to risk a steam burn. This boil-out is the secret weapon for a truly deep clean, setting the stage for the final scrub and rinse that will leave your fryer looking brand new.
Scrubbing, Rinsing, and Detailing for a Flawless Finish
The boil-out did the heavy lifting, dissolving all that nasty, baked-on grease. But now it’s time for the detail work. This is the stage that really separates a quick wipe-down from a professional, deep clean. Your technique here makes all the difference.
After you've drained the cooled boil-out solution, you’re bound to see some stubborn gunk still clinging to the fryer walls, especially in the corners and around the heating elements. That’s your target. The mission is to get rid of every last bit of that grime without damaging the stainless steel.
Arming Yourself with the Right Tools
It's tempting to reach for steel wool or a heavy-duty scraper, but don't do it. Harsh, abrasive tools will carve microscopic scratches into the fryer's surface. You might not see them, but those tiny grooves are perfect hiding spots for bacteria and make every future cleaning job that much harder.
Instead, build a dedicated fryer cleaning kit with the right tools for the job.
- Long-Handled Brushes: A brush with a long handle and stiff nylon bristles is your best friend. It gives you the leverage to scrub the vat walls while keeping your hands safely away from any lingering heat.
- Specialized Detail Brushes: You'll need smaller, more flexible brushes to get into the tight spots. Think about the areas around thermostats, heating elements, and inside the drain valve—that's where carbon loves to build up.
- Non-Abrasive Scouring Pads: For those extra-tough spots that a brush just can't tackle, a non-abrasive pad gives you the scrubbing power you need without scratching the finish.
The Rinsing and Neutralizing Process
Once you’ve scrubbed away every speck of grime, the next step is absolutely critical for your food quality: the rinse. Even a trace of leftover boil-out chemical will contaminate fresh cooking oil, giving your food a soapy, off-putting taste.
Start by rinsing the entire vat thoroughly with hot water. Fill it up, swish the water around to hit every surface, and then drain it completely. Do this at least twice. You have to be positive that every drop of cleaner is gone.
After the hot water rinses, it’s time for a final neutralizing rinse. Fill the fryer one last time with clean, warm water and add about a cup of white vinegar. The vinegar's mild acidity will neutralize any alkaline residue left behind by the cleaning solution. This is an extra insurance policy for your oil and your food.
Don't rush the rinse. This is your final check for food safety and quality. Skipping this or doing a lazy job can ruin a whole batch of expensive cooking oil and, worse, the flavor of your signature fried items.
Let that vinegar and water solution sit for about 10 minutes, then drain it completely. The very last step is to dry the fryer's interior until it’s bone-dry, using clean, lint-free cloths. Any moisture left behind will cause violent, dangerous sputtering when you add hot oil. Taking the time to do this right ensures your fryer is not just clean, but ready to cook consistently great food.
Building a Long Term Fryer Maintenance Routine
https://www.youtube.com/embed/pM0pSYjwQH8
A perfect deep clean is a great reset, but it’s the daily and weekly habits that really save your fryer—and your wallet—in the long run. When you build a solid maintenance routine, fryer care stops being a massive, dreaded project and becomes a series of small, manageable tasks. This is how you extend the life of your equipment, keep your food quality consistent, and sidestep those expensive emergency repair calls.
The secret is just consistency. Simple actions, done by every single shift, are what prevent the nasty, caked-on buildup that makes a full boil-out so painful. We're not talking about complicated procedures here; these are small habits that make a huge difference in preserving your cooking oil and keeping your fryer working at its best.
Daily and Weekly Maintenance Checks
The easiest way to get your kitchen staff on board is to create a simple checklist. These tasks need to become as second-nature as prepping their station or wiping down at the end of the night.
Daily Tasks (End of Every Shift):
- Skim Debris: Always use a fine-mesh skimmer to get any floating food particles out of the hot oil. Little bits left behind just burn and degrade your oil faster.
- Wipe Down Surfaces: A quick wipe of the fryer's exterior, including the backsplash and sides, prevents that sticky, impossible-to-remove grease film from forming.
- Cover the Fryer: Once it's had a chance to cool, covering the vat overnight is a must. It keeps dust, pests, and other contaminants out of your oil.
Weekly Tasks (Best Done During a Slow Period):
- Filter the Oil: Even if you aren't doing a full oil change, filtering it once a week is crucial. It pulls out all the fine sediment that skimming can't catch, which can seriously slow down how fast your oil breaks down.
- Inspect Thermostats: Check that your fryer is actually holding the temperature you set it to. If it's running too hot or too cool, you’re going to end up with greasy, poorly cooked food.
- Check Pilot Lights and Connections: For gas units, make sure the pilot light is burning strong and blue. Give the gas lines and electrical cords a quick visual check for any signs of wear and tear.
Treating your equipment with this kind of regular attention is just part of running a smart kitchen. To discover the latest news and industry trends on topics like this, check out our detailed guide on commercial kitchen equipment maintenance.
Knowing When to Call the Professionals
While your team can handle the day-to-day, there are times when bringing in the pros is a smart business move. They have the tools and techniques to do a job that goes way beyond what a typical kitchen staff can pull off, and it often saves you money in the long run. For a truly deep clean that hits every nook and cranny, it's worth looking into professional restaurant cleaning services as part of your overall strategy.
These companies aren't just scrubbing harder; they're using specialized gear. Think advanced, vacuum-based microfiltration systems that can extend the life of your cooking oil by up to 2 times its normal lifespan. That's a direct cut to your oil costs. Plus, a professional deep clean ensures you're meeting health and safety codes by getting rid of hazardous carbon buildup that in-house crews might miss.
Outsourcing your deep fryer cleaning isn't just about saving labor. It's a strategic decision that can dramatically reduce oil costs, minimize kitchen downtime, and ensure your equipment is being maintained to the highest possible standard.
A solid maintenance plan is a mix of both: diligent daily habits from your crew combined with periodic deep cleans from a professional service. This approach doesn't just keep your fryer in peak condition—it builds a safer, more efficient, and ultimately more profitable kitchen.
Deciding on Your Cleaning Strategy: DIY vs. Professional
Choosing between handling all your fryer cleaning in-house or hiring a professional service comes down to a few key factors for your business. There’s no single right answer, but this breakdown can help you figure out what makes the most sense for your operation.
| Factor | DIY In-House Cleaning | Professional Service |
|---|---|---|
| Cost | Lower upfront cost (mostly labor and supplies). | Higher per-service cost, but potential long-term savings on oil and repairs. |
| Time & Labor | Requires significant staff time and training. Can pull staff from other duties. | No staff time required. Cleaning is done efficiently by trained specialists. |
| Effectiveness | Good for daily upkeep but may miss deep-seated carbon and grease buildup. | Extremely thorough. Uses specialized equipment for a deeper clean and oil filtration. |
| Expertise | Relies on the training and diligence of your kitchen staff. | Performed by experts who specialize in fryer maintenance and safety standards. |
| Downtime | Can lead to longer downtime if staff is inexperienced or interrupted. | Minimal downtime, often scheduled during off-hours to avoid disruption. |
| Best For | Restaurants with experienced staff, tight budgets, and a strong internal maintenance program. | High-volume kitchens, businesses focused on maximizing oil life, or those wanting to ensure compliance. |
Ultimately, many of the most successful kitchens use a hybrid approach. They nail the daily and weekly tasks in-house to keep things running smoothly and then bring in a professional service quarterly or semi-annually for that "like new" deep clean that resets the clock.
Got Questions? We’ve Got Answers on Fryer Cleaning
Even with the best instructions, you're bound to run into questions when you're elbow-deep in a fryer cleanout. Every kitchen is different, and every fryer has its own personality. Here are some straight-up answers to the most common things we get asked about cleaning a commercial deep fryer.
Think of this as your quick-reference guide for getting the details right. Nailing these specifics is what separates a decent clean from a great one.
How Often Should I Really Be Doing a Full Boil-Out?
Honestly, it all comes down to how hard you’re working your fryer. If you're running a high-volume spot, especially one frying up fresh, battered items all day, you should plan on a full boil-out every 3 to 4 months. For kitchens with a lighter load, maybe just heating up frozen products, you can probably stretch that to every 6 months.
But forget the calendar for a second. The real answer is in the oil itself. Is it getting dark way too fast? Are you seeing smoke at normal cooking temperatures? Does your food have a funky, slightly bitter taste? Those are all tell-tale signs that it’s time for a deep clean, no matter when you did it last.
What are the Biggest Mistakes People Make When Cleaning a Fryer?
You can do everything right, but a few common slip-ups can be dangerous or even damage your fryer. Steer clear of these.
- Adding Water to Hot Oil: This is the big one. Never, ever introduce water into the vat until the fryer has completely cooled down and you've drained every last drop of oil. If you don't, you risk a violent steam explosion that can send scalding water and hot oil flying everywhere.
- Skimping on the Rinse: Coming in a close second is rushing the rinse cycle. If you leave any chemical cleaner behind, it will instantly contaminate your fresh oil, make your food taste terrible, and pose a potential health risk.
- Grabbing the Steel Wool: It might be tempting to use steel wool or other harsh, abrasive pads to attack tough spots, but don't do it. You'll create microscopic scratches all over the stainless steel, which become the perfect hiding spots for bacteria and make every future cleaning job that much harder.
The most overlooked step in the whole process is that final rinse. People get tired and rush it. But cutting this corner basically undoes all your hard work. Pro tip: after the main rinse, do one last quick rinse with a mix of water and a bit of white vinegar. It neutralizes any remaining cleaner and leaves the surface perfectly food-safe.
Can I Just Use Dish Soap for the Boil-Out?
That’s a hard no. Regular dish soap is a disaster waiting to happen in a fryer. It's designed to create a mountain of suds, which will foam up and boil right over the top of the vat, creating a seriously slippery and dangerous mess all over your floor.
Even if you managed the suds, dish soap just isn't powerful enough. It can’t break down the tough, polymerized grease and baked-on carbon that’s specific to fryers. You need a dedicated, low-sudsing, high-alkaline commercial fryer cleaner built for exactly this job.
At Encore Seattle Restaurant Equipment, we know that great food starts with great equipment. If you're looking to upgrade or just starting out, check out our huge selection of new and used commercial fryers. Find exclusive deals and the perfect unit for your kitchen by visiting us at https://encoreseattle.com.