

A Guide to Commercial Ice Storage Bins
In any busy restaurant or bar, your ice storage bin is one of those critical pieces of equipment you don't think about until it's not working—or it's empty during the dinner rush. It’s the unsung hero of daily operations, holding a key ingredient for everything from signature craft cocktails to fresh seafood displays. These aren't just simple containers; they're specialized, insulated units designed to hold massive quantities of ice, keeping it clean, cold, and ready to go.
Picking the right one isn't just a matter of size. It’s a strategic business decision that directly impacts service speed, food safety, and your bottom line. Staying informed about the latest equipment trends is crucial for chefs and restaurant owners looking to optimize their operations.
Why Your Ice Storage Bin Is a Kitchen MVP
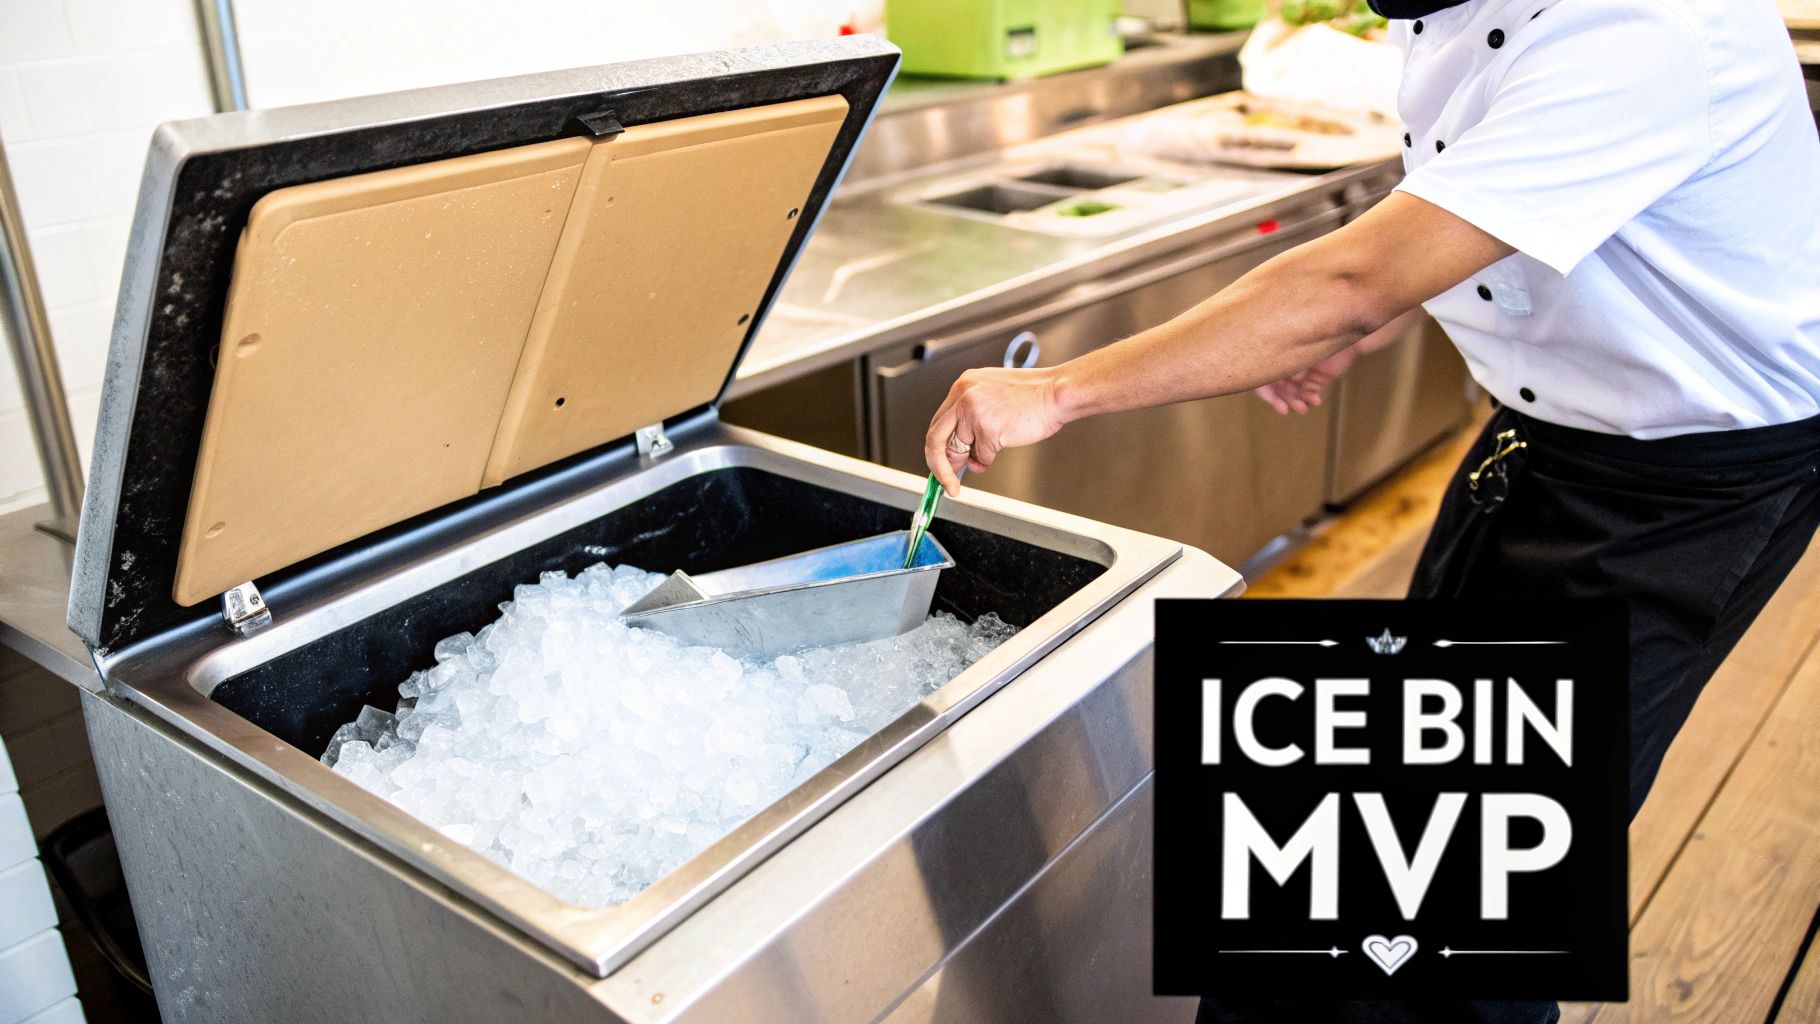
Think of your ice bin as the silent partner to your ice machine. While the machine produces ice, the bin expertly manages your inventory. It's the essential buffer you need to power through a slammed dinner service without running out of ice—a potential disaster that can bring your bar to a grinding halt or compromise food on the cold line.
A well-chosen bin is a cornerstone of kitchen efficiency. When it's the right size and placed strategically, it reduces staff steps, minimizes physical strain, and accelerates the entire service flow. That direct impact on your operations makes it a true Most Valuable Player in any professional kitchen.
More Than Just a Box
Today’s ice bin is the modern-day descendant of a long line of food preservation technology. The concept dates back to the 19th-century ice trade, a massive industry where crews harvested ice from frozen lakes and packed it in enormous, insulated ice houses. Remarkably, natural ice became the second most valuable US export after cotton by the late 1800s, highlighting how vital cold storage has always been to commerce.
Fast forward to today, and these bins are engineered for peak performance, safety, and durability, turning a historical necessity into a modern operational asset.
For restaurant owners and chefs, it’s key to see an ice bin as a strategic investment, not just another utility. The right unit protects your ice quality, supports your staff, and ultimately guards your bottom line by making sure service never misses a beat.
This mindset is crucial when designing your kitchen layout. Smart organization and storage are everything, and the ice bin is a major piece of that puzzle. For more on setting up your space for success, explore our guide on commercial kitchen storage solutions. Proper planning prevents bottlenecks and ensures every piece of equipment, including your ice bin, contributes to a flawlessly run kitchen.
Choosing the Right Type of Ice Storage Bin
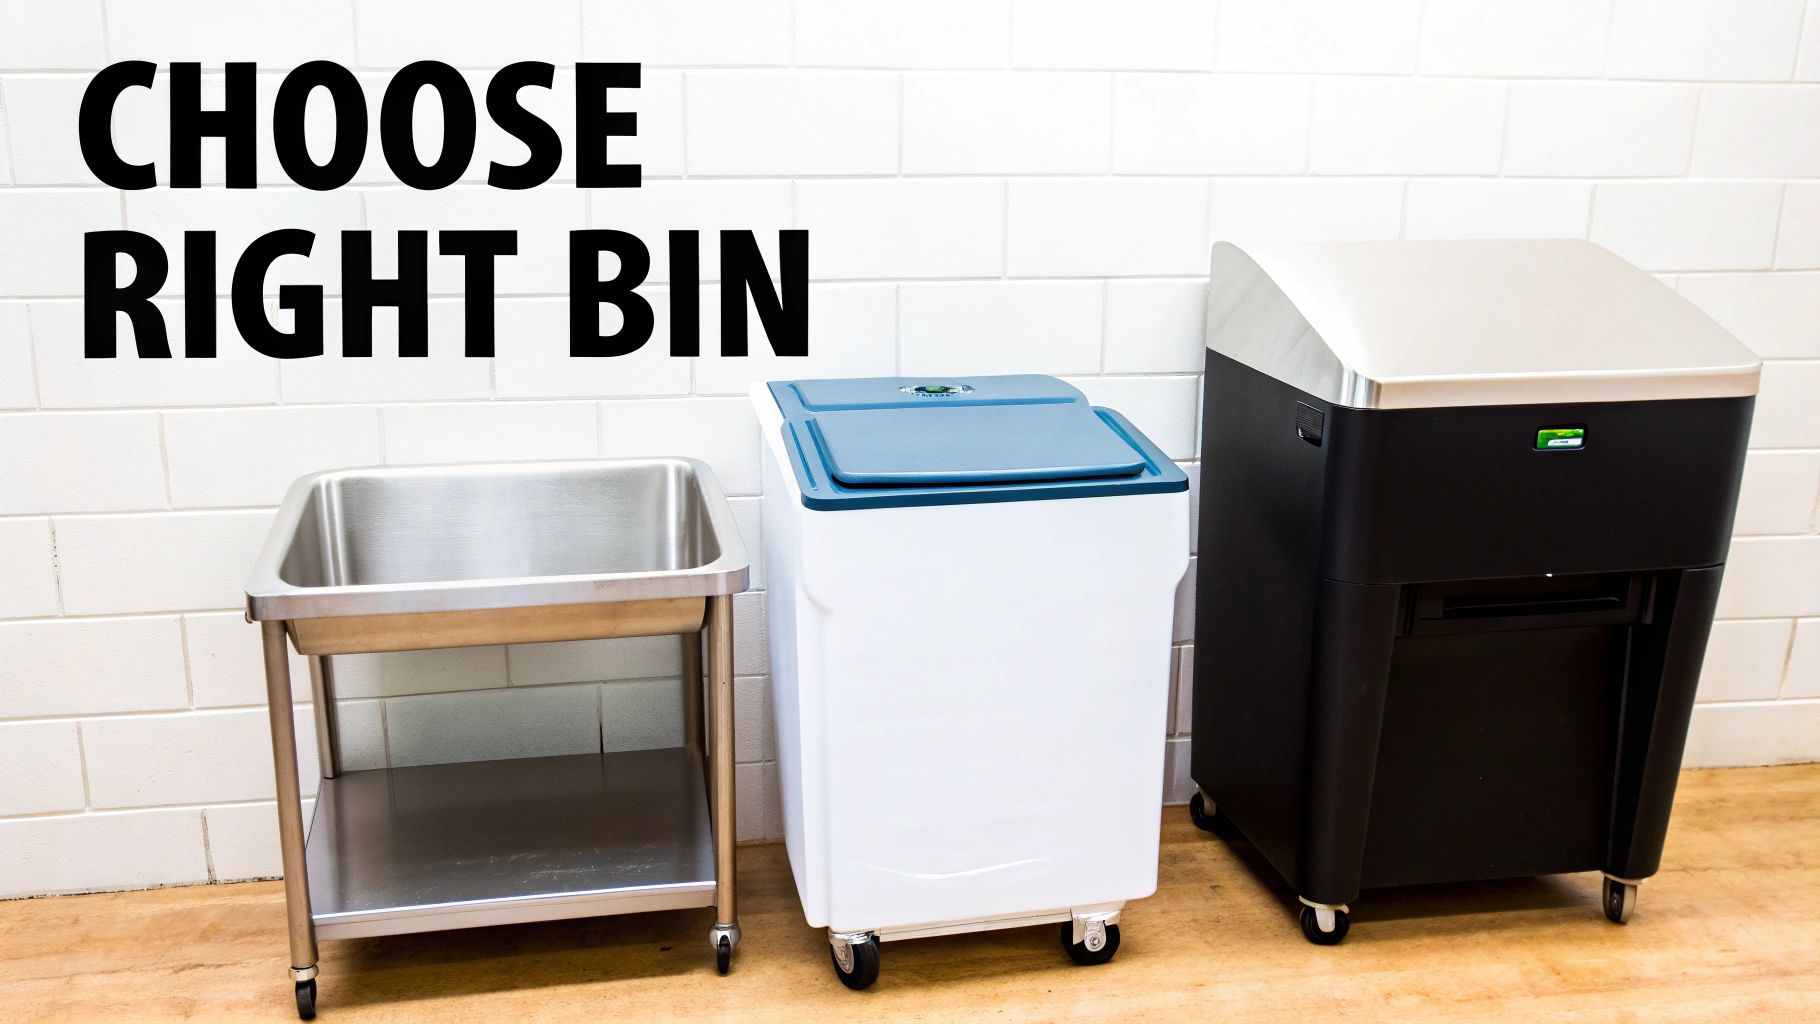
Selecting the perfect ice storage bin is like a chef choosing the right knife—the best choice always fits the job. You wouldn't use a delicate paring knife to butcher a whole hog, and you definitely wouldn't cram a massive freestanding bin behind a crowded bar. The key is to match the bin's design, materials, and capacity to your kitchen’s unique workflow, space, and ice demand.
This decision has a direct impact on how smoothly your service runs day in and day out. A well-placed bin saves your staff precious time and steps, but the wrong one can create a frustrating bottleneck right in the middle of a dinner rush. Let's break down the main types so you can make a smart, long-term investment.
Matching Bin Style to Your Kitchen Layout
The physical footprint of your operation is the first thing to consider. It will heavily influence which type of ice bin makes the most sense, as each style offers different advantages based on your space and service model.
-
Freestanding Bins: These are the heavy lifters of the ice world. They’re designed to sit under large, modular ice machine heads and hold a massive amount of ice. Think of them as the bulk storage solution for busy restaurant kitchens, hotels, or cafeterias that need hundreds of pounds of ice ready to go at a moment's notice. Their biggest selling point is sheer volume.
-
Undercounter Bins: Perfect for squeezing into tight spots, these compact units slide right under a standard-height counter. They are the go-to for bars, cafes, and server stations where staff need fast, convenient access to ice without trekking across the kitchen. Their capacity is smaller, but their real value is in optimizing workflow.
-
Ice Machine and Bin Combos: These are all-in-one units that package the ice maker and storage bin into a single piece of equipment. They’re a simple, plug-and-play solution that’s often perfect for smaller businesses or operations with moderate ice needs. They completely remove the guesswork of matching separate components.
When you're mapping things out, remember that a bin's location is just as important as its size. A small undercounter bin at a server station can dramatically speed up drink service, even if you have a giant freestanding unit in the main kitchen for refills.
Decoding Materials: Stainless Steel vs. Polyethylene
Beyond the style, the material your ice bin is made of plays a huge role in its durability, maintenance needs, and overall lifespan. The two most common options you'll see in commercial kitchens are stainless steel and polyethylene, and each comes with its own set of trade-offs.
A bin's construction affects everything from how well it holds the cold to how easy it is to scrub down. Choosing the right material from the start ensures your equipment can take the daily beating of a high-volume food service environment.
The material you choose for your ice bin is a classic balancing act between upfront cost and long-term durability. Here’s a quick look at the pros and cons of the two most common options.
Ice Storage Bin Material Comparison
| Material | Pros | Cons | Best For |
|---|---|---|---|
| Stainless Steel | Extremely durable and long-lasting; Resists corrosion and rust; Easy to clean and sanitize; Professional appearance. | Higher upfront cost; Can show dents if heavily abused. | High-volume restaurants, hotels, and any operation prioritizing longevity and food safety. |
| Polyethylene (Plastic Lined) | More affordable than stainless steel; Resists dents and scratches from scoops; Lightweight and easy to move; Good insulation properties. | May not last as long as stainless steel; Can be stained or damaged by harsh chemicals over time. | Bars, cafes, and budget-conscious businesses that still need durable, food-safe storage. |
Ultimately, stainless steel is the premium, long-haul investment. It’s tough, looks great, and is a breeze to keep clean, which is a massive win for food safety. But if you’re trying to manage your equipment budget, a high-quality polyethylene-lined bin offers a fantastic balance of performance and affordability. It's a workhorse that can handle the demands of most operations without the premium price tag.
How to Figure Out How Much Ice You Really Need
Guesswork is a killer in the restaurant business. This is especially true when you're trying to size an ice storage bin. Go too small, and you'll have staff scrambling and customers waiting during a dinner rush. Go too big, and you're just wasting money on electricity and giving up valuable kitchen space.
Figuring out your real ice needs isn't rocket science, but it does mean you have to think beyond daily averages and plan for your absolute busiest moments. Getting the math right from the start means your bin acts as a reliable buffer, keeping service flowing smoothly even when every seat is full. Let's walk through the simple formulas the pros use.
Start With the Industry Rules of Thumb
Before you can pick a size, you need a baseline for how much ice an operation like yours typically burns through. These aren't set in stone, but they’re fantastic starting points that have held up in thousands of real-world kitchens and bars.
- Restaurants: A good estimate is 1.5 lbs of ice per customer. If you serve 200 guests on a packed Friday night, you’re looking at a minimum of 300 lbs of ice just for drinks.
- Bars & Nightclubs: The demand here is much higher. You should plan on 3 lbs of ice per seat. A 50-seat bar needs to have about 150 lbs of ice ready to go for drink service alone.
- Hotels: For lodging, the calculation is per room. The standard is 5 lbs of ice per room, so a 100-room hotel will need around 500 lbs of ice available for guest use each day.
Remember, these numbers are mostly for what goes into a glass. You’ll need to tack on extra for things like stocking a salad bar, filling a seafood display, or blending frozen cocktails.
Stated Capacity vs. Usable Ice
Here’s a rookie mistake that trips up a lot of people: assuming a 500 lb bin actually gives you 500 lbs of ice you can use. It doesn't. When an ice machine drops cubes into a bin, it creates a cone or a pyramid. You can't reach the ice at the very top or packed into the back corners.
The real-world, scoopable ice you can actually get to is often just 70-80% of the manufacturer's listed total capacity.
So, a bin that’s advertised with a 500 lb capacity will realistically give you about 350-400 lbs of ice that's easy to access. You absolutely have to factor this into your math. If you know you need 400 lbs of ice during your peak rush, you should be looking at bins with a stated capacity closer to 500 lbs to give yourself that safety net. You can dive deeper into how bin size and production work together in our guide to choosing a 500 lb ice maker.
Let's Do the Math: A Real-World Example
Let's pull this all together. Say you're opening a new restaurant that has a 100-seat dining area and a 20-seat bar.
-
Figure Out Restaurant Needs:
- 100 seats x 1.5 lbs/seat = 150 lbs
-
Figure Out Bar Needs:
- 20 seats x 3 lbs/seat = 60 lbs
-
Add a Buffer for Everything Else:
- Let's add a 25% cushion for water stations, the salad bar, and unexpected needs: (150 + 60) x 0.25 = 52.5 lbs
-
Find Your Total Peak Demand:
- 150 lbs (dining) + 60 lbs (bar) + 52.5 lbs (buffer) = 262.5 lbs
That 262.5 lbs is the magic number for usable ice. To find the right bin, you have to work backward using that 70-80% rule. To get 262.5 lbs of ice you can actually scoop, you'll need a bin with a stated capacity somewhere in the 330-375 lb range.
This kind of careful planning shows just how crucial efficient cooling solutions have become. In fact, the global market for ice storage bins is expected to grow at a compound annual growth rate of 7% through 2033, which proves how vital these workhorses are for any modern food service business. Picking the right bin isn't just about getting through the week; it's about investing in equipment that can handle your growth and keep your operation running without a hitch. You can explore more about this expanding market and its future trends to see where the industry is headed.
Matching Your Bin and Ice Machine for Peak Performance
Think of your ice machine head and storage bin as a team. For that team to win, they have to be perfectly in sync. Just plopping any machine on top of any bin is a surefire way to cause problems—think operational nightmares, damaged equipment, or even a voided warranty. It’s an expensive mistake.
Getting the pairing right from day one is about more than just making ice; it’s about creating an efficient, reliable system. The goal is a seamless flow from production to storage to scoop, especially when the dinner rush hits. This synergy is what prevents ice shortages and keeps service moving.
Aligning Production with Storage Capacity
Here's the golden rule: your bin’s storage capacity should always be larger than your ice machine's 24-hour production rate. The machine is the factory, and the bin is the warehouse. If your factory churns out more product than the warehouse can hold, you've got overflow, waste, and a big mess.
If the bin is too small, the ice machine's sensors will constantly tell it to shut off. This frequent on-and-off cycling means the machine never gets into a good production rhythm and can't perform at its peak. The result? You're out of ice right when you need it most, even though your machine should have been able to keep up.
A correctly sized bin lets the ice machine run its full, efficient cycles, building up a surplus during quiet hours. This gives you a deep reserve of ice, ready to handle those peak demand surges without a problem.
On the flip side, a bin that’s way too big for the machine creates its own set of issues. Ice that sits around for too long can start to melt and refreeze, forming a giant, unusable ice block. It can also absorb funky odors and flavors from the surrounding environment, which will end up in your customers' drinks.
Physical Footprint and Ice Type Compatibility
Beyond just how much ice it can hold, the physical dimensions have to match up. The machine head needs to sit squarely and securely on the bin with no gaps or overhang. A solid, stable fit is non-negotiable for safety—you don’t want a heavy, expensive piece of equipment shifting or falling.
You also need to consider the type of ice you're making, because different shapes take up space differently.
- Cubed or Nugget Ice: These larger ice forms create a lot of air pockets when they stack, so they take up more volume per pound.
- Flaked Ice: This soft, dense ice packs together tightly, almost like snow, so you can store more weight in a smaller space.
This is a big reason why different businesses need different setups. The ice demands of a busy hotel are worlds away from those of a neighborhood bar or a quick-service restaurant.

As the graphic shows, a one-size-fits-all approach just doesn't work. Each business has unique peaks and overall volume needs that dictate the right machine-and-bin combination.
Using Adapters for Mismatched Brands
Ideally, you'd buy your ice machine and bin from the same manufacturer. That’s the easiest way to guarantee a perfect match. But in the real world, budgets and deals don't always line up that neatly. You might find a great price on a bin from one brand and a machine head from another.
That's where adapter plates save the day. These are kits designed specifically to bridge the gap between incompatible units. They create a secure, stable platform, letting you safely mount a machine from one brand onto a bin from another. If you're mixing and matching, using the right adapter isn't just a good idea—it's essential.
Smart Installation Tips for Efficiency and Safety
Where you decide to put your ice storage bin is a bigger deal than most people realize. It's not just about finding a space where the unit fits. A smart installation is a strategic decision that affects everything from the bin's efficiency and lifespan to the safety of your staff. Get this right, and you're setting yourself up for success from day one.
Nailing the setup avoids a whole slew of future problems, like subpar ice or sky-high energy bills. Think of it as preparing the ground for your equipment to run at its absolute best, making your kitchen workflow smoother and protecting your investment.
Location Logistics and Utilities
First things first: you need a spot that can support the bin's basic needs. That means having the essentials sorted out before the delivery truck even shows up. A perfectly level surface is absolutely crucial. If the base is uneven, you'll run into drainage problems and put unnecessary stress on the unit's frame.
You also have to think about utilities. Your bin needs easy access to a floor drain to get rid of meltwater. Without it, you’ll get pooling water, which is a serious slip hazard. If you're dealing with tricky water lines or drainage setups, knowing when to hire a professional plumber is key to a safe, code-compliant installation.
Don't forget about airflow. The bin and the ice machine it’s connected to need room to breathe—usually about a foot of clearance on all sides is a good rule of thumb. Without that space, heat gets trapped, making the equipment work overtime and guzzle electricity.
Strategic Placement for Maximum Efficiency
Once you've got the basics covered, it's time to think strategically. One of the costliest mistakes I see is people installing ice storage bins right next to heat sources like ovens, fryers, or even a busy commercial dishwasher. The ambient heat from these appliances will wage a constant war against your bin’s insulation, causing ice to melt faster and driving up your energy costs.
This is also where you can get smart with energy management. Did you know that one metric ton of ice can store about 93 kilowatt-hours (kWh) of cooling energy? By putting your bin in a cool, well-ventilated spot, you help preserve that stored energy. This allows you to shift your cooling load to off-peak hours, cutting down on what you spend on expensive daytime power. For a deeper dive, you can learn more about how ice storage contributes to a sustainable energy grid.
Proper placement isn't just about protecting the ice; it's about protecting your staff. Positioning the bin ergonomically—at a height and location that minimizes bending and reaching—reduces physical strain and helps prevent workplace injuries. A thoughtfully placed bin creates a safer and more efficient kitchen.
A Practical Guide to Ice Bin Cleaning and Maintenance

It’s easy to look at an ice bin and just see, well, ice. But in the eyes of a health inspector, that bin is a food contact surface, every bit as important as your cutting boards and prep counters. Forgetting to clean it isn't just a small oversight—it's a fast track to health code violations and a serious risk to your customers' safety. A consistent cleaning routine isn't just a good idea; it's non-negotiable.
This guide will walk you through a straightforward, no-nonsense approach to keeping your ice bin in top shape. By setting up a simple schedule for daily, weekly, and monthly tasks, you'll not only stay compliant but also get more life out of your equipment. More importantly, you’ll guarantee that every scoop of ice you serve is as clean and safe as it gets.
Building a Realistic Cleaning Schedule
Consistency is everything. A random, "when we get to it" approach is exactly how biofilm, slime, and mold get a foothold. A structured cleaning schedule, on the other hand, is your best defense, keeping your bin in prime condition with surprisingly little effort.
Think of it like daily prep in the kitchen. You do a little work each day so you don't face a monster task on Saturday night. The same logic applies here. Breaking down the maintenance into manageable daily, weekly, and monthly jobs makes the whole process painless and effective.
Here’s a sample schedule you can adapt to get started. It outlines the what, when, and why of keeping your ice storage bin sanitary and running smoothly.
Ice Bin Maintenance and Cleaning Schedule
| Frequency | Task | Purpose |
|---|---|---|
| Daily | Wipe down the bin exterior and scoop handle. Check for spills. | Prevents cross-contamination and maintains a professional appearance. |
| Weekly | Empty the bin completely and inspect the interior for any signs of slime or mold. | Early detection of biological growth before it becomes a major health hazard. |
| Monthly | Perform a full deep clean and sanitization of the bin's interior. | Removes mineral scale and eliminates any unseen bacteria or biofilm. |
This simple rhythm helps you stay ahead of any potential problems, ensuring your ice supply is always pristine.
The Step-by-Step Deep Cleaning Process
That monthly deep clean is where the real magic happens. It’s your chance to tackle the gunk and buildup that a quick daily wipe-down just can't handle. This process gets rid of both mineral deposits (scale) and nasty biological contaminants like slime and mold.
First things first: always turn off and unplug the ice machine head unit. The last thing you want is for it to start dropping a new batch of ice mid-clean. You’ll need to empty the bin completely, so it's best to schedule this during a slow period to avoid disrupting service.
- Wash the Interior: Grab a bucket of warm water and a mild detergent. Scrub every interior surface—the door, the gaskets, and especially the corners. A soft-bristled brush is your best friend here, as it can get into tight spots without scratching the polyethylene or stainless steel.
- Rinse Thoroughly: Once everything is scrubbed down, rinse the entire interior with clean water. And then rinse it again. You need to get every last bit of soap residue out, otherwise, it can leave a funky taste in your ice.
- Sanitize All Surfaces: This is the most important step for safety. Use a food-safe sanitizer and carefully follow the manufacturer’s directions for the right concentration and contact time. This is what kills the harmful bacteria that can make people sick.
- Air Dry Completely: Prop the bin door open and let it air dry. Don't be tempted to wipe it down with a towel—that can just reintroduce contaminants you worked so hard to remove. Once it's bone dry, you're clear to restart the ice machine.
To ensure you're using the right products, our guide on ice machine cleaners and sanitizers offers expert advice on selecting solutions that are both effective and safe for your equipment.
Troubleshooting Common Maintenance Issues
Even with the best cleaning routine, things can still go sideways. Knowing how to spot and fix these common problems can save you a lot of grief and the cost of a service call.
- Clogged Drain: See water pooling at the bottom of the bin? That’s a classic sign of a clogged drain line, usually blocked with slime or other gunk. Disconnect the line and flush it out with a cleaning solution to clear it.
- Worn or Damaged Gaskets: The gaskets around the door are crucial for an airtight seal. If they’re cracked, torn, or brittle, cold air escapes and your ice will melt much faster. Give them a quick inspection regularly and replace them if they look worn out.
- Persistent Odors: If you open the bin and get a whiff of something funky, that means something is growing in there, even if you can't see it. That's your cue to drop everything and do an immediate, thorough deep clean and sanitization.
Remember, a clean bin is only half the battle. The ice maker itself needs care, too. It's a good idea to learn how to clean your ice maker to ensure the entire system is spotless. A clean machine feeding a clean bin is the only formula for a truly sanitary ice supply.
Got Questions About Ice Bins? We've Got Answers.
Even when you've done all your homework, questions are bound to come up. After all, your ice bin is a piece of equipment you rely on every single day. Getting good answers can mean the difference between fixing a small annoyance and dealing with a major shutdown.
We've heard just about every question in the book from restaurant owners and chefs. Here are a few of the most common ones we get, along with some practical advice from years of experience.
"Why is water pooling at the bottom of my ice bin?"
Seeing a puddle of water in your bin is a classic sign of a drainage issue. Nine times out of ten, the culprit is a clogged drain line. Over time, slime and other gunk can build up and block the path for meltwater to escape.
Another thing to check is if the bin is level. If it was installed on a slant, even a slight one, water will naturally collect in the low spots instead of making its way to the drain where it belongs.
"How often do I really need to empty and clean the whole bin?"
The official answer for safety and health codes is a full, deep clean and sanitization at least once per month. But let's be realistic—if you're a high-volume spot or you're located somewhere warm and humid, you might need to do it more often.
Pro Tip: Do a quick visual check once a week. It lets you spot the early signs of slime or mold. Catching it early means a quick wipe-down, not a massive deep-scrubbing project that kills your Saturday afternoon.
Think of it as preventative maintenance. A regular cleaning schedule keeps your ice safe and actually helps your equipment last longer.
"Can I just use a glass to scoop ice?"
Absolutely not. Please, never do this. You have to use a dedicated, food-safe ice scoop, ideally one made from tough plastic or stainless steel. Using a glass is one of the most dangerous mistakes you can make in a kitchen.
If that glass chips, you'll have tiny, invisible shards of glass in your ice. That’s a massive safety hazard and a lawsuit waiting to happen. Keep the scoop clean and store it outside the bin in a proper holder to avoid cross-contamination.
At Encore Seattle Restaurant Equipment, we know that having the right tool for the job is what makes a kitchen run smoothly. We help restaurant owners and chefs discover the latest trends and exclusive deals on essential equipment and supplies. Whether you're choosing the perfect ice storage bin or planning a full build-out, our team is here to share our expertise and help you find the best value. Check out our huge selection of new and used restaurant supplies and see why the Pacific Northwest's food scene has trusted us for over 30 years. Visit us at https://encoreseattle.com to get started.