

How to Organize a Chest Freezer for Restaurant Success
A well-organized chest freezer isn't just tidy—it's a critical tool for any commercial kitchen. It's the difference between chaos and control. The secret lies in a system: zoning by food type, using stackable bins, maintaining a clear labeling system, and implementing a First-In, First-Out (FIFO) inventory process. This is how you turn that cold, cluttered pit into a streamlined, money-making asset.
Unlock Profit and Efficiency in Your Commercial Kitchen
A chaotic chest freezer is more than just a headache; it’s a silent killer of your restaurant's profits. This guide cuts through the generic tips to give you a battle-tested system for taming the beast. We’ll show you how smart organization directly hits your bottom line by slashing food waste, accelerating service during the dinner rush, and keeping you on the right side of health inspectors.
Think of this as your playbook for transforming a black hole of forgotten food into a high-performance part of your kitchen. It’s not about making things look pretty. It’s about building a robust foundation for a smoother, more profitable operation, all built on a few core pillars:
- Strategic Zoning: No more digging. Create dedicated zones for specific food categories so your team can find what they need in seconds.
- Smart Inventory Management: Use FIFO and crystal-clear labeling to stop spoilage in its tracks.
- Consistent Maintenance: Set up simple routines that keep your freezer running like a top and your food safe.
The Business Case for Freezer Organization
In any restaurant, food truck, or catering business, every minute and every ingredient is money. A disorganized freezer costs you both. When a line cook has to excavate a container of prepped mirepoix from beneath a mountain of frozen goods, service grinds to a halt. When that case of prime steaks you forgot about surfaces with a thick coat of freezer burn, your food cost percentage creeps up.
These aren't just minor annoyances. They are small, constant leaks in your revenue that add up fast. A well-organized freezer is a direct investment in your kitchen’s efficiency and your profit margins. You'll see real, tangible benefits in better cost control and a less stressful kitchen for your entire team.
By mastering how to organize a chest freezer, you’re not just cleaning up; you’re building a system that protects your inventory, empowers your staff, and strengthens your bottom line.
Why Chest Freezers Dominate Commercial Kitchens
There's a good reason why these workhorses are a staple in professional kitchens. Chest freezers command a massive 49.8% revenue share of the global freezer market in 2024, and it all comes down to energy efficiency. They can use up to 15% less power than upright models for bulk storage, a huge win for anyone watching their utility bills.
The most popular models, holding 100-200L, have captured 27.4% of the market share because they hit that sweet spot for urban kitchens needing to balance stock levels with a limited footprint. But this efficiency also presents the main challenge: that deep, cavernous space can become a mess in a hurry without a solid plan.
Getting your freezer in order is just one piece of the puzzle. Our guide on reducing food waste in restaurants provides a bigger picture. For a deeper dive into equipment performance, it's always smart to keep up with expert insights on commercial refrigeration.
Map Out Your Freezer Space Before You Load It
Before a single box goes back into that freezer, stop. I know the temptation is to just get everything back in there quickly, but rushing at this stage is a one-way ticket back to the disorganized mess you just fixed. What you need is a plan—a simple map of how your freezer is going to work for your kitchen. This is the step that makes all the difference between a quick tidy-up and a system that actually lasts.
Your game plan starts with a completely empty, clean slate. That means a full defrost and a thorough sanitizing. Don't skip this. Thick frost build-up is like insulation in reverse; it makes your compressor work harder and secretly drives up your energy bill. More importantly, a sanitized interior is a critical food safety checkpoint.
A deep clean isn't just for looks. It's a hard reset for your freezer's efficiency and a non-negotiable step for keeping your food safe. Building your system in a dirty freezer is like building a house on a shaky foundation.
Once the unit is sparkling and ready to go, the real work begins. With the freezer empty, you can finally see the full space you have to play with.
Zone Your Freezer for a Faster Workflow
The secret to a truly organized freezer is zoning. It’s a simple concept: you divide the interior into dedicated areas for specific types of food. The goal is to create a system so intuitive that any member of your staff can find what they need in seconds. Less time with the lid open means a more stable temperature and better-quality food.
Think about how you set up your walk-in. You’d never stack raw chicken on top of finished desserts, right? The same logic applies here. Grouping items properly not only makes service faster but also significantly cuts down the risk of cross-contamination.
The zones you create should reflect your menu and how your kitchen operates. Here are a few common-sense categories to get you started:
- Raw Proteins: Always give beef, poultry, and fish their own dedicated section, preferably at the very bottom. This way, any accidental drips can't contaminate anything else.
- Prepped Veggies & Fruit: This is for your portioned mirepoix, blanched greens, or house-made fruit purees.
- Stocks, Sauces & Soups: Keeping all your liquid gold together makes grabbing the base for a special a breeze.
- Baked Goods: Par-baked bread, pastry dough, and frozen desserts should live in the same neighborhood.
- Event-Specific Items: If you’re in catering, having a zone just for this weekend’s wedding prep is an absolute lifesaver.
Create a Visual Map for Your Team
Once you know your categories, it's time to assign them a home. A good rule of thumb is to put the items you grab most often in the top baskets or on the most accessible shelf. The bulk items you use less frequently can go on the bottom. A coffee shop, for instance, would keep daily-use scone dough in a top basket, while the 20-pound bags of reserve espresso beans are stored deep down.
Take five minutes to draw a simple diagram of your freezer and label the zones. You can tape this map right onto the freezer lid or a nearby wall. This visual guide is gold for training new hires and keeping everyone on the same page. As you're mapping things out, it's also a good time to look into different storage container organization ideas to see how you can make the most of every square inch. This blueprint is what will make your new system stick.
Getting the Right Gear for a Flawless System
Mapping out your freezer is the strategic half of the battle; bringing that plan to life requires the right gear. A truly functional system depends on picking storage solutions and inventory tools that actually work for your kitchen's unique flow. This is where you connect your blueprint to daily operations, making sure your team can work quickly, safely, and efficiently.
The right containers are about so much more than just being tidy. They're essential for maximizing every square inch of space, preventing cross-contamination, and shaving seconds off retrieval times during a hectic service. Making a smart choice here pays off every single day.
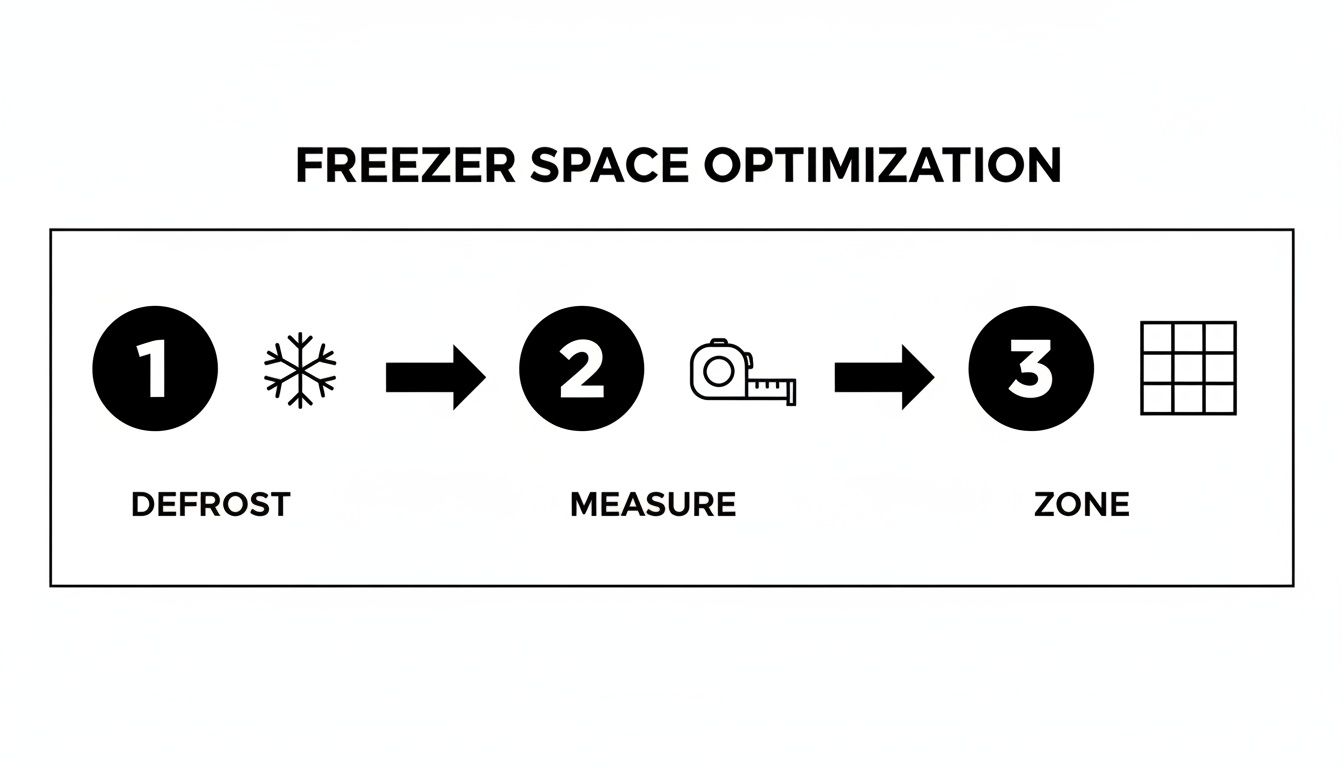
This simple flowchart—Defrost, Measure, and Zone—is the foundation you need to lay before you even think about buying bins. Doing this prep work first guarantees you choose a system that perfectly fits both the physical space and the organizational map you've created.
Choosing the Best Bins and Containers
The "best" container is simply the one that fits your product and your freezer. Before you spend a dime, measure your freezer's interior dimensions—length, width, and depth. This one small step prevents the frustrating and costly mistake of buying bins that don't stack right or leave awkward, unusable gaps.
-
Clear Plastic Bins: These are fantastic for at-a-glance visibility. A line cook can quickly spot the container of prepped mirepoix or portioned chicken breasts without having to pull everything out. Just make sure you get sturdy, BPA-free plastic rated for freezer use to avoid cracks.
-
Solid, Color-Coded Bins: In high-volume kitchens, color-coding is a game-changer. Assigning colors to your zones (red for raw beef, blue for seafood, green for vegetables) lets staff grab what they need on instinct. It's an intuitive system that reinforces food safety and requires almost no training. Our guide on commercial kitchen storage solutions dives deeper into optimizing your entire back-of-house.
The need for better freezer organization is growing fast. In the USA alone, chest freezer shipments are expected to hit a massive 12 million units in 2025, with commercial kitchens grabbing a 30% slice of that market. Modern multi-compartment designs, now found in 30% of models, help separate food types and can cut cross-contamination risks by up to 25%. To make the most of this, experts recommend vertically layering clear plastic bins that hold 20-30 lbs each, which can boost accessibility by 40% and seriously slash retrieval times during a rush.
Choosing the right bin is a critical decision that impacts workflow and food safety. Here's a quick breakdown of common options to help you decide what's best for your operation.
Freezer Bin Comparison for Commercial Kitchens
| Bin Type | Best For | Pros | Cons |
|---|---|---|---|
| Clear Plastic Bins | Quick-grab prep items, portioned ingredients, sauces. | Instant visibility, easy to clean, stackable. | Can become brittle over time, potential for cracking. |
| Solid, Color-Coded Bins | Raw proteins (HACCP), specific categories (bakery, veg). | Excellent for zoning, durable, reinforces food safety. | No visibility without pulling the bin out. |
| Milk Crates | Bulky, oddly-shaped items like bone-in proteins or large veg. | Extremely durable, great airflow, inexpensive. | Small items can fall through, harder to label neatly. |
| Wire Baskets | Pre-packaged goods, breads, items needing air circulation. | Lightweight, promotes even freezing, good visibility. | Not suitable for liquids or small, loose items. |
Ultimately, most kitchens benefit from a hybrid approach, using different bin types for different zones. Match the container to the inventory, not the other way around.
Implementing a Bulletproof Labeling System
An unlabeled container in a commercial freezer is waste waiting to happen. A solid labeling system is the engine that drives a successful First-In, First-Out (FIFO) process. Every single item that goes into that freezer needs a label with three critical pieces of information.
The rule is simple: if it's not labeled, it doesn't exist. An effective labeling system is your primary defense against food waste and your best tool for ensuring quality and safety.
Your labels have to be clear, consistent, and tough enough to handle freezing temperatures. Standard masking tape and a ballpoint pen won't cut it—they’ll fall off or smudge from condensation. You need to invest in proper freezer-safe labels and oil-based permanent markers.
Every label should clearly show:
- Item Name: Be specific. "Beef Demi-Glace," not just "Sauce."
- Pack Date: The day the item was prepped and frozen.
- Use-By Date: The deadline for using the product to maintain its quality.
This consistency is non-negotiable. It takes all the guesswork out of it for your staff, making sure they always grab the oldest stock first, which directly protects your food costs.
Modernizing Your Inventory Tracking
While physical labels are the on-the-ground essential, you can back up your FIFO system with a broader inventory tracking method. The right choice here really depends on the size and pace of your operation.
For smaller setups like a food truck or café, a simple whiteboard mounted near the freezer works beautifully. Just create columns for Item, Quantity, and Pack Date. Staff can quickly update it when adding or removing items, giving everyone a real-time snapshot of what's inside.
For larger restaurants or catering businesses, it might be time to go digital. Simple spreadsheet templates or dedicated inventory management apps offer much more detailed tracking. Some systems even let you generate scannable QR codes for your labels, linking each physical container to a digital record. This gives you powerful data on product turnover and helps you fine-tune your purchasing cycles for peak efficiency.
Get a Handle on Your Freezer Inventory and Capacity
Perfectly stacked bins and flawless zones don't mean much if your freezer is packed with the wrong products. A truly organized freezer is only effective when it holds the right amount of the right inventory. This is where we shift from just physical arrangement to the strategic side of things: serious inventory control and capacity planning.
Without a firm grip on what you actually have, you're flying blind. This leads to costly mistakes, like reordering ingredients you already have buried at the bottom or, even worse, running out of a key item mid-service. Mastering your inventory is how you turn a simple storage unit into a tool for controlling food costs and slashing waste.
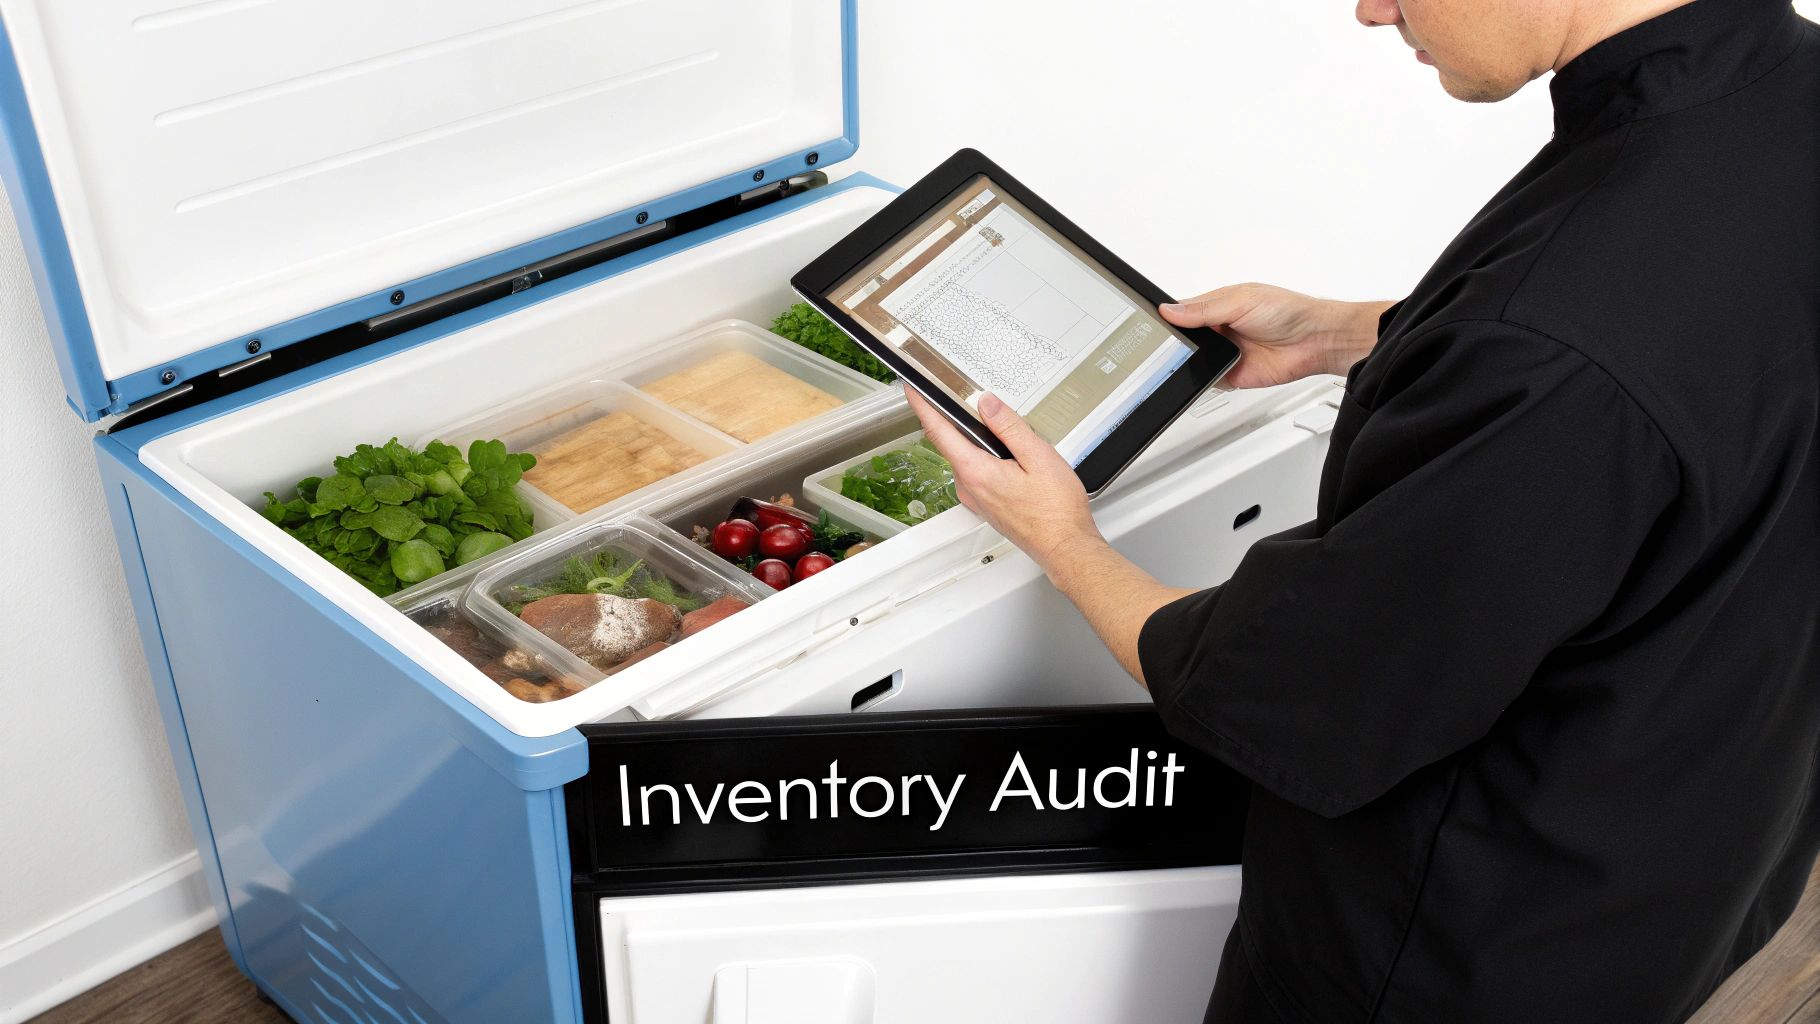
Conduct a Ruthless Inventory Audit
The first real step is a full-scale inventory audit. And I don't just mean counting boxes. This is a purge designed to reclaim precious freezer real estate. Pull every single thing out and create three distinct piles: Keep, Use Immediately, and Toss.
This process forces you to confront the financial impact of poor organization. That forgotten case of specialty sausage from a seasonal menu isn't an asset anymore; it's just taking up space that could hold a high-turnover product that actually makes you money.
- Keep: These are your core, high-demand items that are well within their use-by dates and are essential to your current menu. No-brainers.
- Use Immediately: This pile is for anything approaching its use-by date. Get creative and turn these into staff meals or daily specials to recover the cost.
- Toss: You have to be ruthless here. Anything with significant freezer burn, signs of spoilage, or that's long past its expiration date has to go. It’s a sunk cost.
An inventory audit is your opportunity for a hard reset. Every item you discard is a lesson in purchasing and organization that directly informs a more profitable future.
Once the purge is complete, you're left with only valuable, usable inventory. This clean slate lets you accurately assess what you really need and helps prevent the same expensive mistakes from happening all over again. This level of control is a fundamental part of effective cold chain management in any professional kitchen.
Calculate and Respect Your Freezer's True Capacity
Knowing how to organize a chest freezer is also about understanding its limits. Overstuffing a freezer is one of the most common—and costly—errors I see in commercial kitchens. It blocks airflow, forces the compressor to work overtime, and creates warm spots that compromise food safety and quality.
A simple, effective guideline is the 80% Rule. Never fill your freezer more than 80% full. That space isn't wasted; it’s essential for air to circulate efficiently, ensuring everything stays frozen solid and your energy bills stay in check.
To figure out your usable capacity, find your freezer's total volume in cubic feet (it's usually listed on the unit). If you have a 20-cubic-foot freezer, your maximum usable capacity is 16 cubic feet (20 x 0.80). Treat this number as your operational ceiling.
Understanding this number directly influences your purchasing. For a pizzeria heading into a busy weekend, it means knowing you can fit exactly three cases of bulk cheese and two cases of dough, but that a fourth case of cheese just won't work. This prevents the unmanageable overflow that leads straight back to disorganization and potential waste. Aligning your purchasing cycles with your freezer's true capacity is a cornerstone of smart kitchen management.
The market reflects this need for strategic capacity. Large-capacity chest freezers over 400 liters are surging in popularity, now representing 25% of new commercial units in a market projected to hit $33.45 billion by 2029. For food truck operators and café owners, this trend highlights the importance of efficiency; data shows that proper bin systems can boost inventory turnover by 28%. But a common pitfall is undersizing—a staggering 30% of buyers choose a freezer that's too small, leading to an 18% energy waste from overpacking. You can dive deeper by reviewing the latest market research on chest freezers.
Keeping It Organized for the Long Haul
Let's be real. A perfectly zoned and labeled freezer is a thing of beauty, but the real test is what it looks like after a brutal dinner rush on a Saturday night. Keeping that freezer organized isn’t a one-and-done project; it’s a discipline you build into your kitchen's DNA.
The good news? It doesn't require a massive overhaul of your workflow. It's all about weaving small, consistent habits into your team's daily rhythm. With a few smart checklists and clear ownership, you can make sure your system actually sticks.
Simple Checklists Are Your Best Friend
The secret to making maintenance stick is to make it almost effortless. Forget complicated procedures. A few simple checklists posted right on or near the freezer can break down a dreaded chore into tiny, manageable tasks for daily, weekly, and monthly routines.
This isn’t just about nagging; it's about creating muscle memory. These lists act as constant, quiet reminders that keep everyone on the same page and stop small messes—like a leaky container of stock—from becoming a frozen, sticky disaster.
-
Daily Tasks (End of Shift): This is the five-minute scan that saves you hours later.
- Label Check: A quick once-over on any new items that went in. Is everything properly dated and named?
- Spill Patrol: Wipe up any drips or condensation right away. It takes ten seconds now, or ten minutes with a scraper later.
- Lid Seal Confirmation: Just a quick push to make sure the lid is shut tight. This simple check prevents temperature drops and saves a surprising amount on your energy bill.
-
Weekly Tasks (Do this on a Tuesday morning, not Friday night): A little proactive upkeep goes a long way.
- Quick FIFO Rotation: You don't have to empty the whole thing. Just pull out the top bins in each zone and make sure the older stuff is sitting on top, ready to be grabbed first.
- Combine and Conquer: Got two half-full containers of bolognese? Combine them into one. It's amazing how much space this frees up.
- Whiteboard Update: Take 60 seconds to cross-reference what's in the freezer with your inventory list. It keeps your counts honest.
These little routines are what separate a freezer that works for you from one that works against you.
Schedule Your Defrost—Don’t Wait for a Crisis
Even the most well-maintained manual defrost freezer will eventually build up ice. That frost isn't just annoying; it’s an energy thief. It acts like insulation, forcing your compressor to work overtime and slowly inflating your utility costs. Worse, it can mess with air circulation, creating warm spots that jeopardize food safety.
Think of defrosting as preventative maintenance, not an emergency repair. Scheduling it every six months or so protects your equipment, your product, and your profit margin.
A solid rule of thumb is to schedule a full defrost when the ice hits about a quarter-inch thick, or at the very least, once every six to twelve months. Pick your slowest day of the week to minimize the headache. The upside is that emptying the freezer is the absolute best time to do a full inventory audit and give the inside a proper, sanitizing scrub-down.
Here's a sample schedule you can tweak for your own kitchen to turn these tasks into no-brainers.
Sample Freezer Maintenance Schedule
A simple chart like this, posted where everyone can see it, makes it clear who's responsible for what and when.
| Frequency | Task | Purpose | Assigned To |
|---|---|---|---|
| Daily | Label & Spill Check | Ensures FIFO compliance and prevents mess buildup. | Closing Chef/Cook |
| Weekly | Stock Rotation & Consolidation | Maximizes space and reduces food waste. | Prep Team Lead |
| Monthly | Bin Wipe-Down & Audit | Keeps containers clean and inventory counts accurate. | Kitchen Manager |
| 6-12 Months | Full Defrost & Deep Clean | Maintains energy efficiency and food safety standards. | Head Chef |
This isn't just a to-do list; it's a system for accountability that keeps your freezer running smoothly year-round.
Make It Stick with Training and Visual Cues
A system is only as good as the people running it. To get real buy-in, you need to show your team how this new setup makes their lives easier. During your next pre-shift meeting, walk everyone through the new layout. Explain the "why"—how it means less time hunting for ingredients and less product getting lost and wasted.
Then, back up that training with dead-simple visual aids.
- Post the Map: Laminate your freezer zone map and tape it right onto the lid or a nearby wall. This is a game-changer for new hires and makes it easy for anyone to find things and, more importantly, put them back where they belong.
- Appoint a "Freezer Captain": Give one person—maybe your lead prep cook or a sous chef—ownership of the freezer. Their job is to keep an eye on things, lead the weekly checks, and gently nudge anyone who isn't following the system. Having one point person makes a world of difference.
When you make organization a shared responsibility with clear, simple expectations, the culture starts to shift. It stops being one person's job to clean up a mess and becomes everyone's job to prevent one in the first place. That’s how you build a system that lasts.
Common Chest Freezer Questions, Answered
Even with a rock-solid system, questions always come up in the heat of service. I've been in and around kitchens for years, and the same handful of freezer problems pop up again and again. Think of this as your go-to cheat sheet for troubleshooting the most common snags.
How Often Do I Really Need to Defrost This Thing?
For most restaurants and commercial kitchens, you should plan on a full defrost every 6 to 12 months. The real tell-tale sign, though, is when the frost inside gets to be about a quarter-inch thick.
Once it hits that point, the frost acts like a thick winter coat, insulating the inside of your freezer. This makes the compressor work overtime just to keep things cold, which you'll definitely notice on your next energy bill. More importantly, that ice buildup kills the air circulation, creating warm spots that are a serious food safety risk. Do yourself a favor and schedule this job for a slow day to keep service running smoothly.
What's the Best Way to Label Food So It Actually Stays Labeled?
Forget about standard paper labels and a Sharpie. They won’t last a day in a commercial freezer. The condensation and cold will turn them into a soggy, illegible mess in no time.
You need to get the right tools for the job. Invest in a roll of proper freezer-safe labels—the adhesive is made to stick in the cold. Pair those with an oil-based permanent marker, which is what the pros use because it won't smudge or fade when it gets wet.
My best tip: Always, always stick the label on the container before you put it in the freezer. The adhesive grabs on much better at room temperature, meaning it won’t peel off once things get frosty. Make sure every single label has the item name, the date it was packed, and a clear use-by date. That's the only way your FIFO system will work.
Is It Okay to Use Cardboard Boxes to Keep Things Organized?
I get this question a lot, and the answer is a hard no. It might seem like a cheap and easy fix, but using cardboard boxes in a freezer is asking for trouble and creates major food safety headaches.
Cardboard is like a sponge for moisture. It gets damp, soggy, and weak, becoming a perfect breeding ground for bacteria. Eventually, it just falls apart, taking your whole organization system down with it. Even worse, those solid boxes block airflow, which means your freezer won't cool evenly.
-
Here’s what to use instead:
- Tough, food-safe plastic bins
- Stainless steel wire baskets (great for circulation!)
- Color-coded commercial-grade containers
These are all non-porous, a breeze to sanitize, and designed to let cold air move freely, which is exactly what you need for your freezer to run efficiently and safely.
What Are the Biggest Mistakes I Can Make with Freezer Organization?
I've seen the same three mistakes turn a perfectly good freezer into a chaotic money pit time and time again. If you can avoid these, you're already way ahead of the game.
- Having No Zones: This is the number one problem. It’s a free-for-all where cooks waste precious minutes digging for that one bag of shrimp during a busy dinner rush. When you don't have dedicated spots for proteins, vegetables, and prepped items, you're just killing your kitchen's efficiency.
- Sloppy FIFO and Labeling: A "First-In, First-Out" system only works if you're disciplined about it. Missing dates, hard-to-read handwriting, or vague descriptions like "Chicken" lead directly to spoiled product and wasted money. You might as well just be throwing cash in the trash.
- Buying a Freezer That's Too Small: So many owners try to save a buck by getting a smaller unit, but it always backfires. They underestimate how much they'll need, and the freezer gets dangerously over-stuffed. A crammed freezer can't circulate cold air, which wastes energy and makes it impossible to organize anything. As a rule of thumb, always plan for at least 20% extra capacity to give your inventory room to breathe and your business room to grow.
An organized kitchen is a profitable kitchen. If you're looking for premium new or used refrigeration units to build your system around, check out the massive inventory at Encore Seattle Restaurant Equipment. Stay informed on industry trends and discover exclusive deals on the gear that helps your restaurant thrive at https://encoreseattle.com.