

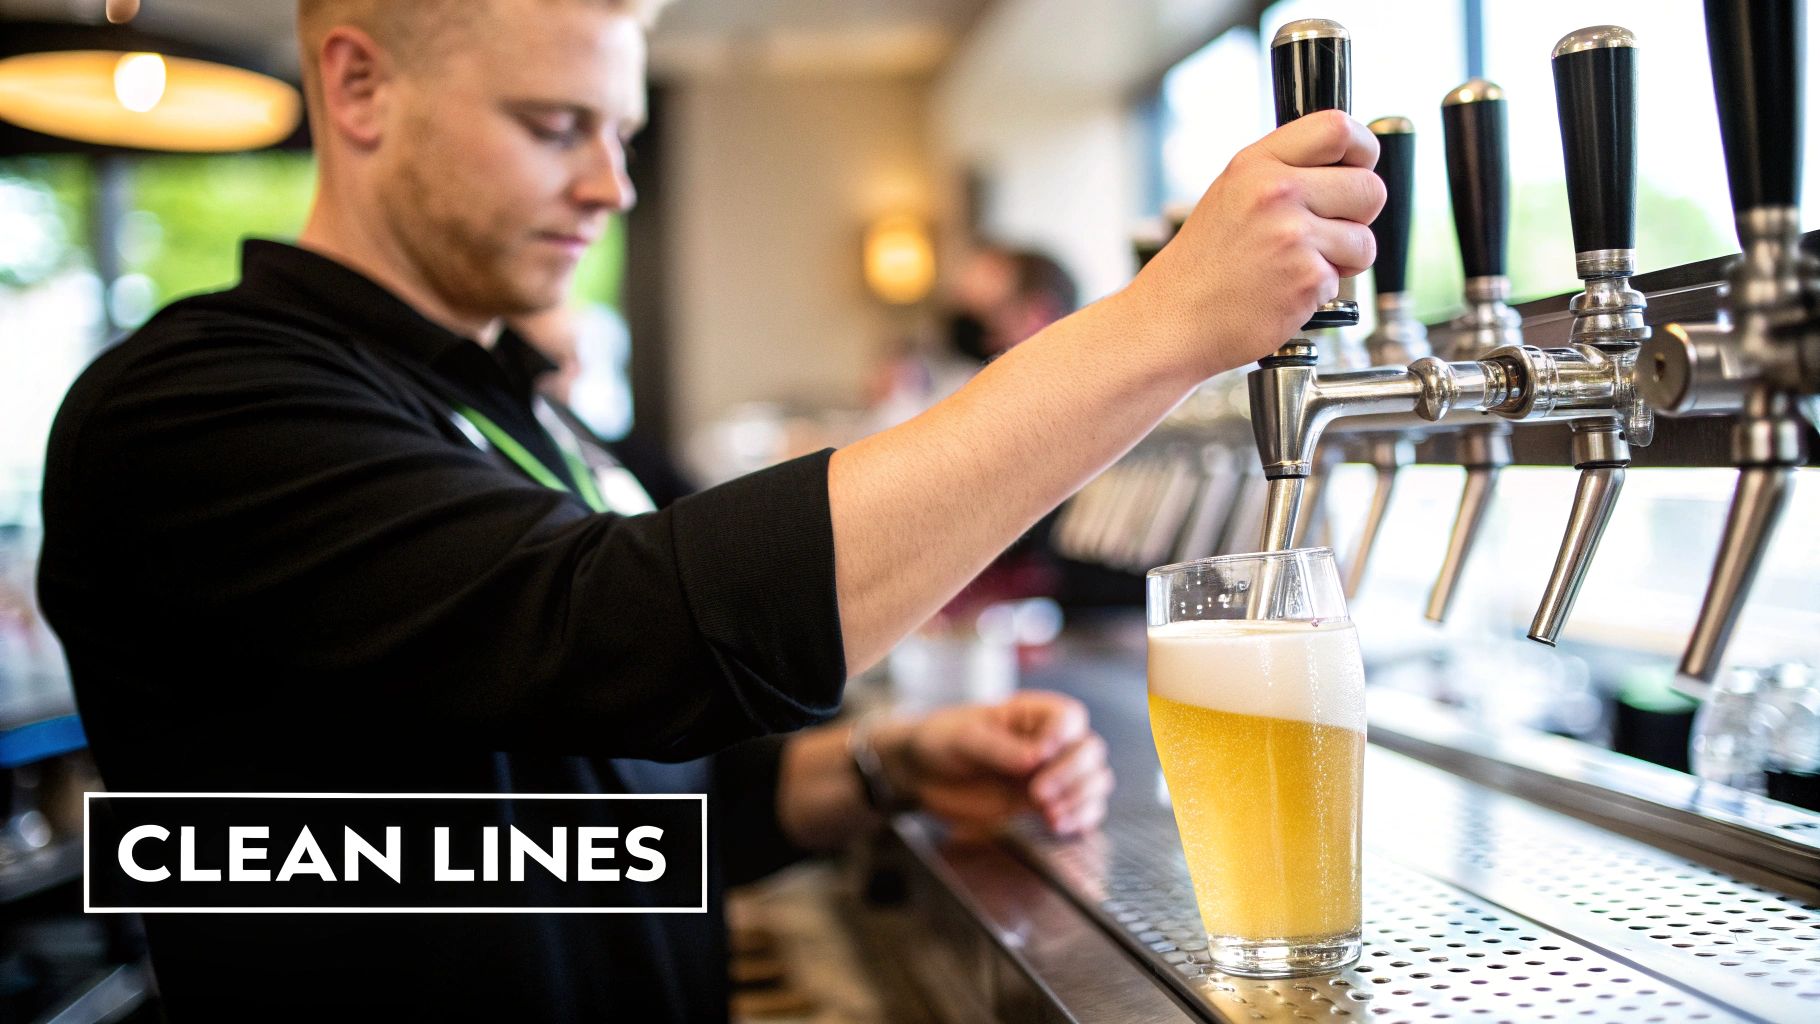
A Bar Owner's Guide to Draft Beer Line Cleaning
Serving a great pint of draft beer is about more than just hooking up a keg. It's a craft, and the secret lies in what your customers can't see: the cleanliness of your beer lines. Think of draft line cleaning as the most crucial, non-negotiable maintenance you'll perform. It's the process of flushing your lines with specific chemical solutions to obliterate the bacteria, yeast, mold, and mineral deposits that build up over time.
This isn't just busywork. That gunk, often called biofilm, can ruin a beer's flavor and aroma in just a few days, turning a crisp pilsner into a sour, buttery mess. Staying informed about industry best practices and having the right supplies is key for any restaurant owner or chef looking to serve the best possible product.
Why Clean Beer Lines Are Your Biggest Asset
Every single pint that goes across your bar is a direct reflection of your standards. It all starts with the hidden guts of your draft system. A strict draft beer line cleaning routine isn't just another item on a to-do list; it’s a cornerstone business practice that directly impacts your profit, customer loyalty, and reputation.
Trying to save a few bucks by skipping this maintenance is one of the costliest mistakes you can make. Those invisible enemies—biofilms, wild yeast, and bacteria—start multiplying the second the beer flows. They create off-flavors that can send a first-time visitor or even a loyal regular walking out the door for good.
Protecting Flavor and Profitability
Brewers pour their hearts and souls (and a lot of money) into getting their beer's flavor profile just right. Dirty lines can completely sabotage all that hard work, introducing nasty tastes often described as sour, buttery, or even papery. This doesn't just disappoint your customers; it damages your relationship with the breweries that trust you to pour their product as it was intended.
On top of that, consistent cleaning means every keg you tap translates directly into a high-quality, profitable product. When the beer tastes right, people order another. Simple as that. You quickly become known as the place for a great draft beer, a trend savvy restaurant owners are capitalizing on.
The number one factor affecting draft beer quality is poor hygiene. Neglecting your lines doesn't just serve a bad pint; it reflects poorly on your brand and can lead to a direct loss in sales.
The Standard for Excellence
The Brewers Association has set the gold standard: clean your draft beer lines every two weeks. This isn't an arbitrary number. It's the frequency proven to prevent the buildup of contaminants that spoil a beer's taste and can even pose a health risk. Sticking to this schedule is the single best way to pour consistently fresh, fantastic-tasting beer.
For any bar owner, seeing how operational choices affect the bottom line is everything. Keeping those lines spotless is a critical piece of the puzzle to improve overall restaurant operations, making things run smoother and cutting down on waste.
The impact of a solid cleaning routine is night and day. Let's break it down.
The True Cost of Neglecting Your Beer Lines
A quick look at the business impact of doing things the right way versus cutting corners.
| Area of Impact | With Regular Cleaning (Every 2 Weeks) | With Infrequent Cleaning |
|---|---|---|
| Beer Quality | Consistently fresh, crisp taste as the brewer intended. | Off-flavors (sour, buttery, acidic), foamy pours. |
| Customer Loyalty | Customers return for reliable, high-quality pints. | Customers leave with a bad impression and don't come back. |
| Profitability | Reduced foam and waste means more sellable beer per keg. | Increased product waste from fobbing; lost sales. |
| Brand Reputation | Known as a go-to spot for great draft beer. | Reputation for serving "bad" or "off" beer. |
| Health & Safety | Prevents harmful mold and bacteria growth. | Risk of health code violations and serving unsafe beer. |
As you can see, the "cost" of cleaning is really an investment that pays for itself many times over in happy customers and a healthy bottom line.
Beyond the Beer Lines
This dedication to cleanliness has to go beyond your draft system. It's a reflection of your establishment's overall hygiene, which is always under a microscope. Letting equipment maintenance slide can cause problems much bigger than a bad Yelp review.
To get a full picture of what health inspectors are looking for, you should grab our comprehensive restaurant health inspection checklist. Being proactive about sanitation everywhere in your business protects you, your staff, and your customers.
Assembling Your Professional Cleaning Toolkit
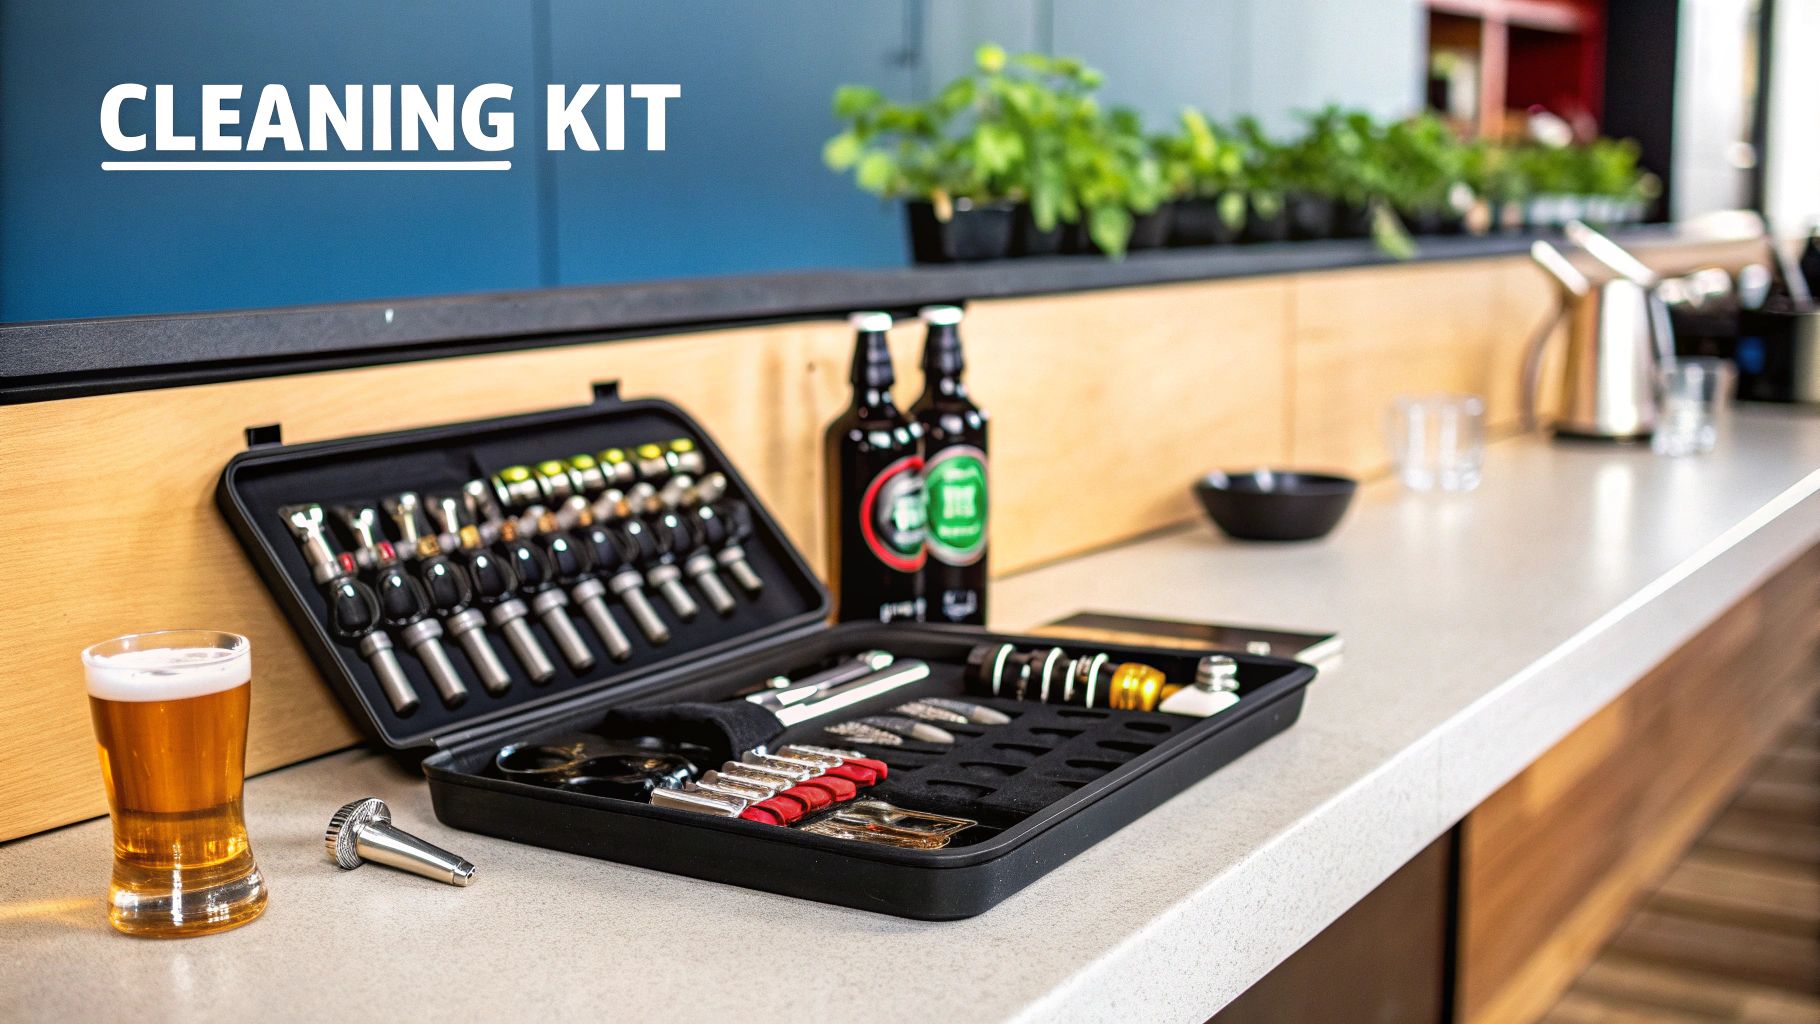
Walking into a cleaning job without the proper gear is like a chef trying to prep without their knives. You might get it done, but the result is going to be messy, inefficient, and frankly, a little dangerous. The first real step toward a solid draft beer line cleaning routine is building a dedicated, professional-grade kit with the right restaurant equipment and supplies.
Having a complete, well-organized toolkit means your team isn't scrambling for parts or trying to make do with the wrong tools. It transforms a dreaded chore into a streamlined process. This is about more than just a bucket and some chemicals; it's about having the right piece of equipment for every single part of your draft system.
The Foundation: Your Cleaning Canister
The heart of any good cleaning setup is the canister or pump you use to push the solution through the lines. This is what does the heavy lifting. You’ve basically got two choices, and the right one for you really depends on the size and complexity of your bar's setup.
A hand-pump cleaning canister is a straightforward, budget-friendly option that's perfect for smaller draft systems with just a few taps. It's portable, dead simple to use, and requires no electricity. The downside? It relies on you to build up the pressure, which can get tiring and deliver inconsistent flow, especially if you're trying to clean a larger, multi-tap system.
On the other hand, an electric recirculation pump is a serious upgrade. It delivers consistent pressure and flow, forcing the cleaning solution through every inch of your lines—even in long-draw systems. It’s more of an upfront investment, for sure, but these pumps can easily cut your cleaning time in half and provide a much more thorough clean. For a busy bar with a lot of taps, it's a no-brainer.
Choosing the Right Cleaning Chemicals
The chemicals you use are every bit as important as the hardware. Not all cleaning solutions are created equal. Using the wrong stuff can damage your lines, corrode your fittings, or—worst of all—leave a chemical residue that taints the beer. The goal is to obliterate all the organic gunk without harming the system itself.
Always stick with brewery-approved, non-corrosive chemical solutions designed specifically for draft lines.
- Caustic (Alkaline) Cleaner: This is your workhorse for the bi-weekly clean. It’s formulated to dissolve all the nasty organic stuff: proteins, yeast, hop resins, and bacteria. This gunk is what pros call biofilm.
- Acid Cleaner: You’ll use this every quarter to tackle the inorganic buildup that caustic cleaners can't touch. We’re talking about "beer stone," which is essentially calcium oxalate. An acid wash keeps your lines crystal clear and prevents mineral deposits from clogging things up.
Never, ever mix caustic and acid cleaners. This creates a dangerous chemical reaction that can release harmful gases. Always run them as separate cleaning cycles with a complete water rinse in between.
Essential Hand Tools and Accessories
The canister and chemicals take care of the inside of the lines, but what about all the parts you can see and touch? Faucets, couplers, and shanks are full of small crevices where biofilm loves to hide. A solid set of hand tools isn't just nice to have; it's essential for a truly deep clean.
Your toolkit isn't complete without these key items:
- Faucet Wrench: This specialized spanner wrench is the only tool you should use to remove your faucets. If you grab a pair of pliers or a standard wrench, you will scratch and damage the chrome finish, creating brand-new hiding spots for bacteria.
- Faucet and Coupler Brushes: You'll need a set of durable brushes with stiff bristles. A good faucet brush gets deep inside the tap body, and you'll want smaller brushes to get into all the nooks and crannies of your keg couplers.
- Personal Protective Equipment (PPE): These cleaning chemicals are no joke. Make sure anyone handling them is equipped with safety glasses and chemical-resistant gloves to protect against splashes.
- Bucket: It's simple, but you can't do the job without it. You need a bucket to catch the cleaning solution as it runs out of the tap. Using a clear or light-colored bucket is a pro tip—it lets you see the gunk you’re flushing out.
Investing in quality tools from the get-go pays off. They last longer and do the job right. To discover the latest deals on the tools you need, browsing a full range of commercial bar equipment can help you find durable, professional-grade options to make your cleaning routine faster and more effective.
A Practical Walkthrough of the Cleaning Process
Alright, you've got your gear ready. Now for the part that really matters: getting those lines spotless. Moving from theory to practice can feel a little daunting the first time, but you'll find a rhythm quickly. We're going to walk through this together, step by step.
Remember, the goal isn't just to give the lines a quick flush. We're doing a deep, methodical clean that hits every single component, from the coupler that connects to the keg all the way to the tip of the faucet. Do this right, and you'll wipe out any biofilm, beer stone, and other gunk, ensuring every pint tastes exactly like it did at the brewery.
Setting the Stage with Safety and Preparation
First thing's first: safety. The chemicals we use are no joke, and they demand respect. Before a single drop of cleaner touches your system, get your Personal Protective Equipment (PPE) on. At the very least, this means grabbing a pair of chemical-resistant gloves and some safety glasses.
With your gear on, it’s time to de-pressurize the system. Go to your gas tank—whether it’s CO2 or Nitrogen—and shut off the supply to the specific line you're about to clean. Now, head over to the keg. Untap the coupler by lifting the handle and giving it a counter-clockwise turn. This disengages it and stops the beer from flowing.
I always recommend opening the faucet for a second to bleed out any leftover pressure in the line. It's a simple step that prevents you from getting a surprise spray of beer or gas when you start disconnecting things.
This visual guide gives you a great high-level view of the three core phases you'll be tackling.

As you can see, it's a logical flow: get prepped, run the cleaning cycle, and finish with a thorough rinse and reassembly.
Circulating the Caustic Solution
With the keg out of the picture, it's time to hook up your cleaning canister. Attach the output from your canister directly to the beer line where the keg coupler was. Then, take the faucet at the other end of that line and place it in a bucket to catch everything you're about to flush out.
Next, mix your caustic (alkaline) cleaning solution. Follow the manufacturer's directions to a T, mixing the chemical with warm water right inside the canister. A critical tip here: never use hot water. It can make the chemicals less effective and could even warp your vinyl beer lines over time.
Once it's mixed, pressurize the cleaning canister (either with the hand pump or your gas line, depending on the model) and open the faucet. Let the solution run through until what's coming out into the bucket is no longer beer-colored. That’s how you know the line is full of cleaner.
The real work happens when the solution is soaking or circulating. For the absolute best results, the Brewers Association recommends circulating the solution for a minimum of 15 minutes. If you're using a simpler static cleaning kit, let that solution sit and soak in the lines for at least 20 minutes.
This soaking period is non-negotiable. It’s when the caustic solution gets to work, dissolving all the stubborn proteins, yeast, and biofilm that have built up inside the lines. I've seen countless people rush this step, and it's the single biggest reason for an incomplete clean.
The Critical Rinsing Phase
After the cleaner has worked its magic, you have to get every last trace of it out of the system. This step is just as important as the cleaning itself. Any chemical residue left behind will completely ruin the beer and can be hazardous.
Disconnect the line from your cleaning canister, dump any remaining solution, and give the canister a good rinse with clean water. Refill it with fresh, cool water, hook it back up to the beer line, and flush the entire system until you’ve filled your bucket.
Here’s a pro tip: use pH test strips on the water coming out of the faucet. It’s the only truly reliable way to confirm all the alkaline cleaner is gone. When the pH of your rinse water perfectly matches the pH of your regular tap water, you know the line is clean and safe.
Disassembling and Cleaning Components
Don't just stand around while the lines are cleaning and rinsing! Use that time productively. This is the perfect window to deep-clean the parts that live outside the line—specifically the faucets and keg couplers. These things are notorious for hiding gunk.
- Faucets: Grab your faucet wrench and remove each faucet from the tower or shank. Take it completely apart, keeping careful track of the small internal O-rings and seals. Let all the pieces soak in a small bucket with your cleaning solution. After a good soak, use a faucet brush to scrub every nook and cranny, then rinse them completely with fresh water.
- Keg Couplers: Disassemble the coupler next. Pay close attention to the check valve and the main probe O-rings, as that's where I usually find the most buildup. Scrub every part with a coupler brush, give them a soak in the solution, and follow up with a thorough rinse.
Skipping these small parts is like washing your car but leaving the wheels caked in mud—it undermines all your other hard work. Understanding how all these little pieces work together is key. If you want to dive deeper, learning about professional draft beer system installation provides great context for how a healthy system operates.
Reassembly and the Final Test Pour
Once every part is sparkling clean and has been rinsed until you're sure it's just metal and water, it's time to put your system back together. Reassemble the faucets and couplers, making sure every seal and O-ring is seated properly. I always hand-tighten everything first, then give it a final gentle turn with the wrench. Be careful not to crank down on it too hard, as you can easily damage the seals.
Reconnect the beer line to your clean coupler, tap the keg, and pour a test pint. The first ounce or two might be a little foamy as the line settles, but it should quickly level out into a perfect pour.
Now, for the moment of truth: give it a taste. The beer should be crisp, clean, and taste exactly how you know it should. If you pick up any chemical or off-flavors, your rinse wasn't thorough enough. It’s a pain, but you’ll have to disconnect the keg and flush the line with more clean water.
Building a Bulletproof Cleaning Schedule
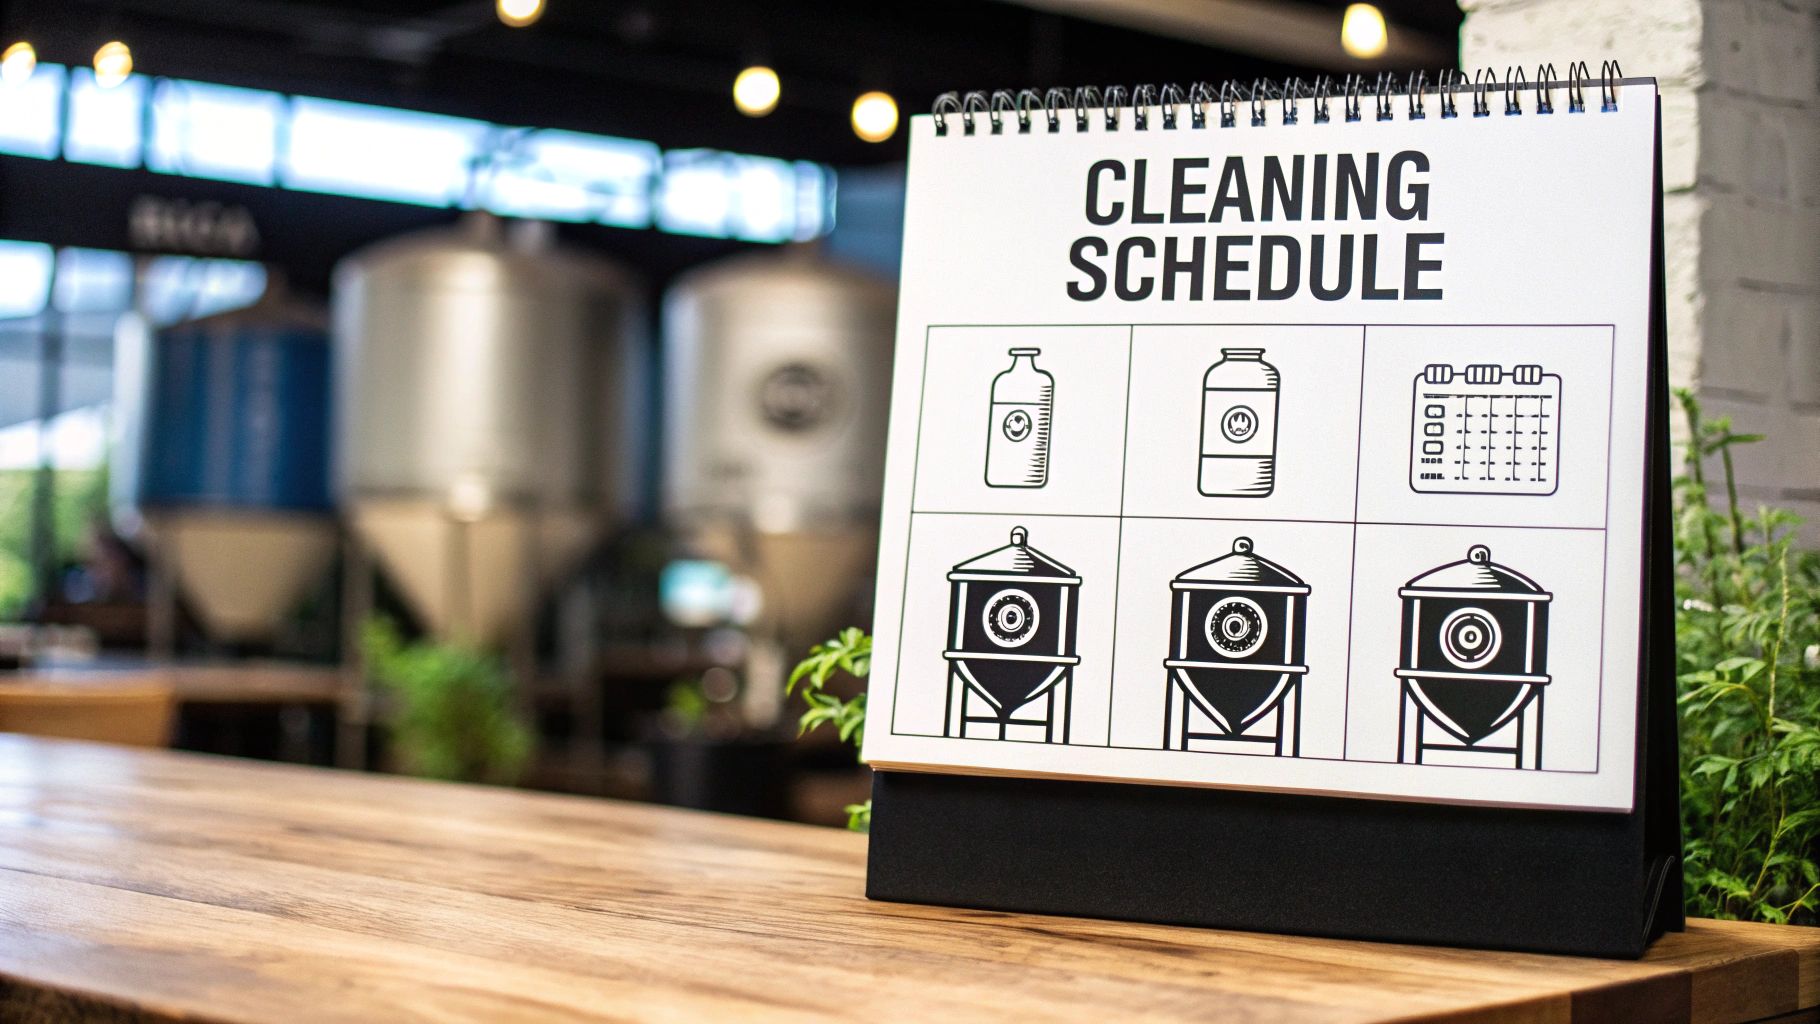
Great beer is born from consistency. A single deep clean is nice, but it’s the routine that truly protects the quality of your draft beer. The real secret isn't just knowing how to clean your lines, but building a schedule that runs like clockwork.
This is about making maintenance a non-negotiable part of your operations. A well-defined schedule takes the guesswork out of the equation for your staff, ensuring your standards are met every single time. It's the best defense for your product, your customers, and your reputation.
The Two-Week Standard
Talk to any brewer or quality expert, and they'll tell you the same thing: clean your lines every two weeks. This is the industry gold standard for a reason. It’s your primary defense against the bacteria, yeast, and mold that can quickly ruin a beer's flavor.
Every 14 days, your lines need a thorough flush with a brewery-approved caustic (alkaline) solution. Sticking to this schedule is the single most important thing you can do to prevent biofilm from getting a foothold. Treat this bi-weekly clean as an unbreakable appointment, and you'll be serving beer that tastes exactly as the brewer intended.
The industry is taking this more seriously than ever. Following the latest industry trends is vital for restaurant owners and chefs. The global market for beer line cleaning kits was valued at USD 859.6 million in 2025 and is projected to hit USD 1,524.95 million by 2035. That's a huge jump, and it shows just how critical proper hygiene has become.
The Quarterly Acid Wash
Your bi-weekly caustic clean is fantastic for handling organic gunk, but it does nothing for mineral deposits. Over time, stuff like calcium oxalate—what we call "beer stone"—builds up inside your lines. This creates rough surfaces where bacteria can hide and can even start flaking off into your customers' pints.
That’s where an acid wash comes in. Every three months, you need to run an acid line cleaner through your system. This dissolves those stubborn mineral deposits, leaving your lines perfectly smooth and sanitary. Think of it like descaling a coffee maker; it’s a necessary deep clean.
A common mistake I see is people thinking caustic and acid cleaners do the same job. They don't. Caustic cleaners attack organic soil like biofilm and yeast, while acid cleaners break down inorganic minerals like beer stone. You absolutely need both at the right intervals for a complete clean.
Adjusting for Specialty Lines
The two-week/quarterly schedule is a solid baseline, but it's not a one-size-fits-all solution. Some beverages are just messier than others and create buildup much faster. You'll need to identify these high-maintenance lines and give them more frequent attention.
Be prepared to clean more often for lines pouring:
- Sugary Ciders & Seltzers: The high sugar content is a buffet for microbes, leading to rapid gunk accumulation.
- Kombuchas & Sours: These often contain live cultures that would love to make a permanent home in your draft lines.
- Hazy IPAs: All that protein and hop matter in those delicious hazy beers can leave behind some stubborn residue.
For these specialty lines, I always recommend cleaning them after every single keg. It’s the only way to be sure you’re preventing flavor contamination and serving a pure product.
Logging and Staff Ownership
A schedule is useless if nobody follows it. The best way to keep everyone on track is with a simple, visible cleaning log. Post it right inside your walk-in cooler or next to the draft tower—somewhere it can't be missed.
The log should track the date, which lines were cleaned, the type of chemical used (caustic or acid), and the initials of the person who did the job. This isn’t about policing your team; it's about empowerment.
When you implement a system like this, you’re embedding the principles of effective quality control processes into your daily culture. It gives your staff clear ownership of a critical task and turns maintenance into a shared responsibility instead of a forgotten chore.
Even with a meticulous cleaning routine, draft systems can be finicky. Nothing's more frustrating than dealing with a misbehaving tap during a busy shift. But before you call for an expensive service tech, a little bit of know-how can solve most common issues right on the spot.
Let's walk through the most frequent headaches that pop up and how you can diagnose and fix them yourself, saving both time and money.
https://www.youtube.com/embed/AxeQQ19CiwE
Decoding Those Foamy Pours
Foam is hands-down the number one enemy of a profitable draft program. A pint that’s mostly head is pure waste. When your beer starts pouring wild, the problem almost always boils down to one of two things: temperature or pressure.
Your first move should be to check the temperature inside your walk-in cooler. If it’s even a few degrees too warm, CO2 will start breaking out of the beer before it ever hits the glass, causing foam. You need that cooler holding rock-steady between 36-38°F (2-3°C).
If the temperature is spot on, the next suspect is your CO2 regulator. The wrong pressure setting is a classic cause of foamy beer. Too much pressure blasts the beer out of the faucet too quickly, while not enough pressure lets the CO2 expand inside the beer line. Either way, you get a foamy mess.
A quick tip from the trenches: Temperature fluctuations are a killer. If your walk-in cooler door is constantly being opened during a rush, the temperature can swing enough to cause foaming issues. Ensure the door seals properly and isn't left open for long periods.
Why Is My Beer Pouring Flat?
On the other end of the spectrum is flat, lifeless beer—a real disappointment for any customer. This points to a CO2 issue as well, but it's typically about losing carbonation rather than having too much.
When a beer is pouring flat, here are the usual suspects:
- Low CO2 Pressure: If the regulator is set too low, it can't push enough gas into the keg to maintain proper carbonation levels. Over time, the beer just goes flat.
- A CO2 Leak: A tiny leak anywhere from the tank to the keg coupler means gas is escaping. You can often hear a faint hiss, but the best way to find it is to spray connections with soapy water and look for bubbles.
- An Old Keg: While not as common, a keg that has been tapped for a very long time can eventually lose its carbonation.
Always start by confirming your CO2 tank isn't empty. Then, check that the regulator is set to the brewer's recommendation—usually somewhere in the 12-14 PSI range for most standard ales and lagers.
Chasing Down Off-Flavors After Cleaning
This one is a real head-scratcher. You just finished a thorough draft beer line cleaning, but the beer still tastes...off. It's frustrating, but it usually means a small but critical part of the system got overlooked.
More often than not, the problem is hiding in the small, removable components. Take the faucet and the keg coupler completely apart and give them a second, more detailed cleaning. You’d be amazed at how much gunk can hide in the tiny nooks and crannies of a coupler probe.
The other possibility is an incomplete rinse. If you're getting a soapy or chemical taste, you simply didn't flush the line with enough fresh water after cleaning. This is precisely why pros use pH test strips to make sure the line is back to neutral before putting beer back on.
Quick Troubleshooting at a Glance
When things go wrong in the middle of a service, you need answers fast. This chart is designed to help you quickly identify what might be happening and what to check first.
Quick Troubleshooting Guide for Draft Issues
| Problem | Potential Cause | Quick Fix/Check |
|---|---|---|
| Wild, Foamy Pours | Cooler is too warm. CO2 pressure is too high. Kinks in the beer line. | Verify cooler is at 38°F. Adjust regulator down in small increments. Inspect lines for any obstructions. |
| Flat, Lifeless Beer | CO2 pressure is too low. Empty CO2 tank. Gas leak in the system. | Adjust regulator to 12-14 PSI. Check tank gauge. Check all connections for leaks. |
| Sour or Buttery Taste | Biofilm or bacteria in the lines or components. | Perform a full caustic clean. Disassemble and scrub faucets and couplers. |
| Leaking Faucet | Worn out rubber seals or O-rings inside the faucet. | Disassemble the faucet and replace any cracked or worn internal washers and O-rings. |
Think of this as your first line of defense. By methodically checking these common culprits, you can solve the vast majority of draft issues without needing to call for backup.
Answering Your Beer Line Cleaning Questions
Even with the best instructions, you're bound to have questions pop up. After all, getting the hang of draft line maintenance takes a bit of practice. Let's tackle some of the most common questions I hear from bar owners and managers.
Think of this as the expert advice you'd get from a seasoned pro over a pint—straightforward, practical answers to help you get the job done right.
How Long Does a Proper Cleaning Really Take?
I get this one a lot. People think it's going to shut down their bar for half the day. The good news? It won't.
Once you have your routine down, you can knock out a single beer line in about 15-20 minutes. That covers everything: flushing with water, soaking with the chemical solution, rinsing it all out, and giving the faucet and coupler a good scrub.
If you’re running a bigger system, you just work smarter. You can clean multiple lines at once, especially if you have an electric recirculation pump. With a pump, you can tackle a bank of four, six, or even eight lines together, which drops the average time per line significantly. The real trick is having all your gear and chemicals ready to go before you even un-tap that first keg.
Can I Use Bleach or Other Household Cleaners?
Let me be crystal clear here: absolutely not. This is a massive mistake for both safety and beer quality. Putting anything like bleach, dish soap, or a generic sanitizer through your draft system is a recipe for disaster.
Here's exactly why you have to stick with brewery-approved chemicals:
- It Destroys Your Equipment: Bleach is incredibly corrosive to the stainless steel parts in your system. It will also eat away at the vinyl or barrier tubing over time, leading to costly replacements.
- It Leaves Behind Nasty Residue: Household cleaners aren't designed to be rinsed out of a closed system like a beer line. They leave behind chemicals that not only create foul, off-flavors in your beer but can also be genuinely hazardous if someone drinks them.
- They Just Don't Work: These products aren't formulated to dissolve beer stone or kill the specific types of bacteria and yeast that build up inside a draft line.
You need a dedicated caustic cleaner for your bi-weekly clean and an acid-based cleaner for your quarterly deep clean. No exceptions. It’s the only way to do the job safely and effectively.
What Is the Financial Impact of Regular Cleaning?
This is where a lot of people miss the big picture. Cleaning your lines isn't an expense; it's one of the best investments you can make for your bottom line. Trying to "save" money by skipping a cleaning will always cost you more in the long run.
The numbers don't lie. Moving from a lazy two-month cleaning schedule to a proper two-week one can generate serious profit. How? Less foam and less waste. One analysis showed that by pouring just five extra pints per keg that would have otherwise been foam, a bar can add $886.60 in pure profit per tap handle, per year. For a small four-tap setup, that's over $3,500 straight to your pocket. You can see the full economic breakdown of line cleaning for yourself.
The most profitable pint is the one you don't waste. Regular cleaning drastically reduces foam, meaning you sell more beer from every keg and pour less profit down the drain.
How Do I Know If My Lines Are Truly Clean?
You can't just eyeball it. A shiny faucet is a good start, but the real nasties hide deep inside the lines. The only way to be 100% sure is to get a little scientific.
Grab some pH test strips. After you've run your cleaning chemical through and are in the final rinsing stage, test the water coming out of the faucet. When the pH of the rinse water matches the pH of the regular water from your tap, you know you've successfully flushed every last trace of the cleaning solution.
This simple check takes all the guesswork out of the equation. Of course, the ultimate proof is in the pour. A perfectly crisp, clean-tasting pint is the best sign of a job well done.
Your draft system is the heart of your beverage program and a huge part of your customers' experience. Keeping it in perfect working order is non-negotiable. For everything from top-of-the-line draft systems to the professional-grade supplies that keep them flowing perfectly, Encore Seattle Restaurant Equipment has you covered. Check out our complete lineup of bar and beverage equipment to keep your pours pristine and your profits high, and stay tuned for exclusive deals to help your business thrive.